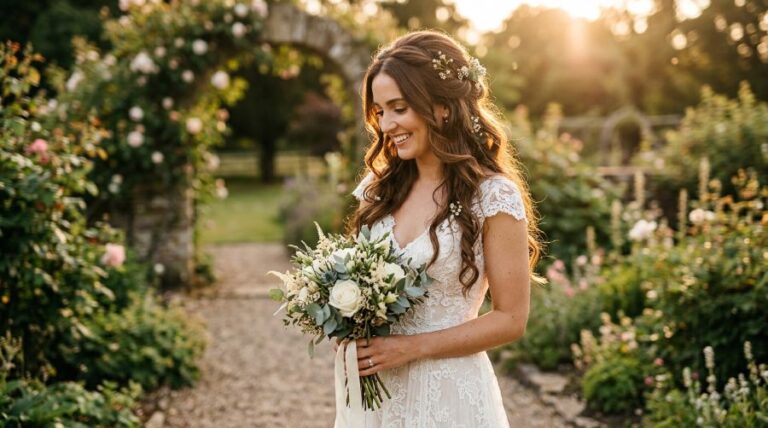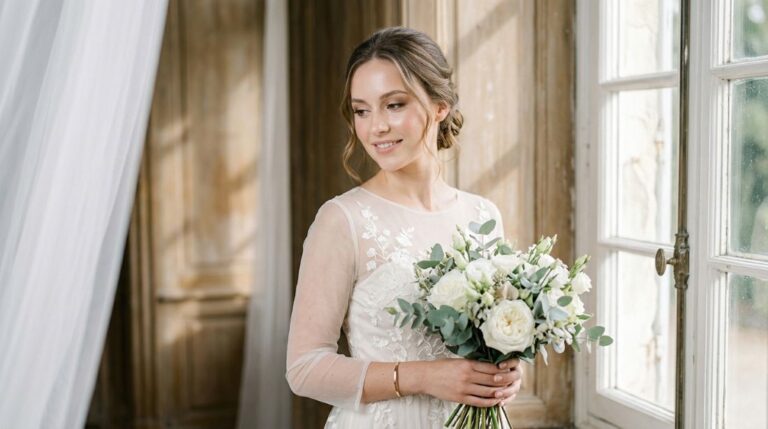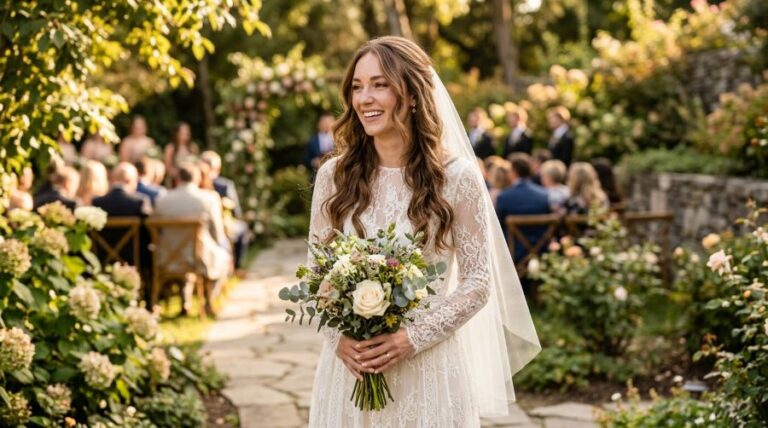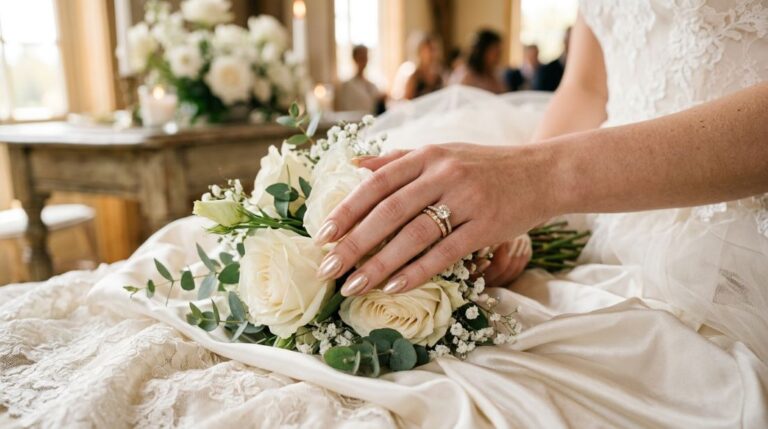
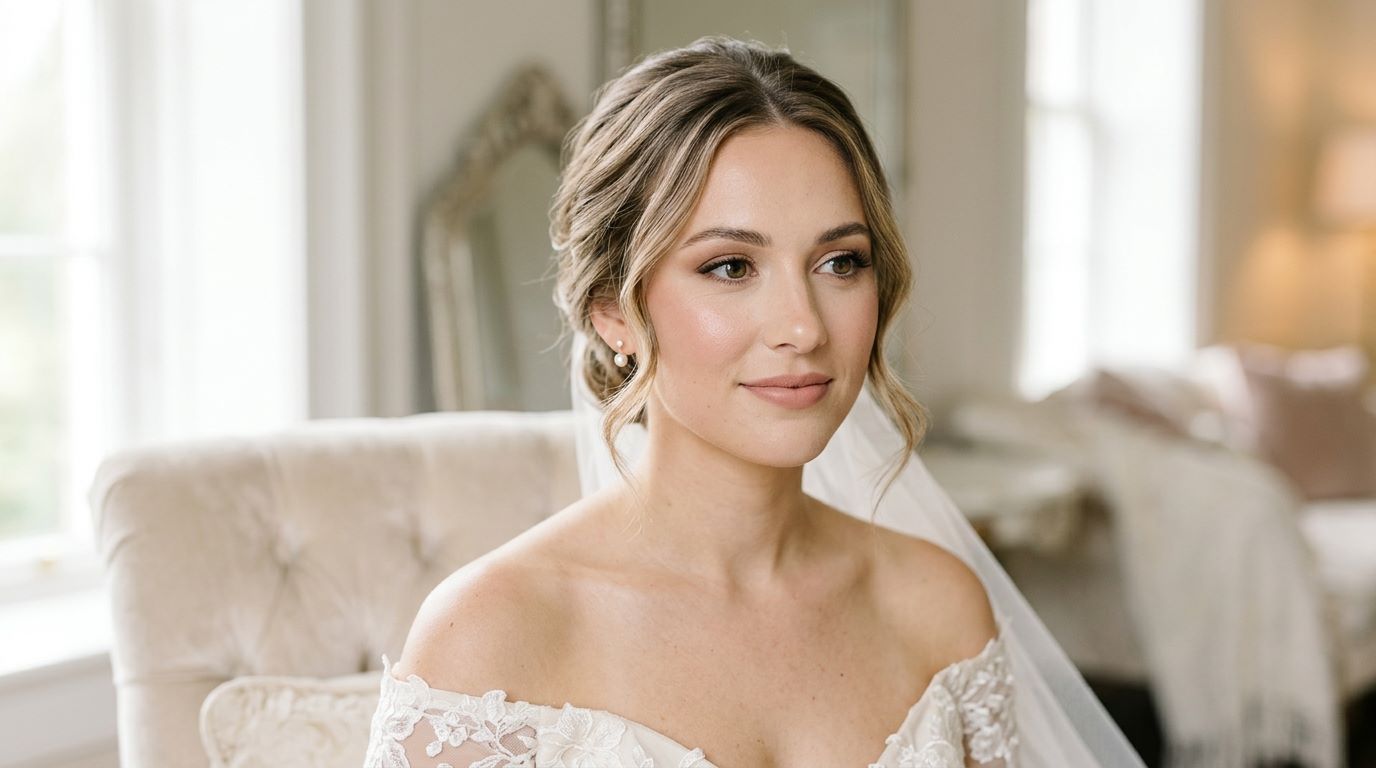
Wedding mornings move fast, and your makeup has to keep up with every hug, happy tear, dance floor spin, and golden-hour photo. Brides everywhere search for the same thing: a look that survives a twelve-hour day without turning into a touch-up emergency. This roundup gathers bridal makeup looks and techniques built for staying power, paired with budget-friendly tricks you can try at home before the big day. Whether you’re working with a professional artist or doing your own makeup, these ideas will help you walk down the aisle, dance at the reception, and still look photo-ready when the night winds down. Let’s get into the looks that hold up under real wedding conditions.
Waterproof Base Foundation for All-Day Wear
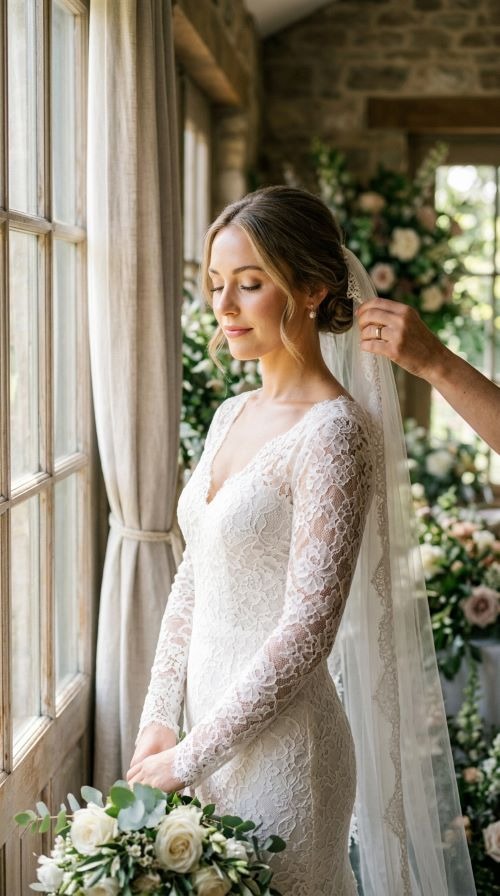
Your foundation is the backbone of a long-lasting bridal look. Pick a waterproof or long-wear formula labeled “24-hour” or “transfer-resistant.” These formulas grip skin better than regular foundation and resist sweat, tears, and hugs. Apply with a damp sponge instead of a brush. A damp sponge presses product into skin rather than sitting on top, which helps it last longer. Start thin. You can always add more, but too much product cracks by evening. A budget tip: drugstore brands like Maybelline Super Stay or L’Oréal Infallible perform close to high-end options for a fraction of the price. Test your foundation a full week before the wedding, not the night before. Wear it for eight hours straight and see how it holds up to talking, eating, and moving around. If it fades by hour four, that’s your answer. Set your base with a light dusting of translucent powder right after applying foundation. This locks moisture underneath and keeps oil from breaking through too early. Simple steps like these make the biggest difference between makeup that survives your reception and makeup that needs constant fixing.
Setting Spray That Locks Everything In
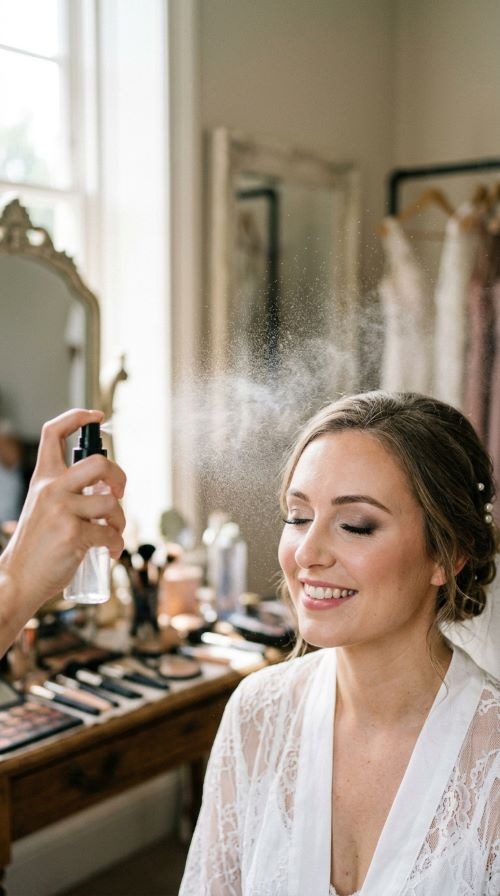
Setting spray is the final seal on your makeup, and skipping it is a common mistake. A good spray creates a light film over your face that keeps foundation, concealer, and powder from moving. Hold the bottle about ten inches from your face and mist in an X and T pattern. This covers every angle without soaking your skin. Let it air dry for thirty seconds before touching your face. Budget option: Urban Decay All Nighter is a favorite, but NYX Matte Finish spray costs a fraction of the price and holds up well for a full day event. For outdoor weddings, choose a spray with a matte finish to fight shine from heat. For dry climates, pick a hydrating spray so your skin doesn’t look flaky by evening. A simple DIY trick some brides use: keep a small setting spray bottle in your reception bag for a quick refresh before photos or dancing. One spritz can revive your whole look without adding more powder or foundation on top.
Matte Airbrush Finish for Long Ceremonies
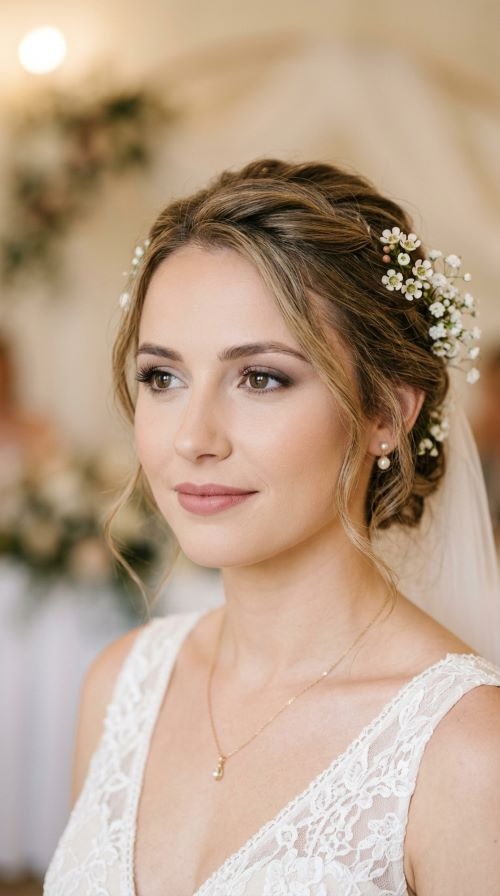
Airbrush makeup uses a fine mist of foundation instead of a brush or sponge, which creates a thin, even layer that resists smudging. This finish works well for long ceremonies where you’re standing under lights or outdoors for hours. The mist settles into skin rather than sitting on the surface, so it holds up through heat and movement. If hiring an airbrush artist isn’t in your budget, drugstore mattifying primers can mimic a similar flat finish. Look for primers labeled “pore-blurring” or “oil-control.” Apply a thin layer under your regular foundation for a smoother, longer-lasting result. Blotting papers are another budget-friendly backup. Keep a small pack in your clutch to press away shine without disturbing your makeup underneath. Avoid rubbing your face during the day since that breaks down the matte layer faster. Instead, dab gently with a tissue or blotting sheet. Brides with oily skin benefit most from this technique, especially for summer or destination weddings where heat and humidity test every product. A matte airbrush base paired with a light setting powder can carry you from morning prep straight through the last dance.
Dewy Glow Look With Long-Lasting Power
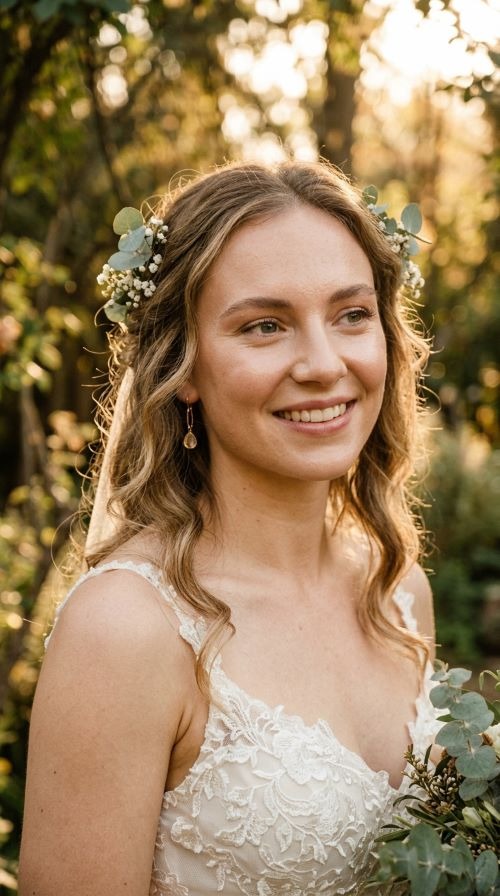
A dewy finish photographs beautifully, but it needs the right technique to survive a full day. Start with a hydrating primer to give skin a smooth, glowing base. Use a lightweight liquid foundation, not a full-coverage matte formula, since dewy looks rely on skin showing through. Set only where you need it, like the T-zone, and leave your cheeks and forehead untouched to keep that natural shine. A drugstore favorite for this look is e.l.f. Halo Glow, which mimics pricier glow drops. Add cream blush over your foundation before powder for a soft, lit-from-within color that lasts. Skip heavy powder everywhere else, since too much powder flattens the glow within hours. For touch-ups, carry a small vial of facial oil or a dewy setting spray to refresh your skin without adding more makeup. This look works best for indoor weddings or evening ceremonies where lighting is softer. If your venue is outdoors in heat, ask your artist to balance dew with a light mattifying powder in the center of your face only, keeping the glow everywhere else intact.
Classic Red Lip That Survives the Reception
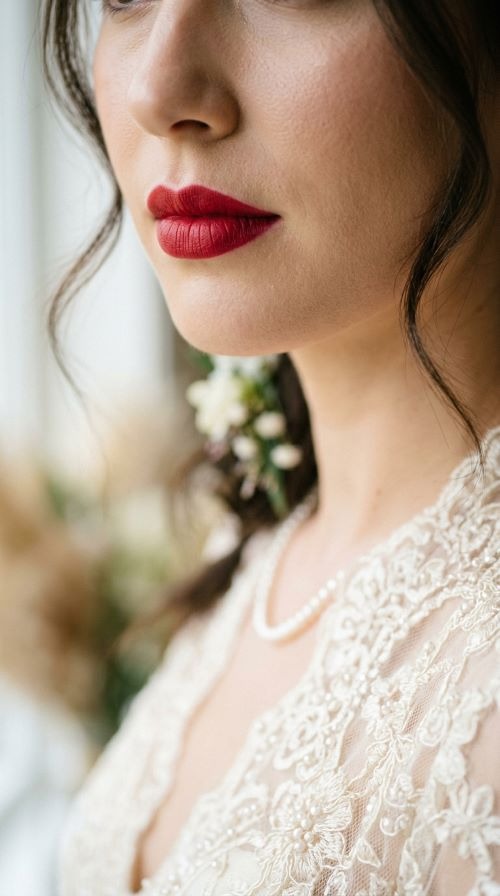
A red lip makes a statement, but red is notorious for fading fast during eating, drinking, and kissing cheeks all night. The trick is layering. Line your lips first with a matching lip liner, then fill in the entire lip with the liner before adding lipstick on top. This creates a base color that stays even if the lipstick wears off. Blot with a tissue, then apply a second coat. Budget-friendly liners like NYX Slim Lip Pencil work just as well as pricier brands. For extended wear, choose a liquid matte lipstick instead of a traditional bullet formula. These dry down and resist smudging much longer. Keep your lip color in your reception bag for quick reapplication between toasts and dances. A small trick some brides use: apply lip color before eating, then gently press a tissue between your lips to remove the top layer, leaving a stain underneath. This keeps color present even after meals. Red lips pair well with simple eye makeup, letting the lip be the standout feature without competing with heavy eyeshadow.
Nude Lip Combo for Effortless Touch-Ups
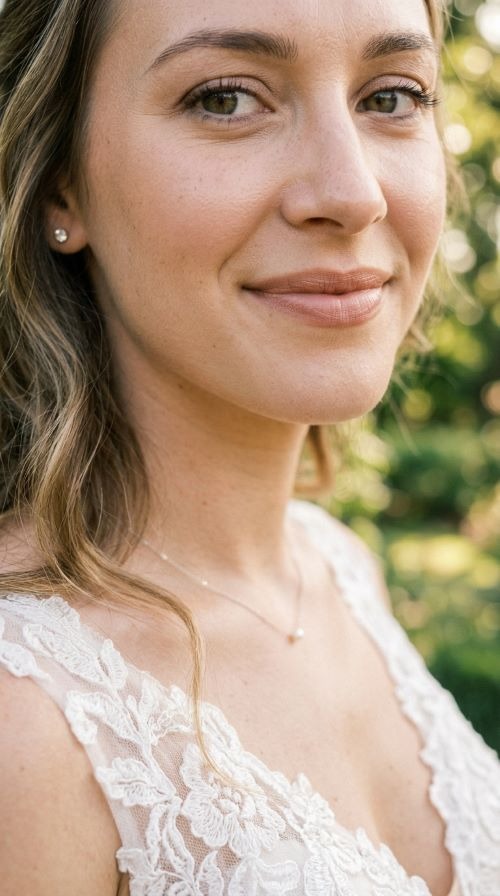
Nude lips are forgiving and easy to maintain throughout a long wedding day. Because the color is close to your natural lip tone, minor fading is barely noticeable, which means fewer touch-ups. Start with a lip liner slightly darker than your natural shade to add definition. Fill in with a nude lipstick or tinted balm for a soft, wearable finish. Drugstore options like Wet n Wild Mega Last in nude shades work well and cost only a few dollars. For added longevity, dab a small amount of concealer around the lip edges to sharpen the shape before applying color. This keeps your lipline crisp even after hours of talking and smiling. Carry a travel-size tube in your bag, but you likely won’t need to reapply often. Nude lips also pair beautifully with bold eye makeup, since they don’t compete for attention. If you want a bit more shine for photos, add a clear gloss over the matte nude base right before your ceremony starts. This combo balances low-maintenance wear with a polished, camera-ready finish.
Smokey Eyes That Don’t Smudge by Sunset
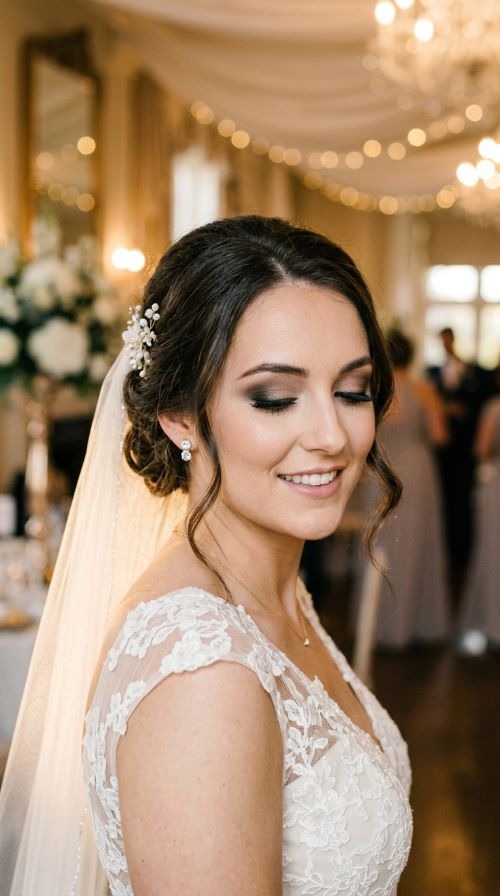
Smokey eyes look dramatic in photos but can smudge under the lower lash line by the end of the night. The fix starts with primer. Apply an eyeshadow primer before any color to help pigments stick and resist creasing. Use a waterproof or long-wear eyeshadow formula, and always set with a translucent powder pressed lightly under the eyes. Budget tip: NYX and Colourpop offer eyeshadow palettes with strong pigmentation for a fraction of high-end prices. Blend your darkest shade into the crease and lower lash line using a small fluffy brush, tapping off excess before applying. This prevents fallout that can smudge later. Finish with a waterproof eyeliner along the lash line to hold the shape all day. Avoid touching your eyes throughout the day, especially during emotional moments. Instead, gently dab with a tissue rather than rubbing. A small pot of loose setting powder in your bag lets you press away any oil buildup before photos. Smokey eyes work best when paired with a neutral or nude lip, keeping the overall look balanced rather than heavy.
Bold Winged Liner for Sharp All-Day Definition
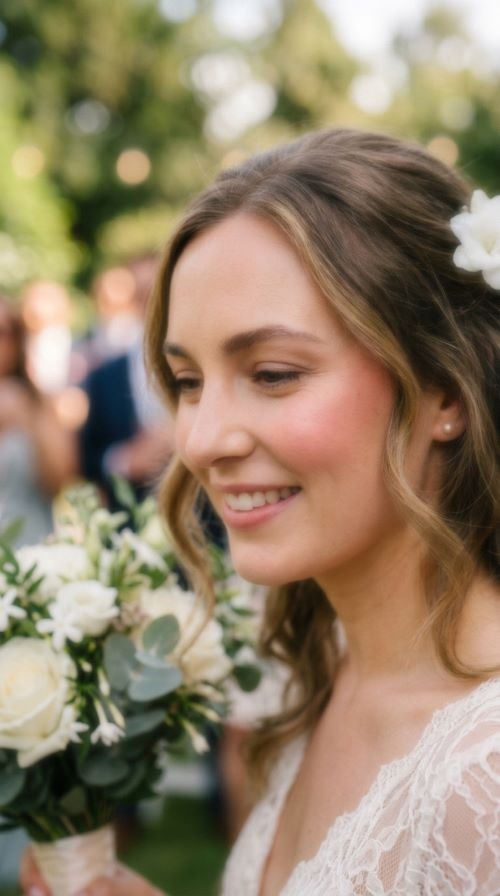
A winged liner adds definition that holds its shape better than shadow-based looks. Choose a liquid or gel liner over pencil, since pencil formulas tend to smudge faster throughout a long day. Rest your elbow on a table for stability while drawing the wing, and build the line in small strokes rather than one continuous sweep. Budget picks like e.l.f. Intense Ink Liner give a sharp finish at a low price point. Set your liner with a matching eyeshadow pressed lightly on top using a thin brush. This step locks the line in place and prevents smudging from touching your face or wiping away tears. Practice your wing shape a few times before the wedding so your hand feels confident on the day itself. If your line comes out uneven, a small angled brush dipped in concealer can clean up the edges without removing the whole look. Winged liner pairs well with minimal eyeshadow, letting the line be the main feature. This look photographs sharply from any angle and holds up through hours of dancing and laughing.
Soft Bridal Blush That Lasts Through Tears
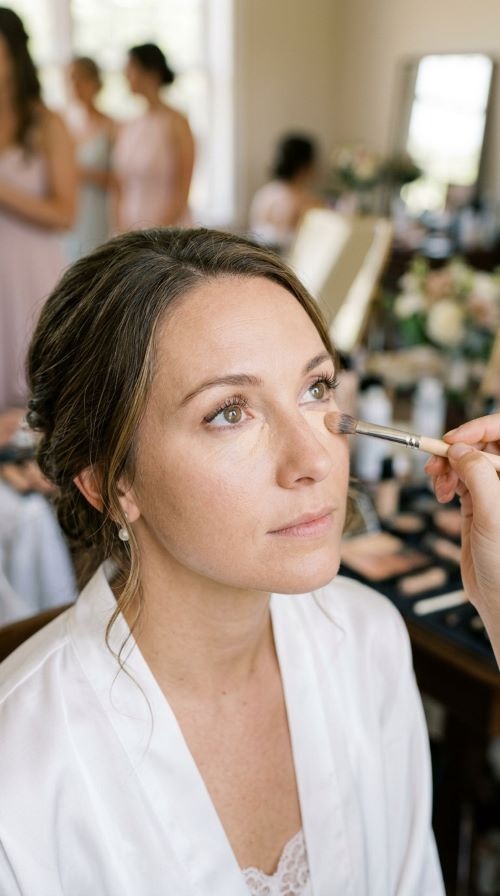
Blush adds warmth to your face, but powder blush can fade fast if tears or sweat touch your cheeks. Layering cream and powder blush together creates a color that holds through emotional moments. Apply a cream blush first with your fingers, blending upward toward your temples. Let it set for a minute, then dust a matching powder blush lightly on top. This combination locks color in place better than either product alone. Budget-friendly cream blush options like NYX Sweet Cheeks cost only a few dollars and blend easily. Choose a shade close to your natural flush rather than something too bright, since bold color tends to look patchy if it fades unevenly. If tears do happen, gently pat your cheeks with a tissue rather than wiping, which can remove more product. A quick touch-up with the same cream blush restores color in seconds without needing a full reapplication. This method works for any skin tone and holds up through ceremony emotions, family photos, and reception dancing without turning patchy or disappearing by evening.
Full Coverage Concealer for Under-Eye Confidence
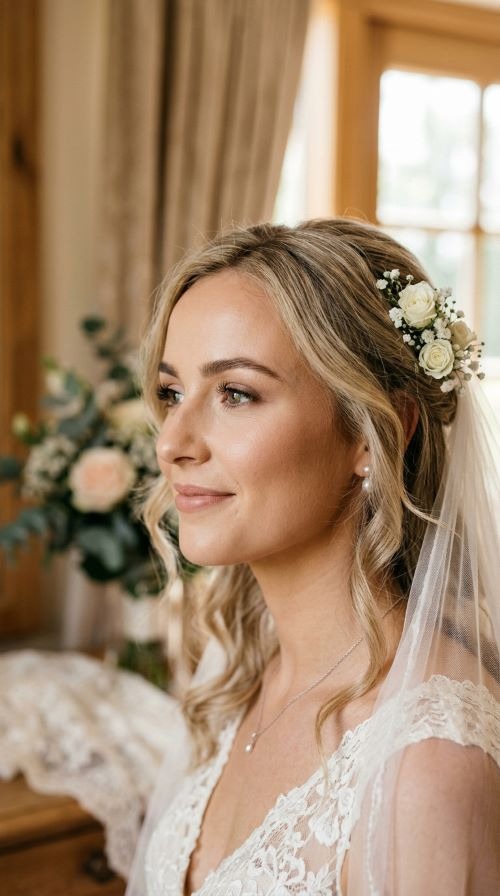
Wedding mornings often start early, and concealer becomes your best friend for hiding tired eyes. Choose a concealer one shade lighter than your foundation for brightening, and apply in a triangle shape under the eyes rather than just a small dot. This lifts the entire under-eye area in photos. Use a damp sponge to blend, pressing rather than dragging, which keeps coverage intact longer. Budget picks like Maybelline Instant Age Rewind offer strong coverage without a high price tag. Set concealer with a small amount of translucent powder using a fluffy brush, pressing gently instead of swiping. This prevents the concealer from creasing into fine lines as the day goes on. If you know you’ll be crying happy tears, apply a thin layer of setting powder specifically under the eyes before the ceremony starts. This creates a barrier that helps prevent smudging. Keep a small concealer stick in your bag for reception touch-ups, dabbing lightly rather than reapplying a full layer. Bright, smooth under-eyes make a noticeable difference in every wedding photo taken throughout the day.
Contour Technique That Holds Through Dancing
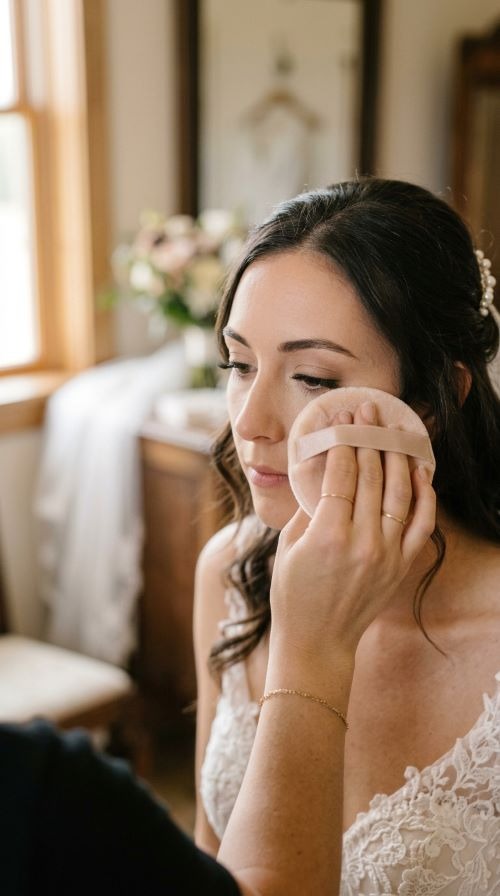
Contour adds shape to your face, but heavy movement on the dance floor can cause it to shift if not set properly. Use a cream or stick contour for the initial shape, blending it below your cheekbones, along your jawline, and at your hairline. Blend well with a damp sponge so there are no harsh lines. Once blended, set the contour with a matching powder shade using a small angled brush, pressing rather than swiping to lock it in place. Budget options like e.l.f. Contour Palette work well for beginners and cost very little. Avoid over-contouring, since subtle shaping photographs more naturally than heavy lines, especially under flash photography. A light dusting of setting powder over the entire face after contouring helps everything stay put through hugs, dancing, and long hours on your feet. If you sweat easily, choose a waterproof cream contour formula rather than a powder-only approach. This keeps your face shape defined from the ceremony through the last song of the night, without needing repeated touch-ups in the bathroom mirror.
Highlighter Placement for Photo-Ready Glow
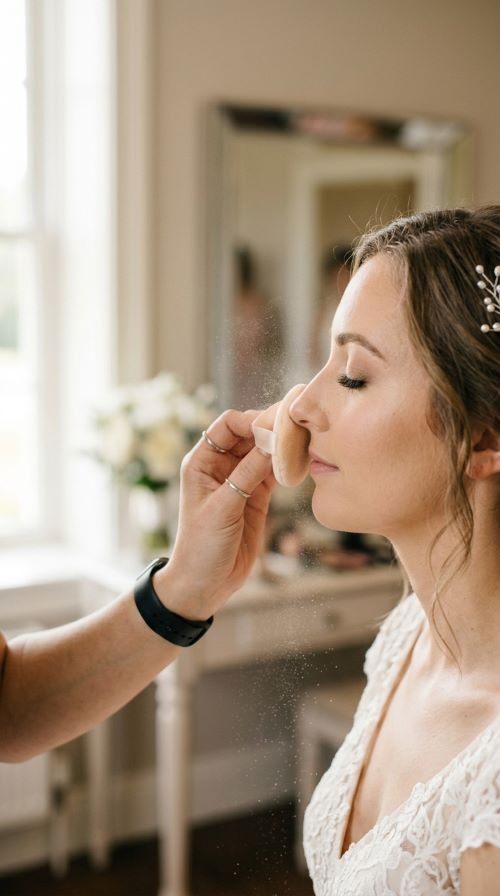
Highlighter draws light to your face in photos, but placement matters more than product choice. Apply highlighter to the tops of your cheekbones, the bridge of your nose, your cupid’s bow, and the inner corners of your eyes. These points catch light naturally and photograph beautifully in both daylight and flash. Use a cream highlighter for a soft glow, or a powder formula for something more controlled. Budget picks like Wet n Wild MegaGlo cost just a few dollars and offer strong shimmer without glitter chunks. Apply with a small fan brush for precision rather than a large fluffy brush, which can spread product too broadly. Avoid heavy highlighter on oily areas like the center of your forehead, since oil combined with shimmer can look greasy by afternoon. A light setting spray after highlighter helps blend the shimmer into skin rather than sitting on top. If your venue has bright outdoor lighting, keep highlighter subtle. For evening receptions under dim lighting, you can build a bit more for extra sparkle in photos and video.
Waterproof Mascara for Emotional Vows
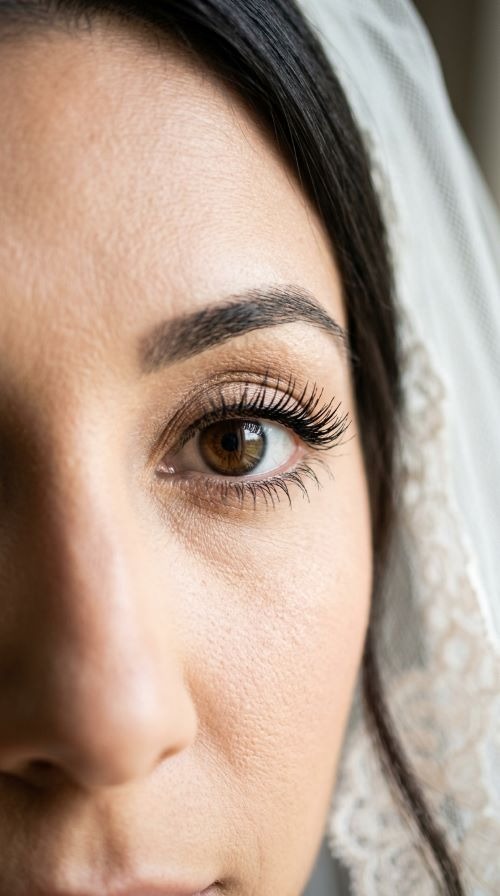
Vows bring tears, and regular mascara doesn’t stand a chance against happy crying. Waterproof mascara is non-negotiable for wedding day makeup. Look for formulas labeled “waterproof” specifically, not just “long-wear,” since these are formulated to resist water and tears completely. Apply in thin coats, wiggling the wand at the base of your lashes before pulling through to the tips. This builds length without clumping. Budget picks like Maybelline Great Lash Waterproof have been a bridal favorite for years and cost only a few dollars. For extra hold, curl your lashes before applying mascara, and consider a lash primer underneath for added volume and lasting power. If you’re prone to heavy tears, ask your makeup artist about lash extensions or false lashes glued with waterproof adhesive as an alternative to mascara alone. These hold shape even through the most emotional ceremony moments. After crying, gently dab under your eyes with a tissue rather than rubbing, which can smudge even waterproof formulas if pressure is applied. Waterproof mascara paired with careful application keeps your lashes full and smudge-free from vows to last dance.
Setting Powder Baking Method for Oily Skin
Baking is a technique where you apply a thick layer of setting powder to areas prone to oil, let it sit for several minutes, then dust away the excess. This method works well for brides with oily skin who need extra insurance against shine. Focus baking on the under-eye area, forehead, and around the nose, since these spots tend to get oily first. Use a damp sponge to press loose powder into place, then let it sit for five to ten minutes while getting dressed or having photos taken elsewhere. Brush away the excess powder with a soft, fluffy brush afterward. Budget-friendly loose powders like the RCMA No Color Powder are a favorite among makeup artists and cost less than many setting powder alternatives. This technique creates a long-lasting matte finish that resists breakthrough oil for hours. Avoid baking your entire face, since this can look too flat and heavy in photos. Instead, target only the oiliest zones and let the rest of your face keep its natural texture. This balance gives you shine control without sacrificing a soft, believable finish.
Lip Stain Under Gloss for Lasting Color
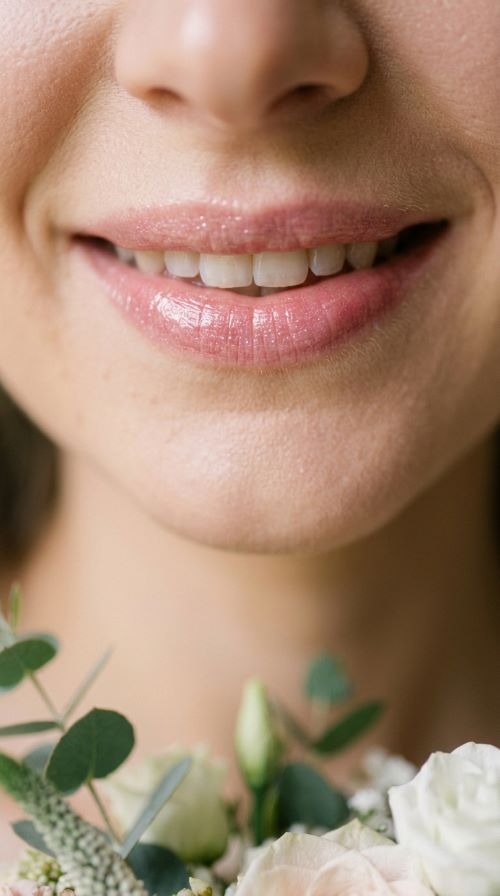
Lip stains soak into the lip’s surface rather than sitting on top, which means the color survives eating, drinking, and kissing far longer than regular lipstick. Apply a lip stain first, letting it dry for a minute before adding a light layer of gloss on top for shine. This combination gives you long-lasting color with a fresh, glossy finish for photos. Budget picks like Benefit Benetint have been a favorite for years, though drugstore versions like Maybelline SuperStay Ink Crayon also perform well. Blot the stain lightly with a tissue after application to remove excess before adding gloss. This prevents the color from transferring too heavily onto glasses or napkins during the reception. If your gloss wears off during the night, the stain underneath keeps your lips looking colored even without reapplication. Keep a small gloss tube in your bag for quick reapplication, but you likely won’t need to touch the stain itself for hours. This method works especially well for brides who don’t want to worry about lipstick throughout a long day of eating and celebrating.
Minimalist Bridal Look for Natural Brides
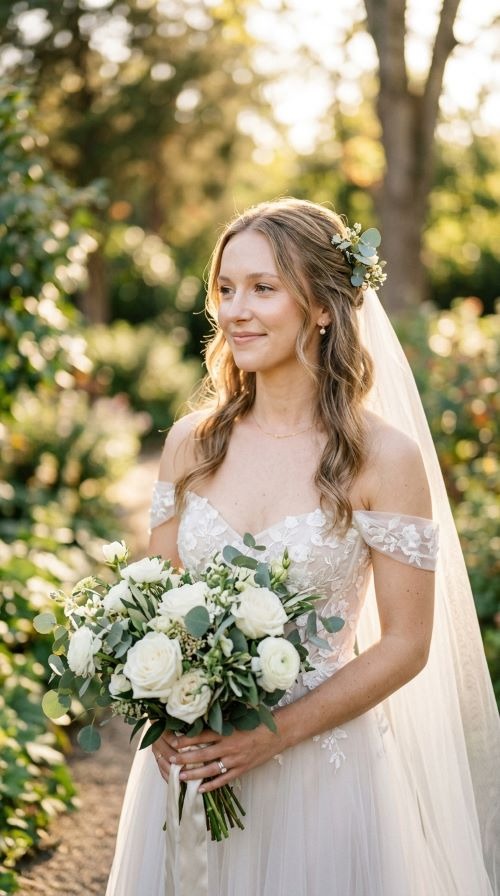
Not every bride wants a full glam face, and a minimalist look can hold up beautifully through a long wedding day since there’s simply less product to fade or smudge. Focus on skin first: a lightweight tinted moisturizer or BB cream evens tone without looking heavy. Add cream blush for a natural flush, groomed brows with a clear gel, and a coat of waterproof mascara. Skip heavy contour and eyeshadow entirely. Budget picks like the ILIA Super Serum Skin Tint give a natural finish for a reasonable price. Finish with a tinted lip balm rather than full lipstick for color that looks effortless. This look requires very little touch-up throughout the day since there’s less makeup to break down. A light setting spray at the start locks everything in without adding extra layers. Minimalist makeup photographs well in natural light and works especially well for outdoor or rustic weddings. If you want a bit more polish for the reception, add a touch of highlighter and a slightly bolder lip color right before the party starts, keeping the daytime look soft and the evening look a touch more defined.
Glam Bridal Look for Statement Photos
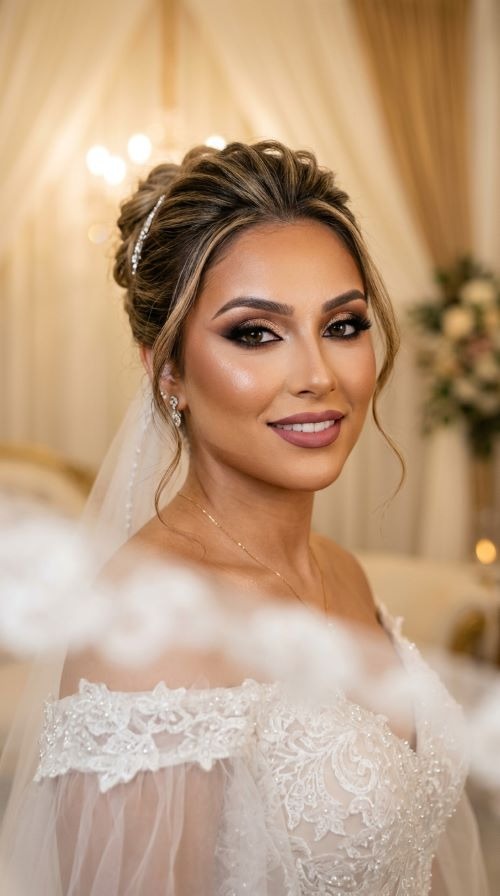
For brides who want their makeup to stand out in every photo, full glam is the way to go, but it needs a strong foundation of primer and setting products to last. Start with a hydrating and mattifying primer combo, then build foundation, concealer, and contour in thin layers rather than one heavy application. Bold eyeshadow, winged liner, and false lashes complete the dramatic effect. Budget-friendly false lashes from Ardell cost just a few dollars and look natural in photos when applied with waterproof lash glue. Set every layer with translucent powder, pressing rather than swiping to avoid disturbing the product underneath. A full glam look benefits from a final mist of setting spray over the entire face, sealing everything from foundation to eyeshadow. Keep touch-up supplies handy, including blotting papers and a small compact of setting powder, since glam looks show shine more visibly than natural ones. This style works beautifully for evening receptions with dramatic lighting, ballroom venues, and brides who want bold, camera-ready features that photograph sharply from every angle throughout the night.
Outdoor Wedding Makeup That Beats the Heat
Outdoor ceremonies mean sun, heat, and sometimes wind, all of which test your makeup’s staying power. Choose a matte, waterproof foundation and skip heavy cream products that can slip in the heat. A mattifying primer applied first helps control oil before it even starts. Budget picks like the e.l.f. Poreless Putty Primer work well under hot conditions. Use powder-based blush and bronzer instead of cream formulas, since powder holds up better against sweat. Waterproof mascara and long-wear eyeliner are essential for outdoor weddings, especially if there’s any chance of tears. Carry blotting papers rather than more powder for touch-ups, since adding layers of powder in the heat can look cakey. A setting spray with a matte finish helps lock everything in place before you step outside. If your ceremony is midday, consider a wide-brimmed hat or shaded area for photos beforehand to keep your face cooler and reduce sweating before the vows even start. These small adjustments make a real difference in how your makeup holds up through a hot outdoor celebration from start to finish.
Indoor Reception Makeup That Handles Humidity
Indoor venues can trap heat and moisture, especially with a room full of dancing guests, which means your makeup needs to handle humidity just as much as an outdoor wedding. Choose a long-wear, humidity-resistant foundation and avoid overly dewy formulas that can look slick under warm indoor lighting. A light mattifying powder in the T-zone helps balance shine without flattening your whole face. Budget-friendly setting powders like the NYX Can’t Stop Won’t Stop Powder work well for humid conditions. Waterproof eyeliner and mascara are a must, since indoor venues often get warm once the dancing starts. Keep blotting papers in your bag rather than piling on more powder throughout the night. A small trick: store your setting spray in a cool spot before the reception, since a cooler mist feels refreshing and sets makeup more effectively than a warm one. If your venue has a dance floor near the ceremony space, expect body heat to rise quickly, so plan your makeup with a bit of extra oil control built in from the very start of the evening.
Destination Wedding Makeup for Tropical Climates
Tropical destination weddings bring extra humidity, heat, and sometimes ocean spray, all of which challenge makeup in unique ways. Waterproof everything is the rule here: foundation, mascara, eyeliner, and even brow products should be labeled water-resistant. A mattifying primer applied generously before foundation helps combat the humidity from the very start. Budget picks like the Milani Prime Perfection primer offer strong oil control for a low price. Choose powder blush and bronzer over cream, since cream products tend to slide in tropical heat. Pack blotting papers and a small compact of setting powder in your travel bag for the ceremony day, since local stores may not carry your usual products. A setting spray formulated for humid climates, rather than a standard one, gives extra staying power. If your ceremony is on the beach, expect wind as an added factor, so keep hair products away from your face to avoid transfer onto your skin. Testing your full makeup routine in similar heat and humidity before traveling helps you catch any products that won’t hold up once you arrive at your destination.
Winter Wedding Makeup That Resists Dryness
Cold air and indoor heating both pull moisture from your skin, which can make makeup look flaky and settle into fine lines if you don’t prep properly. Start with a hydrating primer instead of a mattifying one, since winter skin needs moisture more than oil control. Choose a foundation with a dewy or satin finish rather than full matte, since matte formulas can emphasize dry patches. Budget picks like the NYX Bare With Me Tinted Skin Veil offer hydration without a heavy price tag. Exfoliate gently a day or two before the wedding to remove flaky skin, but avoid exfoliating the morning of, since freshly exfoliated skin can be more sensitive. Use a cream blush and cream highlighter for a soft, healthy glow that suits winter lighting. Keep a small facial mist or hydrating setting spray in your bag for touch-ups throughout the day, since heated indoor venues can dry out skin quickly. Lip balm under your lipstick prevents chapping and keeps color looking smooth rather than patchy. These small adjustments keep your skin looking fresh rather than dry and tight throughout a cold-weather celebration.
Touch-Up Kit Essentials for the Big Day
A small, well-packed touch-up kit saves you from makeup emergencies throughout your wedding day. Keep it simple and only include what you’ll actually use. Pack blotting papers for shine control, a travel-size setting spray, your lipstick or lip stain, and a small compact of pressed powder. Budget picks like e.l.f. blotting papers cost just a few dollars for a pack that lasts all day. Add a small concealer stick for quick coverage under the eyes if tears happen during the ceremony. A travel-size mascara wand is useful too, in case lashes need a quick refresh before the reception. Skip full-size products, since a small kit is easier to carry and hand off to a bridesmaid during photos or dancing. Store the kit in a small pouch that a bridesmaid or planner can hold onto, so you’re never searching for it during a busy moment. A few tissues and cotton swabs round out the kit for cleaning up small smudges. This simple setup means you’re never caught off guard, no matter how long the celebration runs into the night.
Eyebrow Setting Gel for Frame Definition
Eyebrows frame your whole face, and a well-set brow holds its shape through hours of movement, sweat, and touching your face throughout the day. Use a tinted brow gel to add color and hold at the same time, brushing upward and outward in short strokes. Budget picks like the NYX Control Freak Brow Gel cost just a few dollars and hold shape for hours without feeling stiff. For extra definition, fill in sparse areas first with a brow pencil before applying gel on top to lock everything in place. Avoid overly thick or dark brows, since they can look harsh in photos, especially under flash. A light dusting of setting powder over your brows after gel helps reduce any shine and keeps hairs in place longer. If you have oily skin, choose a waterproof brow gel formula specifically, since regular gel can slip by midday. Brows that stay defined throughout the day add polish to your whole face, even if other parts of your makeup need a quick touch-up here and there during the reception.
Long-Wear Primer for Smooth Application
Primer is the step brides most often skip, but it makes the biggest difference in how long your makeup lasts. A good primer smooths skin texture, fills in pores, and gives foundation something to grip onto throughout the day. Choose a primer suited to your skin type: mattifying for oily skin, hydrating for dry skin, and color-correcting if you have redness or dullness to address. Budget picks like the e.l.f. Poreless Putty Primer perform close to high-end versions at a much lower price. Apply a thin, even layer using your fingers, focusing on areas where makeup tends to fade first, like the T-zone and under the eyes. Let primer sit for a minute before applying foundation, giving it time to set into skin properly. Skipping this step often leads to foundation sliding off by midday, especially during a long wedding with lots of movement and emotion. A well-chosen primer paired with a long-wear foundation creates a smooth, grip-friendly base that holds every layer of makeup in place from your first look through the final dance of the night..
Bridal Makeup for Sensitive Skin Brides
Sensitive skin needs extra care on wedding day, since stress and new products can trigger redness or breakouts at the worst possible time. Stick to fragrance-free, hypoallergenic formulas whenever possible, and always test new products on your skin at least two weeks before the wedding. Budget picks like the Vanicream and CeraVe lines offer gentle, affordable options for primer and moisturizer that won’t irritate reactive skin. Avoid heavy mattifying products, since these often contain ingredients that can dry out and irritate sensitive skin further. Choose a mineral-based foundation instead of a heavily fragranced formula, since mineral powders tend to be gentler overall. Keep your routine simple: hydrating primer, lightweight foundation, cream blush, and a gentle setting spray free of alcohol. Avoid trying brand-new skincare products in the week leading up to the wedding, since your skin needs consistency, not surprises. If redness is a concern, a green color-correcting primer applied lightly before foundation can help balance tone without added product. Simple, tested routines protect sensitive skin from unexpected reactions while still delivering a polished, camera-ready finish for your big day.
Budget DIY Bridal Makeup at Home
Doing your own wedding makeup can save hundreds of dollars if you plan ahead and practice. Start by building a simple kit using drugstore products: a long-wear foundation, waterproof mascara, cream blush, and a neutral eyeshadow palette. Budget totals for a full drugstore kit often land under fifty dollars, compared to hundreds for professional application. Practice your full look at least three times before the wedding, at the same time of day your ceremony will happen, since lighting changes how makeup appears. Watch a few tutorials specifically for bridal makeup, focusing on techniques for long wear rather than trendy looks that fade fast. Ask a friend with a steady hand to help with tricky areas like winged liner if you’re not confident doing it yourself. Take photos during practice runs using your phone’s camera, since photos reveal texture and color issues that mirrors don’t always show. Keep your final routine simple rather than trying complicated techniques for the first time on the wedding morning. A well-practiced simple look often photographs better than a rushed, unfamiliar complicated one.
Layering Technique for 12-Hour Wear
Layering thin coats of product, rather than applying one heavy layer, is the secret behind makeup that survives a full twelve-hour wedding day. Start with primer, then a thin layer of foundation, letting each layer settle for a minute before adding the next. Apply concealer only where needed, rather than all over, and set each section with powder immediately after blending. This step-by-step approach prevents product from sliding around since each layer has time to grip before the next one goes on. Budget-friendly tools like a basic sponge and a few soft brushes are all you need, no expensive tools required. Blush, contour, and highlighter should also be layered lightly, building color gradually rather than applying too much at once. A common mistake brides make is rushing the process and piling on product to save time, which actually causes faster fading and more visible touch-ups later. Setting each layer as you go, rather than only at the very end, creates a stronger foundation that holds up through ceremony, photos, dinner, and dancing without needing constant fixing throughout the night.
Setting Spray vs Powder: What Lasts Longer
Both setting spray and setting powder lock makeup in place, but they work differently and brides often wonder which one to prioritize. Powder absorbs oil and mattifies skin, making it better for brides with oily skin or hot, humid venues. Spray creates a light film over the entire face, which works well for dewy looks or dry skin types that don’t want extra powder. For the longest wear, many makeup artists use both: powder to set individual areas like under the eyes and the T-zone, followed by a full-face setting spray at the end to blend everything together. Budget picks like the NYX Matte Finish spray paired with e.l.f. loose powder cost very little combined and perform well for a full day event. If you can only choose one, consider your venue and climate. Hot, humid, or outdoor weddings benefit more from powder’s oil control, while dry or indoor climate-controlled venues do well with spray alone. Testing both methods during your makeup trial helps you decide which combination keeps your specific skin type looking fresh the longest.
Bridal Makeup Trial Tips for Flawless Execution
A makeup trial is your chance to test everything before the actual wedding day, and using it well can prevent surprises later. Book your trial close to your wedding date, ideally within a month, so your skin condition is similar to how it will be on the big day. Wear the trial makeup for a full day, running errands or going out to dinner, to see how it holds up over several hours. Take photos in different lighting, including outdoor daylight and indoor evening light, since colors can shift depending on the setting. Budget tip: if you’re hiring a professional, ask whether the trial cost applies toward your final booking, which many artists offer. Bring reference photos of looks you like, but stay open to your artist’s suggestions based on your skin type and face shape. Note how your skin feels by the end of the trial day, since irritation or excess oil are signs a product needs adjusting before the wedding. Write down exactly which products and techniques worked best so your artist can recreate the same long-lasting look on your actual wedding day.
Final Touch Checklist Before Walking Down the Aisle
The moments right before your ceremony are the last chance for a quick makeup check, so keep a simple checklist ready. Blot any shine with a tissue or blotting paper rather than adding more powder. Check your lips and reapply color if needed, especially if you’ve been sipping water or coffee during prep. Glance at your under-eye area for any concealer creasing and pat gently to smooth it out if necessary. Budget tip: a small compact mirror kept in your bouquet ribbon or a bridesmaid’s clutch means you’re never without a way to check your reflection. Take one last look at your brows and lashes, brushing any stray hairs into place. Ask a bridesmaid or your makeup artist for a final once-over from a few feet away, since some issues are only visible from a distance rather than up close in a mirror. A light mist of setting spray seals everything in place one final time before you walk out. This short checklist takes less than two minutes but gives you the confidence that your makeup is ready for every photo and moment ahead.
Bronzer Application for Sun-Kissed Warmth
Bronzer adds warmth back to your face after foundation and concealer flatten your natural color. Choose a shade only one or two tones deeper than your skin, since anything too dark can look muddy in photos. Apply with a large fluffy brush in a “3” shape along your hairline, cheekbones, and jawline, avoiding the center of your face. Budget picks like the Wet n Wild Color Icon bronzer cost only a few dollars and blend smoothly. Tap off excess product before touching your face, since a light hand prevents patchiness later in the day. Powder bronzer holds up better than cream for long wedding days, especially in warm venues. Set with a light mist of setting spray once blended to lock the warmth in place. Avoid shimmer-heavy bronzers for daytime ceremonies, since flat lighting can make shimmer look greasy rather than glowing. Save a more shimmery bronzer for the evening reception if you want extra sparkle under low lighting. This small step keeps your face looking healthy and warm rather than washed out under bright camera flashes.
False Lash Styles for Natural-Looking Volume
False lashes add definition that photographs beautifully, especially under flash or video lighting. Choose a natural, wispy style rather than a dramatic, full strip if you want lashes that still look like your own. Trim the lash band to fit your eye shape before applying, since a lash that’s too long can poke at the corners. Budget picks like Ardell Wispies cost just a few dollars a pair and are a long-time favorite among makeup artists. Use a waterproof lash glue, not a regular craft glue, since wedding-day tears call for something stronger. Apply glue and let it turn tacky for thirty seconds before pressing the lash on, which helps it hold rather than slide. Individual lash clusters are another option for a more subtle boost of volume without a full strip. If lashes feel too heavy, a strip cut into smaller sections and applied only to the outer corners gives a lifted look without much weight. False lashes paired with waterproof mascara blend everything together for a seamless, full look that lasts.
Color Correcting for Even Skin Tone
Color correcting evens out tone before foundation goes on, which means you need less coverage overall and your base lasts longer without looking heavy. Green corrector cancels redness around the nose and cheeks, while peach or orange correctors brighten dark under-eye circles depending on your skin tone. Apply a thin layer only where needed, then blend the edges softly with a damp sponge. Budget picks like the NYX HD Color Correcting palette include several shades in one affordable compact. Let the corrector set for a minute before applying foundation on top, since foundation blends more smoothly over a set base. Skipping heavy layers of foundation to cover redness or discoloration means your skin looks more natural in photos and holds up longer since there’s simply less product to break down. This step is especially useful for brides dealing with post-breakout marks or visible veins close to the surface. A well color-corrected base creates an even canvas that makes every other step of your makeup routine easier and longer-lasting throughout the day.
Bridal Makeup for Mature Skin
Mature skin benefits from a different approach than younger skin, since fine lines and texture respond better to lightweight, hydrating products than heavy matte formulas. Choose a foundation with a satin or dewy finish, since matte formulas can settle into lines and look dry by midday. Apply with fingers or a damp sponge rather than a stiff brush, which can drag on delicate skin. Budget picks like the L’Oréal Age Perfect foundation line are formulated specifically with hydration in mind. Skip heavy powder except in the T-zone, since too much powder everywhere else can emphasize texture rather than smooth it. Cream blush and cream highlighter add a soft glow that flatters mature skin better than powder versions. A hydrating setting spray, rather than a mattifying one, locks everything in without drying skin out further. Focus on skincare in the weeks leading up to the wedding, since well-hydrated skin holds makeup better than dry skin regardless of product choice. These small adjustments create a soft, radiant finish that photographs beautifully and lasts through a full day of celebration.
Bridal Makeup for Acne-Prone Skin
Acne-prone skin needs a careful balance between coverage and breathability, since heavy products can trap oil and lead to breakouts right before the wedding. Choose a non-comedogenic, oil-free foundation and primer, both labeled specifically for acne-prone or blemish-prone skin. Apply concealer only over active spots rather than the whole face, using a small brush for precision. Budget picks like the e.l.f. Blemish Control line are formulated with salicylic acid and cost very little. Set with a light dusting of powder rather than a heavy layer, since too much powder can look cakey over textured skin. Avoid trying new skincare or makeup products in the week before the wedding, since your skin needs consistency rather than new ingredients that could trigger a reaction. A gentle, alcohol-free setting spray finishes the look without further irritating sensitive spots. If breakouts happen close to the wedding, a color-correcting concealer targeted just to that spot works better than covering your whole face with extra foundation. Simple, breathable routines protect acne-prone skin while still delivering full, camera-ready coverage.
Rainy Day Wedding Makeup Backup Plan
Rain can happen even with the best planning, so having a backup plan for your makeup keeps you calm if the forecast changes. Waterproof formulas across the board, foundation, mascara, eyeliner, and brow gel, are essential for any wedding with rain in the forecast. Budget picks like the Milani waterproof brow gel and Maybelline waterproof foundation hold up well under light rain or humidity. Carry a small umbrella specifically for the bridal party to use during outdoor photos, keeping rain off your face and hair as much as possible. A setting spray applied right before stepping outside adds an extra layer of protection against moisture. If your ceremony moves indoors due to weather, indoor lighting tends to be warmer, so a quick check with a small mirror helps you adjust if your makeup looks different under the new lighting. Pack a few extra blotting papers, since rain can add unexpected shine even with waterproof products. Staying prepared with the right formulas and a few backup tools means unexpected weather won’t derail your wedding day look.
Bridal Makeup for Deep Skin Tones
Deep skin tones deserve products formulated with enough pigment to match undertones accurately, since foundations that oxidize or turn ashy can ruin an otherwise great look. Test foundation shades in natural daylight, not store lighting, and swatch along your jawline rather than your hand. Budget picks like the Black Opal and Black Radiance lines offer strong shade ranges at accessible prices. Choose a highlighter with warm gold or bronze tones rather than icy white shades, since warm shimmer complements deep skin more naturally. Setting powder should be translucent or lightly tinted to avoid leaving an ashy cast once it dries down. A dewy or satin foundation finish tends to photograph better on deep skin than a flat matte finish, which can look chalky under flash photography. Lip colors in rich berry, deep red, or warm brown tones tend to photograph beautifully against deep skin. Working with an artist experienced in deep skin tones, or practicing shade matching carefully at home, makes a noticeable difference in how natural and long-lasting your final look appears.
Bridal Makeup for Fair Skin Tones
Fair skin can show redness and uneven tone more visibly, so a light color-correcting step before foundation helps create a smoother base. Choose a foundation with pink or neutral undertones rather than yellow, since yellow-based formulas can look off against fair skin. Budget picks like the Rimmel Match Perfection line offer a solid range of fair shades at a low price point. Blush in soft pink or peach tones adds a natural flush without looking harsh, and cream formulas blend more seamlessly than heavily pigmented powders. Be cautious with bronzer, since too much can look muddy rather than warm on fair skin. A light hand with contour works better than heavy shading, since fair skin shows harsh lines more easily under flash photography. Setting powder should be translucent to avoid any gray or ashy cast once applied. Soft, rosy lip colors tend to photograph well against fair skin, giving a fresh, romantic finish. These small adjustments in shade and technique help fair-skinned brides achieve a natural, long-lasting glow rather than a flat or overly pale finish.
Setting Your Look With Cold Tools for Extra Hold
Cold tools used briefly on skin before makeup can help tighten pores and reduce puffiness, giving your foundation and concealer a smoother surface to grip onto. A chilled jade roller or a cold compress applied for a minute or two before makeup application can calm morning puffiness from wedding-day nerves or early wake-up calls. Budget picks like a simple stainless steel facial roller cost very little and can be kept in the refrigerator overnight before use. This step is meant purely as a pre-makeup skin prep tool, not a substitute for hydration or skincare. After using a cold tool, pat skin dry gently before applying primer, since any leftover moisture can affect how products blend. Some makeup artists also chill their setting spray bottles briefly before the final mist, since a cool spray feels refreshing and can help set makeup a touch more effectively in warm venues. This small addition to your morning routine takes only a few minutes but can leave skin looking calmer and smoother right before the rest of your makeup goes on.
Bridal Makeup for Second-Day Wear
Many brides have a second event, like a brunch or a second-day photo session, and second-day makeup should feel lighter than the wedding day itself. Focus on skin recovery first: a hydrating moisturizer and a few extra minutes of skincare help skin bounce back after a long first day. Budget picks like CeraVe Hydrating Cleanser and Moisturizer support skin recovery without a high price tag. Use a tinted moisturizer or light BB cream instead of full foundation, since your skin needs a break from heavier products. Cream blush and a swipe of mascara are often enough for a fresh, rested look without redoing a full face. Keep lip color soft and simple, like a tinted balm, rather than a bold color that requires more upkeep. If puffiness is present from wedding-day emotions or a late night, a cold compress for a few minutes before makeup helps reduce swelling. Second-day makeup should feel effortless, letting your natural glow from a joyful day carry the look rather than piling on more product than your skin actually needs.
Skincare Prep in the Weeks Before Your Wedding
Great makeup starts with great skin, and the weeks before your wedding are the time to build a simple, consistent skincare routine rather than trying new products at the last minute. Start a gentle routine at least six to eight weeks out: cleanser, moisturizer, and sunscreen daily, with a hydrating serum added if your skin runs dry. Budget picks like CeraVe and The Ordinary offer effective, affordable options for building a simple routine without overspending. Avoid trying new active ingredients, like strong exfoliants or new retinol products, within two weeks of the wedding, since your skin needs time to adjust safely. Drink water consistently in the days leading up to the wedding, since hydration affects how smoothly makeup applies. A gentle facial a week or two before, rather than the day before, gives skin time to recover from any redness or sensitivity. Sleep and stress management also play a role in how your skin looks under makeup, so prioritize rest in the final week. Healthy, well-prepped skin holds makeup longer and looks better in photos than skin rushed into a routine overnight.
Bridal Makeup for Video-Heavy Weddings
If your wedding includes a videographer capturing candid moments throughout the day, your makeup needs to hold up under moving lights and constant motion, not just still photos. Choose a foundation with a soft, natural finish rather than heavy shimmer, since bright highlighter or glitter can look distracting on video under changing light. Budget picks like the Wet n Wild Photo Focus foundation are formulated to look natural on camera without flashback. Avoid overly bold contour lines, since video captures movement from multiple angles that can make heavy shading look obvious rather than sculpted. Waterproof mascara and long-wear lip color matter even more for video, since you’ll be talking, laughing, and moving throughout the day without pausing for touch-ups. A light setting spray keeps your look consistent across hours of footage rather than shifting in tone as the day goes on. Test your makeup under both daylight and indoor lighting before the wedding, since video often captures both settings. A natural, well-set look tends to translate better on video than anything overly dramatic or heavily powdered.
Groom and Bridal Party Coordination Tips
Coordinating makeup across a bridal party keeps everyone looking cohesive in photos without forcing identical looks on different skin tones and preferences. Choose a shared color palette, like warm neutrals or soft rose tones, and let each bridesmaid’s makeup artist or personal routine adapt the palette to their own skin tone. Budget picks like affordable eyeshadow palettes from ColourPop work well for group looks since one palette can suit several people at a shared price point. If the groom or groomsmen want a bit of help evening out redness or shine for photos, a lightweight tinted moisturizer or matte primer applied by a makeup artist keeps things subtle and natural. Schedule makeup application with buffer time built in, since groups almost always take longer than expected. A shared touch-up kit with blotting papers, a neutral lipstick, and a small mirror can be passed around the group before formal photos begin. Coordinated but individualized makeup creates a polished group photo without erasing what makes each person’s features unique.
Bridal Makeup on a Tight Morning Schedule
Some wedding mornings are simply rushed, and having an efficient routine ready helps you stay calm even on a tight schedule. Prep your skin the night before with a hydrating mask, so your morning routine only needs a light moisturizer rather than a full skincare routine. Budget picks like a simple sheet mask from The Inkey List cost just a couple dollars and make a noticeable difference the next morning. Focus your morning routine on a few key steps: primer, foundation, concealer, mascara, blush, and lip color, skipping anything elaborate that eats up time. A cream-based multi-use stick for cheeks and lips saves steps compared to separate products for each area. Lay out every product the night before in the order you’ll use it, so there’s no searching around on the actual morning. If a professional artist is doing your makeup, confirm arrival times with a buffer of at least thirty minutes for unexpected delays. A streamlined, well-organized routine keeps your morning calm and your makeup just as long-lasting as a more elaborate approach.
Choosing Between Professional Artist and DIY
Deciding between hiring a professional artist and doing your own makeup often comes down to budget, comfort level, and how much you enjoy doing makeup in the first place. A professional artist typically costs more but brings experience with long-wear techniques and can adjust for lighting and venue conditions you might not think to plan for. DIY makeup, using the drugstore techniques covered throughout this guide, can save hundreds of dollars if you’re willing to practice ahead of time. A middle-ground option some brides choose: hire a professional for the ceremony look and switch to a simpler DIY touch-up for the reception, cutting costs while still getting expert help for the most photographed part of the day. Budget picks for DIY brides, like the products mentioned throughout this article, can build a full kit for under fifty dollars total. Whichever route you choose, practice matters more than price. A well-practiced DIY look often outlasts a rushed professional application, and a well-chosen professional often saves stress that DIY can’t replace on an already busy morning.
Conclusion
A wedding day is long, emotional, and full of movement, and your makeup should be built to match that pace rather than fight against it. From waterproof formulas and smart layering to budget-friendly drugstore swaps, these 45 looks and techniques give you real, practical ways to stay flawless from your first look through the last dance. Small choices, like setting spray over powder, cream blush layered with powder, or a simple touch-up kit, add up to a look that holds strong no matter how much the day throws at it. Try a few of these techniques during your makeup trial, practice at home if you’re doing it yourself, and trust that a well-prepared routine will carry you through every hug, tear, and celebration ahead. Your makeup should be one less thing to worry about on your wedding day, and with the right prep, it will be.

Emma is the author and creative voice behind TheFashionary, sharing inspiring ideas on bridal fashion, wedding dresses, hairstyles, and timeless style. She loves discovering beautiful fashion trends and helping readers find inspiration for their special moments.