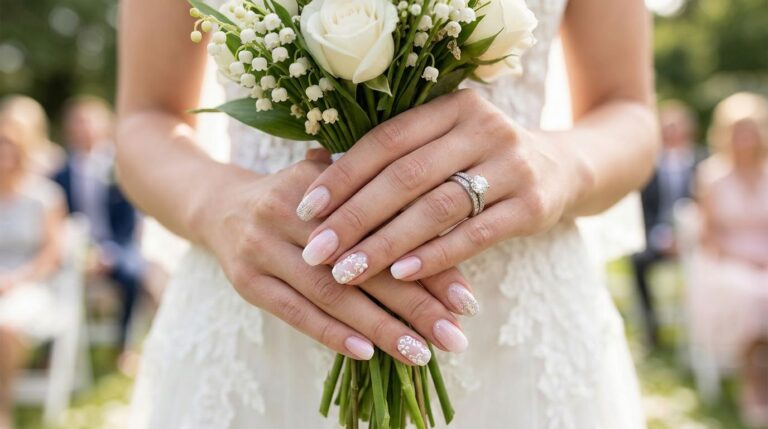
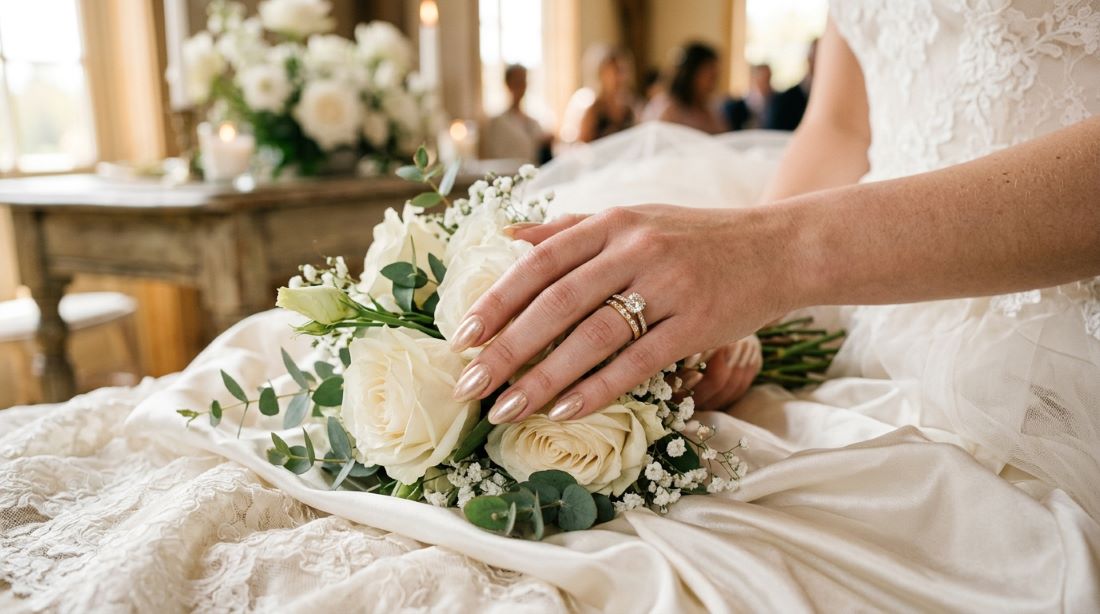
Gold wedding nails can turn a bridal manicure into one of the prettiest details of the entire look. Gold works beautifully with ivory dresses, champagne gowns, pearl accessories, warm makeup, and classic white bouquets. From delicate gold French tips to sparkling chrome finishes, there are plenty of ways to wear the shade without making your nails feel too flashy. These ideas also work for bridesmaids, engagement parties, bridal showers, and wedding guests. Many designs can be recreated at home with affordable polish, nail stickers, foil, glitter, or press-on nails. Whether your style is soft and romantic, modern and sleek, glamorous, or minimalist, these gold wedding nail ideas give you plenty of inspiration for your big day.
If you prefer a softer and more delicate manicure, these ombre wedding nails offer a dreamy alternative with beautifully blended tones.
1. Classic Gold French Tips
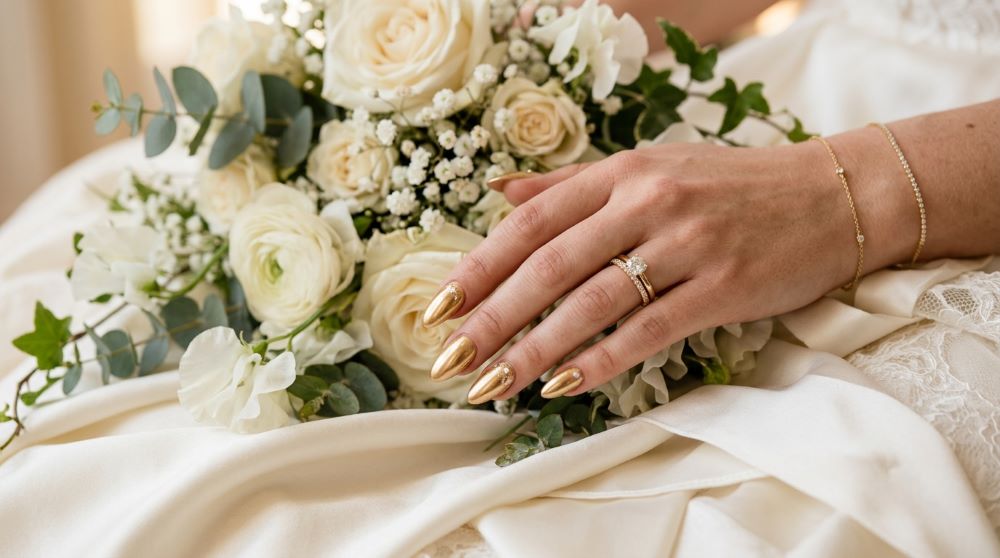
Gold French tips are a timeless choice for a wedding manicure. Start with a sheer nude or milky pink base. Add thin metallic gold tips across the free edge. The result feels bridal without looking overly decorated. Almond-shaped nails work especially well because the curved tip follows the shape of the nail. Short square nails can also carry this style beautifully. For a simple DIY version, use French-tip guides and metallic gold polish. Let the base dry fully before adding the guides. Paint the gold tips in one thin layer. Add another coat if you want stronger shine. A glossy top coat gives the manicure a polished finish. For a softer effect, choose champagne gold instead of bright yellow gold. This style pairs nicely with gold earrings, delicate bracelets, and warm-toned wedding accessories. It also looks beautiful beside white flowers. If your dress has gold embroidery, the manicure can quietly echo those details.
2. Gold Chrome Bridal Nails

Gold chrome nails create a smooth, reflective finish that catches light beautifully. They are a great choice for brides who love glamour but want a clean shape. A nude base underneath can make the gold look softer. A deeper champagne base can create a richer appearance. Chrome powder gives the strongest mirror effect, but gold chrome press-ons can make the style easier at home. Keep the nail shape simple so the finish remains the main attraction. Almond, coffin, and soft square shapes all work well. Add a glossy top coat designed for chrome finishes when possible. For a budget-friendly manicure, try metallic gold polish instead of chrome powder. Two thin coats can still create plenty of shine. Gold chrome looks especially beautiful in wedding photos because sunlight and reception lighting bounce across the surface. Pair it with pearl jewelry for a pretty mix of warm gold and soft white.
3. Champagne Gold Nails
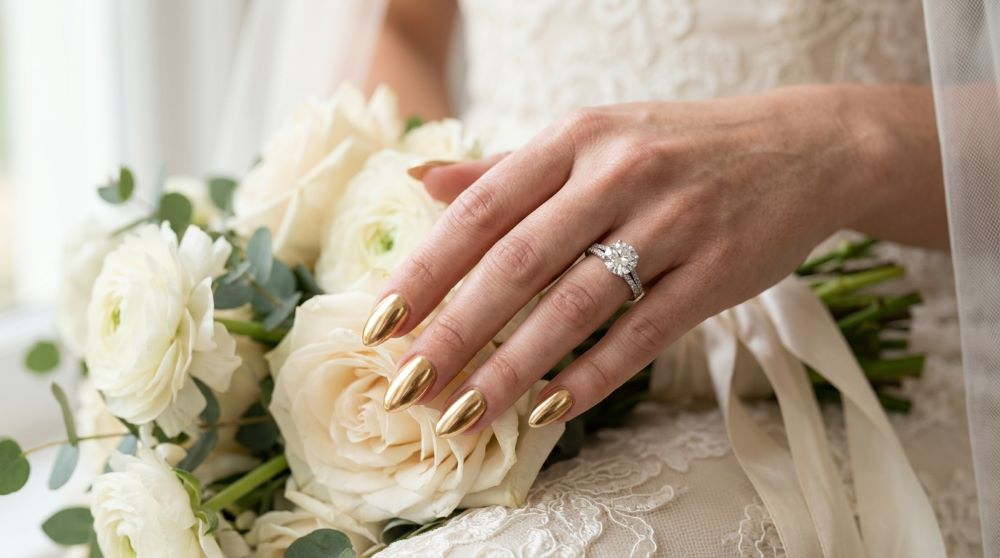
Champagne gold offers a softer alternative to bright metallic gold. It has a warm, delicate appearance that works beautifully with bridal colors. Start with a creamy nude or pale beige base. Add champagne-gold polish across the full nail. You can leave the design simple or add one tiny crystal near the cuticle. This style suits brides who prefer understated details. It also works well with satin dresses because both surfaces catch light softly. Champagne polish can be easier to wear after the wedding because it does not feel strongly tied to a single occasion. For DIY application, use thin coats and allow each layer to dry before adding another. Finish with clear top coat for shine. If your wedding accessories include champagne-colored details, this manicure can connect everything together. Try it on short rounded nails for a natural look or almond nails for a more elegant finish.
4. Gold Glitter Wedding Nails

Gold glitter adds sparkle without requiring complicated nail art. Apply a nude, cream, or pale pink base first. Then cover the nails with fine gold glitter polish. For a softer design, place glitter only on two accent nails. Chunky glitter creates more drama, while fine shimmer looks delicate. A simple DIY trick is to apply glitter polish with a small makeup sponge. This can create stronger coverage than brushing it directly onto the nail. Seal the design with a smooth top coat. Gold glitter looks lovely with evening weddings because reception lights can make every tiny sparkle visible. It also works well with rhinestone jewelry and crystal hair accessories. If you want a balanced manicure, keep the other nails plain. Another option is a glitter French tip. Paint a sheer base, add a curved glitter tip, and finish with clear polish. This design gives you sparkle while keeping the overall manicure refined.
5. Gold Leaf Accent Nails

Gold leaf accents can make a simple manicure feel artistic. Begin with a sheer nude or blush base. Apply small pieces of cosmetic gold foil to one or two nails. Keep the pieces irregular rather than arranging them into exact shapes. That gives the manicure a handmade appearance. A clear adhesive can help the foil stay in place. Finish with two layers of top coat for extra protection. You can place gold leaf near the cuticle, across the center, or along one side of the nail. Pairing it with a milky white base creates a soft bridal appearance. A nude base gives it a warmer feel. This design is easy to customize for your wedding colors. Add tiny pieces of rose gold foil if your jewelry mixes metals. For a budget-friendly option, gold nail foil sheets can provide many manicures from one package. Use tweezers to pick up small pieces and press them gently onto the nail.
For a relaxed yet romantic bridal aesthetic, these boho wedding nails are full of gorgeous ideas to inspire your look.
6. White and Gold Wedding Nails

White and gold make a natural bridal pairing. Use creamy white polish as the main color and add gold details. You can create gold French tips, tiny dots, thin lines, or small flakes. The white keeps the manicure classic while gold adds warmth. Almond nails create an elegant canvas for this combination. Short nails can also look beautiful with one gold accent stripe. For a DIY design, apply two coats of white polish. Let them dry completely. Use a thin nail-art brush to draw gold lines. Do not worry about making every line identical. Small differences can make the manicure look handmade. A glossy top coat brings both colors together. White and gold nails pair especially well with ivory dresses, gold wedding rings, and white floral arrangements. If your bouquet includes greenery, add tiny gold details rather than covering every nail with metallic polish.
7. Nude Nails With Gold Swirls

Gold swirls create movement while keeping the base neutral. Choose a nude polish close to your natural skin tone. Add thin curved lines using metallic gold polish. The swirls can be placed randomly for a relaxed look. You can also create matching designs across every nail. A fine nail-art brush works well for this style. Beginners can practice the curves on paper before painting them on the nails. Gold striping tape offers another easy option. Simply cut small curved pieces and press them onto the dry polish. Seal everything with clear top coat. This manicure looks lovely with flowing wedding gowns and soft hairstyles. It also photographs well because the neutral background keeps the gold visible. For a stronger statement, use two gold swirls on each nail. For something quieter, place one small curve near the sidewall.
8. Gold Pearl Wedding Nails

Pearls and gold create a classic bridal combination. Begin with a sheer pink or milky white base. Add tiny pearl embellishments near the cuticle or along one side of the nail. Place a small gold dot beside each pearl for extra detail. Keep the embellishments limited so the nails remain comfortable. Nail glue can help secure small decorations. A glossy top coat around the embellishments adds shine. This manicure pairs naturally with pearl earrings, pearl hairpins, or a pearl necklace. It also suits vintage-inspired wedding dresses. For an affordable DIY version, use flat-back pearl nail decorations instead of large three-dimensional pieces. Apply them to completely dry polish. If you have short nails, place one pearl near the base of each nail rather than covering the entire surface. The result feels delicate and polished without requiring a salon appointment.
9. Gold Foil Over Milky White Nails

Milky white polish creates a soft background for gold foil. Apply two thin coats of milky white polish. Once dry, press small pieces of gold foil onto selected areas. Avoid making each nail identical. A scattered arrangement gives the manicure a natural artistic feel. Finish with a glossy top coat to smooth the surface. This design is especially pretty for brides who want something more interesting than plain white nails. The gold foil catches light while the milky base keeps the overall appearance soft. You can also add one completely gold accent nail for extra shine. For a low-cost DIY manicure, gold transfer foil can last through many sets. Use a small sponge or tweezers to handle the pieces. If the foil looks too strong, place smaller fragments across the nail instead of large sheets.
10. Minimal Gold Line Nails
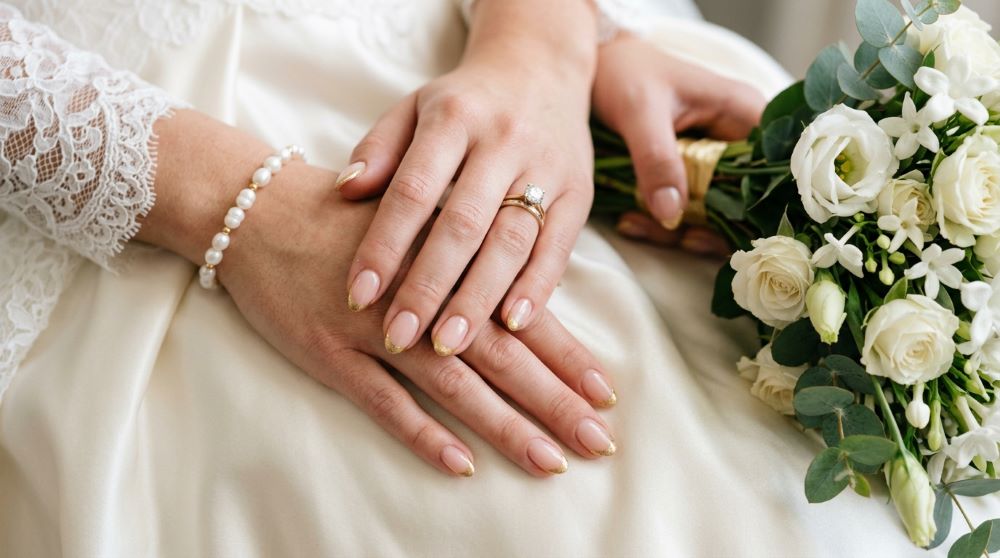
Minimal gold lines are perfect for brides who prefer clean nail art. Start with a nude, beige, or pale pink base. Draw one thin gold line across each nail. The line can run horizontally, diagonally, or vertically. Another option is a tiny curved line near the cuticle. Keep the rest of the nail plain. A fine detail brush gives you control. Gold striping tape makes the design easier for beginners. Press the tape firmly onto completely dry polish. Trim the edges with small nail scissors before applying top coat. This style works particularly well with modern wedding dresses and simple jewelry. It also looks great on short nails. Since the design uses very little polish, it is an affordable choice. Try combining one vertical gold line with a tiny gold dot on alternating nails. The result feels polished while remaining easy to recreate.
11. Gold Glitter French Tips

Gold glitter French tips bring together two classic bridal ideas. Use a sheer nude or pink base. Instead of solid metallic tips, paint the edges with gold glitter. Fine glitter creates a subtle shimmer. Chunkier glitter gives a stronger party effect. Almond and oval nails show off the curved tips beautifully. For DIY application, use French guides to create a clean shape. Apply the glitter in thin layers. Allow each layer to dry before adding more. A clear top coat helps prevent rough glitter texture. This manicure works for daytime ceremonies and evening receptions. It also pairs nicely with glittery shoes or a sparkling hair accessory. If you want a softer look, keep the glitter concentrated at the outer edge and allow some of the nude base to show through. This gives the tips a delicate gradient effect.
12. Gold Ombré Wedding Nails

Gold ombré nails fade from a soft nude base into sparkling gold tips. The gradual effect makes the manicure feel glamorous without covering the entire nail in metallic polish. Begin with a nude base. Use a makeup sponge to dab gold glitter toward the tips. Repeat with several light layers. Each layer should extend slightly less toward the cuticle. This creates a smooth fade. Finish with clear top coat. Almond and coffin shapes work particularly well because they provide a long surface for the gradient. Short nails can use a smaller glitter section. Gold ombré is a great match for champagne dresses, crystal accessories, and warm makeup. It also works nicely for winter weddings. For a budget option, one bottle of gold glitter polish can create the entire look. You can control the amount of sparkle by adding extra layers only to the tips.
13. Gold Heart Accent Nails
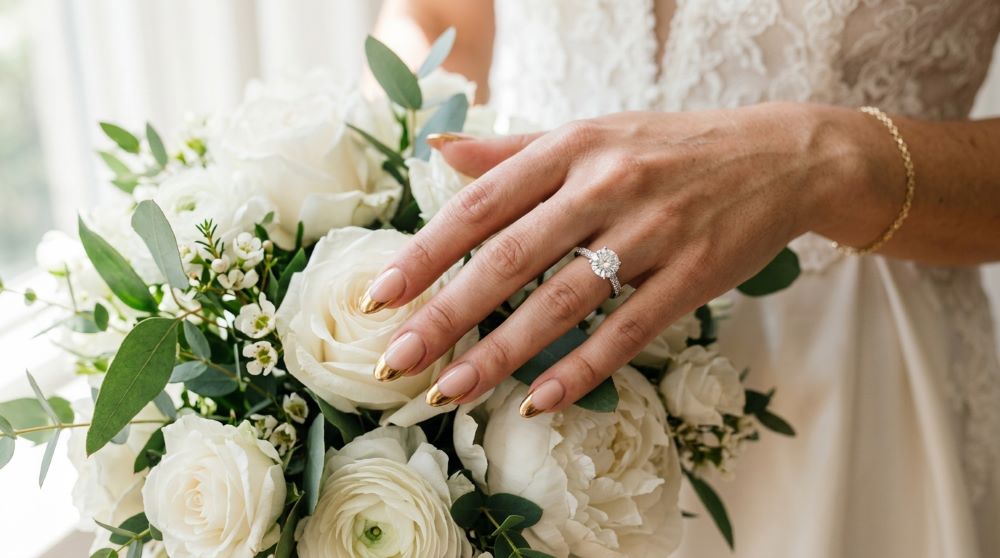
Tiny gold hearts add a romantic detail to a bridal manicure. Use a nude or milky pink base. Paint one small gold heart on each ring finger. Leave the remaining nails simple. You can also place tiny hearts near the cuticles across every nail. A dotting tool makes small hearts easy to create. Place two small dots side by side, then pull the lower edges together with a fine brush. Metallic gold polish gives the hearts a shiny finish. For an easier option, use gold heart stickers. This design works especially well for engagement parties and wedding ceremonies. It feels romantic without becoming overly decorative. Add a glossy top coat after the hearts dry. If your wedding has heart-shaped details in the stationery or decorations, the manicure can quietly echo them. Keep the hearts small so they remain comfortable and refined.
14. Gold Star Wedding Nails
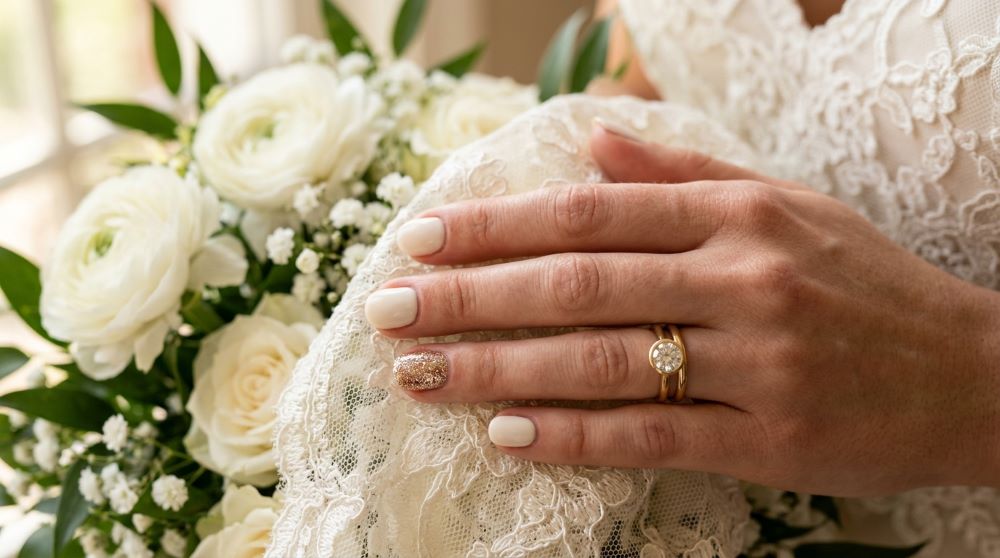
Gold stars bring a subtle celestial detail to bridal nails. Choose a sheer nude or pale pink base. Add tiny gold stars to one or two accent nails. You can use nail stickers for quick application or paint simple five-point stars with a fine brush. Keep the stars small for a delicate appearance. A few scattered stars can look like tiny points of light. This style works especially well for evening weddings. It pairs beautifully with crystal earrings and soft champagne makeup. For DIY application, apply stickers after the base polish has fully dried. Press each sticker flat before adding top coat. If you prefer nail polish, use the tip of a detail brush to create small points. Gold stars also look pretty over a transparent base. That option creates an airy manicure that allows your natural nail color to show.
Prefer a timeless manicure without too much detail? These simple wedding nails can give you a clean and effortlessly elegant finish.
15. Gold Marble Wedding Nails

Gold marble nails combine creamy colors with thin metallic details. Start with a white, beige, or nude base. Add irregular soft lines using a slightly darker nude polish. Then trace a few sections with metallic gold. The goal is a natural stone-inspired pattern rather than perfect lines. Use a very thin brush to create the veins. Keep the gold details scattered. Too much gold can cover the marble effect. Finish with glossy top coat for a smooth surface. This manicure works beautifully with modern wedding styling and neutral flowers. It can also coordinate with marble reception tables or stationery. For a DIY version, practice the pattern on a plastic nail first. Once comfortable, work one nail at a time. You can make the design easier by using nail wraps with a marble print and adding gold lines yourself.
16. Gold Glitter Accent Nail
If full glitter feels too bold, use it on one accent nail. Paint most nails with a soft nude or pink polish. Choose the ring finger for a full coat of gold glitter. Add a thin gold French tip to the other nails. This creates a balanced manicure with one sparkling focal point. The design is simple enough for home application. Apply two coats of your base color first. Let them dry. Then add gold glitter to the accent nail. Finish every nail with clear top coat. This style pairs well with a classic white wedding dress. It also looks pretty beside a gold engagement ring. Fine glitter creates a softer appearance, while chunky glitter makes the accent more dramatic. You can change the mood simply by changing the glitter texture.
17. Gold Metallic Short Nails
Short nails can look stunning with metallic gold polish. A short rounded or squoval shape gives the manicure a neat appearance. Apply a warm gold polish over every nail. Two thin coats usually give stronger coverage than one thick coat. Add glossy top coat for extra shine. If full gold feels too strong, apply it only to the tips. Short metallic nails work well for brides who want something easy to maintain. They are also practical during wedding preparations because there is less length to catch on clothing. For a DIY manicure, gently shape the nails with a file. Apply a base coat before your color. Clean small polish mistakes with a thin brush dipped in remover. Gold metallic polish looks especially pretty with simple jewelry because the nails become the main accessory.
18. Gold and Blush Pink Nails
Blush pink creates a romantic background for gold details. Paint every nail with a soft blush shade. Add gold French tips, tiny dots, or thin lines. The warm combination works beautifully with pink flowers and champagne accessories. Almond nails can make the look more graceful, while short rounded nails keep it sweet and simple. For DIY application, choose a sheer blush polish if you want your natural nail to show. Add gold details after the base has dried. A small dotting tool can create tiny gold accents quickly. Finish with glossy top coat. If your dress has blush undertones, this manicure can make the whole bridal look feel connected. You can also add one pearl to each ring finger. That small detail brings another bridal element without making the manicure complicated.
19. Gold French Tips With Rhinestones
Gold French tips become more glamorous with tiny rhinestones. Start with a nude or milky base. Add thin gold tips. Place one small crystal near the cuticle on each ring finger. This keeps the sparkle controlled. Flat-back rhinestones are easier to wear than larger raised decorations. Apply them with a tiny amount of nail glue after the polish has dried. Seal around them with clear top coat. Avoid covering the rhinestone itself with a thick layer if you want maximum shine. This manicure works well for formal evening weddings. It pairs naturally with crystal earrings and sparkling hair accessories. For a budget-friendly option, small craft-style nail gems can create a similar effect. Use only a few per hand. The gold tips already provide plenty of visual interest.
20. Gold Half-Moon Nails
Half-moon nails place the decorative detail near the base of the nail. Use a nude or creamy base. Paint a gold curved shape around the cuticle area. Leave the rest of the nail soft and neutral. This design has a vintage feel while still looking modern. Small round stickers can help create the curved shape. Place the sticker near the cuticle, paint gold above it, then remove the sticker carefully. Finish with clear top coat. Short nails can wear this style especially well because the design follows the natural curve of the nail. It is also easy to customize. Use champagne gold for a subtle look or bright metallic gold for more shine. Pair the manicure with vintage-inspired jewelry or a simple satin gown.
21. Gold Dotted Bridal Nails
Tiny gold dots can create beautiful bridal nail art with very little effort. Start with a pale nude, pink, or white base. Add small gold dots near the cuticle. You can place one dot on each nail or create clusters of three. A dotting tool makes the process easy. A clean toothpick can also work for a simple DIY version. Dip the tip into metallic polish and touch it lightly to the nail. Allow the dots to dry before adding top coat. This style is perfect for brides who like minimal details. It also works on short nails. For a more decorative look, arrange several tiny dots along one side of each nail. Gold dots can also be paired with small pearls. The result feels delicate and bridal without requiring advanced nail-art skills.
22. Gold Lace-Inspired Nails
Lace-inspired nail art can echo the texture of a wedding dress. Use a nude or soft pink base. Paint tiny gold curves, dots, and scalloped lines to create a lace-like pattern. Keep the design limited to one or two accent nails if you prefer a simpler manicure. Nail stamping plates can make lace patterns much easier to recreate. Gold stamping polish gives a crisp finish. For a DIY approach without stamping tools, use a thin brush and create small repeated curves. Do not worry about exact symmetry. The overall pattern matters more than perfect details. This manicure works beautifully with lace wedding gowns. It can also complement vintage bridal styling. Add a glossy top coat to smooth the design and protect the gold details.
23. Gold Chrome French Manicure
A chrome French manicure gives the classic French shape a modern finish. Use a sheer nude base. Apply reflective gold only to the tips. The contrast between the soft base and mirror-like tips creates a clean look. Almond nails provide enough space for a curved chrome tip. Short nails can use a thinner version. Chrome powders can be applied over a suitable gel system, but press-on nails are an easier home option. If you use regular polish, choose a highly metallic gold instead. A thin French brush can help create the curved edge. Keep the tip consistent across both hands. This manicure looks beautiful with sleek wedding gowns and simple gold jewelry. It also photographs well under bright reception lights.
24. Gold Floral Nail Art
Tiny gold flowers can make a bridal manicure feel romantic. Start with a creamy or nude base. Create small five-petal flowers using gold polish. Add a tiny dot at the center of each flower. You can place one flower on each ring finger or scatter several across the nails. Nail stickers are another simple option. Gold floral details pair naturally with wedding bouquets. They work especially well with roses, baby’s breath, daisies, and dried flowers. For a DIY design, use a small dotting tool. Place five tiny dots around a central dot. Let the flowers dry before adding top coat. Keep the flowers small so the manicure remains delicate. A pale pink base can make the flowers feel romantic, while white creates a more traditional bridal appearance.
25. Gold Glitter Cuticle Nails
Gold glitter can create a pretty border around the cuticle. Apply a nude or milky base. Use a fine brush to place a thin glitter curve along the bottom edge of each nail. Keep the glitter line narrow. This gives the manicure a subtle decorative finish. A gold glitter liner polish can make the application easier. You can also use a small brush with regular glitter polish. Apply one layer first. Add another if you want more sparkle. This style looks particularly attractive on almond and oval nails. It also grows out more gracefully than designs that cover the entire nail. For a wedding manicure several days before the ceremony, that can be useful. Pair it with simple gold jewelry for a coordinated look.
26. Gold Geometric Wedding Nails
Geometric gold lines give bridal nails a modern feel. Use a nude, white, or beige base. Add thin gold triangles, squares, diagonal lines, or simple arches. Keep each shape open rather than filling the entire nail. This allows the neutral base to remain visible. Gold striping tape is an easy DIY tool for clean lines. Apply the tape after the base has dried. Trim the edges carefully. Finish with top coat to keep the tape secure. This design works particularly well with minimalist wedding themes. It also pairs nicely with structured wedding dresses and simple venues. For a softer result, use champagne gold instead of bright metallic gold. You can also mix geometric lines with one plain gold accent nail.
27. Gold Foil French Tips
Gold foil can create French tips with a textured, artistic appearance. Start with a sheer nude base. Place small foil pieces along the nail edge instead of painting a smooth line. Keep the foil slightly irregular. That creates a handmade effect. A clear adhesive helps the pieces stick. Once they are set, cover them with glossy top coat. Almond nails work beautifully with this design because the foil can follow the curved edge. For short nails, use smaller foil pieces. This manicure is a good option if you want gold without a completely solid metallic finish. It also pairs nicely with textured wedding dresses and natural makeup. One package of nail foil can provide enough material for multiple DIY manicures.
28. Gold Glitter Fade Nails
A glitter fade creates a gradual sparkle from the tip toward the center. Use a nude or pale pink base. Apply gold glitter to the tips. Then use a small sponge to soften the edge by dabbing glitter slightly higher on some areas. Repeat until the transition looks smooth. Keep the cuticle area free of glitter. This creates a light, airy appearance. A glossy top coat smooths the surface. Gold glitter fades are especially pretty for evening ceremonies. They catch reception lights without covering the entire nail. If you want a subtle version, use fine shimmer. For stronger sparkle, layer chunky glitter near the tips. This design works on almond, oval, coffin, and squoval nails.
29. Gold Swirl French Nails
Combine French tips with curved gold swirls for a playful bridal design. Use a nude base. Add a thin gold French tip. Then extend one side of the tip into a curved line across the nail. The result has movement without looking crowded. A fine nail-art brush works best. Practice the curve before applying polish. You can make every swirl different or keep them similar. A gold nail-art pen can make the process easier at home. Seal with clear top coat. This design pairs well with modern wedding dresses and minimalist bouquets. For a softer appearance, choose champagne gold. Bright gold creates more contrast against a nude base.
30. Gold Glitter and Pearl Nails
Gold glitter and pearls create a classic bridal combination. Use a soft pink or milky white base. Apply gold glitter to one or two nails. Add tiny pearls to the remaining accent nails. Keep the embellishments small and flat. This makes the manicure easier to wear. Apply pearls after the polish has dried. Use a small amount of nail adhesive. Finish with top coat around the decorations. This design pairs naturally with pearl jewelry. It also looks lovely with beaded wedding gowns. For a budget-friendly option, use inexpensive nail pearls and one bottle of fine gold glitter polish. You can create several different manicures from those supplies.
31. Gold and Ivory Nails
Ivory and gold create a warm bridal palette. Paint the nails with creamy ivory polish. Add thin gold lines, tiny dots, or French tips. Ivory often looks softer than bright white and pairs beautifully with traditional wedding dresses. Almond nails give the manicure an elegant shape. Short square nails make the style more modern. For DIY application, use a fine gold nail-art brush. Start with one simple line per nail. Add extra details only if the design still feels balanced. Finish with glossy top coat. This manicure works well with gold rings, ivory flowers, and champagne wedding decorations.
32. Gold Glitter Ring-Finger Nails
A sparkling ring-finger accent can draw attention to the hand without making every nail dramatic. Paint most nails nude or blush pink. Cover the ring fingers with fine gold glitter. Add a small gold French tip to the remaining nails. This creates a coordinated manicure with one strong focal point. Apply the glitter over completely dry polish. A sponge can help create even coverage. Finish with top coat. The design is affordable and easy to recreate at home. It also works well for brides who want their engagement ring to remain the star. Choose fine glitter for a soft effect or reflective glitter for evening glamour.
33. Gold Chrome Almond Nails
Almond nails provide a graceful shape for gold chrome. File the sides gently and create a rounded point at the tip. Then apply a reflective gold finish. Full chrome creates a bold appearance, so keep the rest of the bridal look simple if you choose this style. Soft makeup and minimal jewelry can balance the manicure. For a DIY option, gold chrome press-ons can provide a salon-like appearance without complex application. Choose a size that matches each nail closely. Apply them carefully and file the edges if required. Gold chrome almond nails look particularly striking against white dresses and neutral bouquets.
34. Soft Gold Shimmer Nails
Soft gold shimmer is perfect for brides who want sparkle without visible glitter pieces. Choose a sheer nude or champagne polish with fine gold shimmer. Apply two thin coats. The tiny particles reflect light gently. This style looks different in sunlight, indoor lighting, and reception photography. Keep the nail shape natural for a relaxed appearance. Round, oval, and almond shapes all work well. A glossy top coat can make the shimmer look smoother. This is also one of the easiest gold wedding manicures to recreate at home. You only need a base coat, shimmer polish, and top coat. It can be worn after the wedding too, making it a practical choice.
35. Gold French Tips With Pearls
A pearl placed at the base of a gold French tip creates a delicate bridal detail. Start with a sheer nude base. Add thin gold tips. Place one tiny pearl near the center of each ring finger. For more decoration, add pearls to every nail. Keep them small and flat for easier wear. Use nail adhesive to secure them. Finish around the pearl with clear top coat. This style looks especially pretty with pearl accessories. It can also match a pearl-covered wedding dress or veil. For a simple DIY manicure, decorate only the ring fingers. The gold tips already provide a consistent design across the hand.
36. Gold Glitter Ombre With Nude Base
A nude-to-gold glitter ombre creates a glamorous yet soft finish. Begin with a neutral nude base. Dab gold glitter onto the tips using a makeup sponge. Add several light layers while moving slightly lower toward the tip with each coat. Keep the cuticle area nude. This creates a gradual sparkle. Almond nails work particularly well, but the design also suits short nails. Fine glitter gives a smooth finish. Chunky glitter creates more visible sparkle. Seal the design with a thick glossy top coat. This manicure looks beautiful with champagne satin gowns and evening receptions.
37. Gold Minimalist Hearts
Tiny gold hearts offer a simple romantic detail. Use a sheer pink or nude base. Add one tiny heart near the tip or cuticle of each ring finger. Keep the remaining nails plain. Gold nail stickers make this look very easy to recreate. For painted hearts, use two small dots and connect them into a point. Finish with clear top coat. This style suits brides who like understated nail art. It also works beautifully for courthouse weddings and intimate ceremonies. Add one tiny pearl beside the heart for extra detail if desired.
38. Gold Abstract Nail Art
Abstract gold nail art allows each nail to have its own design. Use a neutral base. Add random curves, dots, short lines, and small foil pieces in gold. Keep some areas completely bare. This creates an artistic manicure without requiring exact patterns. Use a fine brush for lines and tweezers for foil. A simple DIY approach is to repeat three elements: one curve, one dot, and one foil piece. That gives the manicure consistency while allowing each nail to differ. Abstract gold looks especially good with modern wedding styling.
39. Gold and Nude Checkerboard Nails
A tiny checkerboard pattern can add personality to gold wedding nails. Start with a nude base. Create small squares using gold polish on alternating sections. Keep the pattern limited to one or two accent nails. The remaining nails can have simple gold French tips. Use striping tape to create clean sections. Apply gold polish, then remove the tape carefully. Finish with glossy top coat. This design suits modern brides who enjoy playful details. A champagne-gold polish can make the checkerboard softer.
40. Gold Glitter Starburst Nails
Starburst lines can make the nails look like tiny bursts of light. Use a nude or milky base. From one small point, draw several thin gold lines outward. Keep the design on one or two nails. Add gold glitter to the center if you want extra sparkle. A fine nail-art brush makes the lines easier to control. This style looks beautiful under reception lighting. It also pairs well with celestial wedding details. Keep the lines thin so the design stays delicate.
41. Gold Leaf and White French Nails
Combine gold leaf with classic white French tips. Use a milky nude base. Paint clean white tips. Add tiny gold foil pieces near the cuticle on selected nails. This creates a traditional base with a glamorous detail. Apply top coat carefully around the foil. The manicure pairs beautifully with white gowns and gold jewelry. For a budget version, use gold foil flakes from a nail-art kit and standard white polish.
42. Gold Glitter French Fade
A French fade softens the border between nude nails and gold sparkle. Apply a nude base. Place gold glitter on the tips. Use a sponge to soften the lower edge. Add more glitter at the very tip for stronger shine. Finish with clear top coat. This style works well for brides who dislike sharp French lines. It also grows out gracefully because there is no hard color boundary.
43. Gold Metallic Accent Stripes
Metallic stripes create a clean and modern manicure. Start with a pale nude base. Add one or two thin gold stripes across each nail. You can place them horizontally near the tip or diagonally across the center. Gold striping tape makes the design easy to create. Press the tape firmly onto dry polish. Trim the ends neatly. Finish with top coat. This design looks particularly good on short square nails.
44. Gold Confetti Wedding Nails
Tiny gold confetti pieces can create a festive manicure. Apply a sheer nude base. Place small round or irregular gold pieces across selected nails. Keep the distribution light. The result resembles tiny pieces of celebration scattered across the nails. Clear top coat helps hold the pieces in place. This style is fun for receptions and wedding after-parties. Use fine metallic flakes for a softer appearance.
Conclusion
Gold wedding nails give brides countless ways to add shine without changing the entire bridal look. You can choose delicate gold lines, classic French tips, sparkling glitter, chrome finishes, pearls, foil, or romantic tiny details. A nude, blush, ivory, or milky base can keep the manicure soft while metallic accents bring the sparkle. Many of these designs can also be recreated at home with affordable polish, stickers, foil, glitter, and simple nail tools. Pick the style that matches your dress, jewelry, wedding colors, and personal taste. Whether you want a subtle manicure or a full-glam bridal finish, these 44 gold wedding nail ideas can help you create a beautiful detail that shines from the ceremony to the final dance.
Still looking for more manicure inspiration? These wedding nails designs feature beautiful styles to help you find the perfect look for your big day.

Emma is the author and creative voice behind TheFashionary, sharing inspiring ideas on bridal fashion, wedding dresses, hairstyles, and timeless style. She loves discovering beautiful fashion trends and helping readers find inspiration for their special moments.