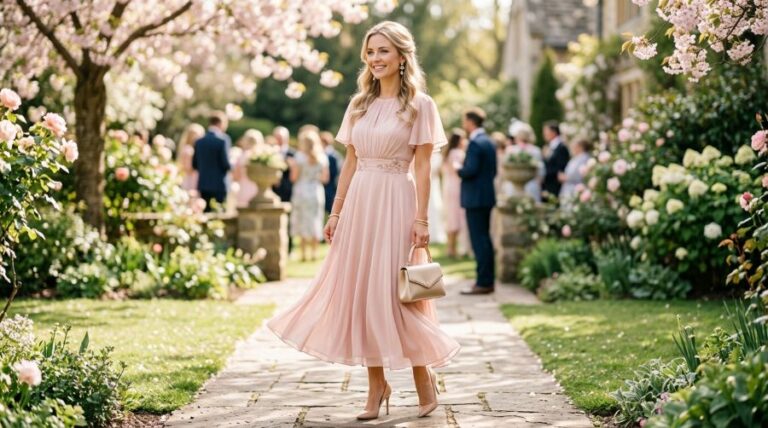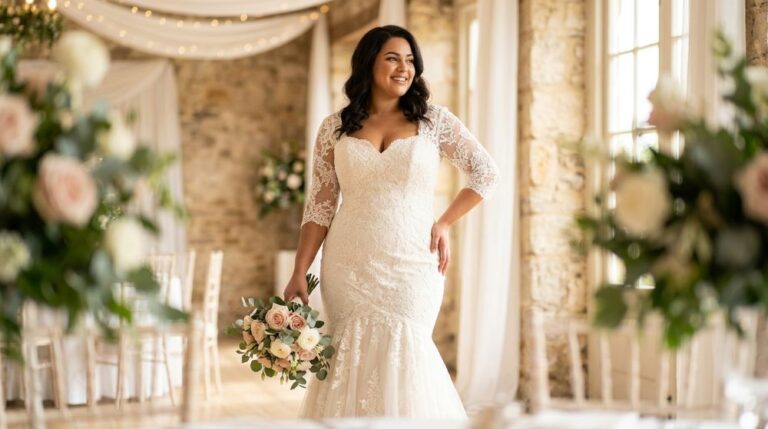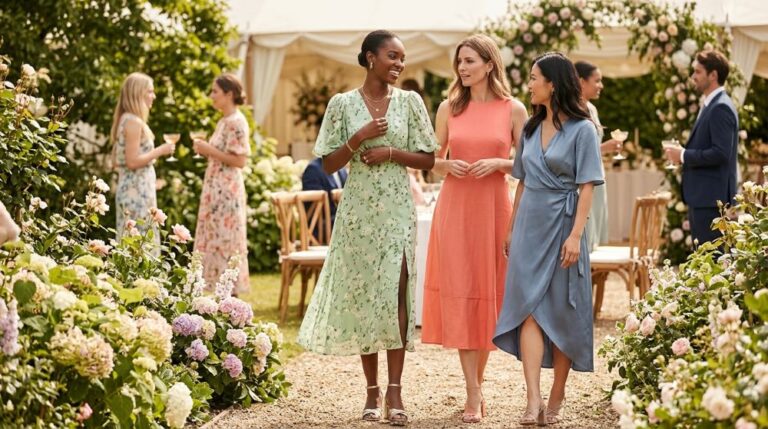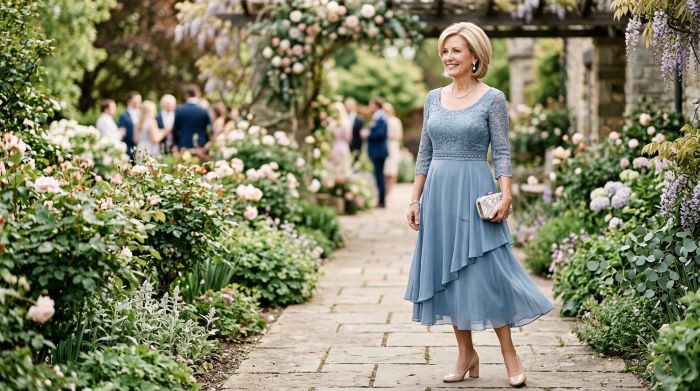
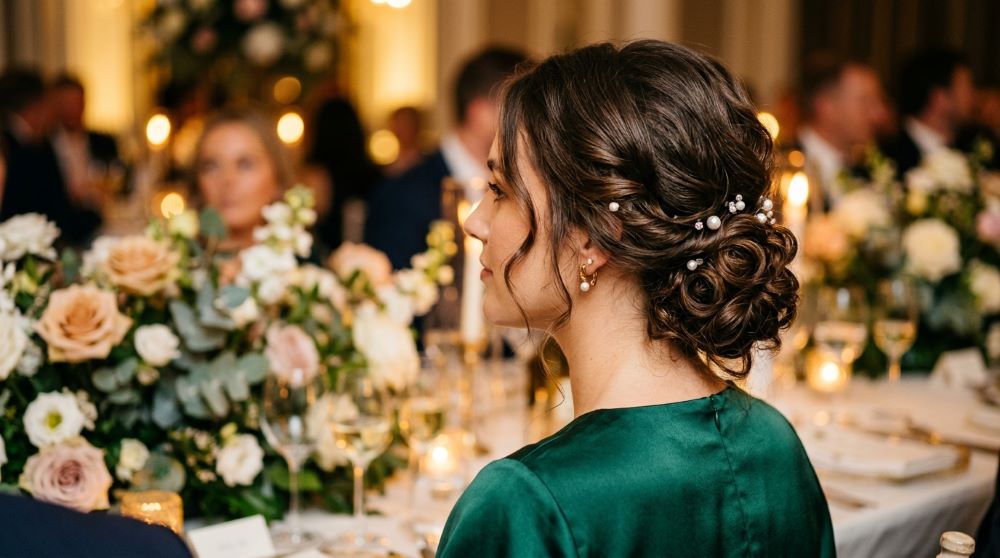
Wedding guest hair can shape your entire outfit, from a simple daytime dress to a glamorous evening gown. The right style should suit the wedding setting, your hair length, and how much time you want to spend getting ready. From soft half-up styles and polished buns to ponytails, braids, curls, and sleek looks, there are plenty of beautiful options that can be done at home. These Wedding Guest Hair Ideas focus on practical styling, affordable accessories, and easy techniques so you can create a polished look without booking an expensive salon appointment.
1. Elegant Half-Up Wedding Guest Hair
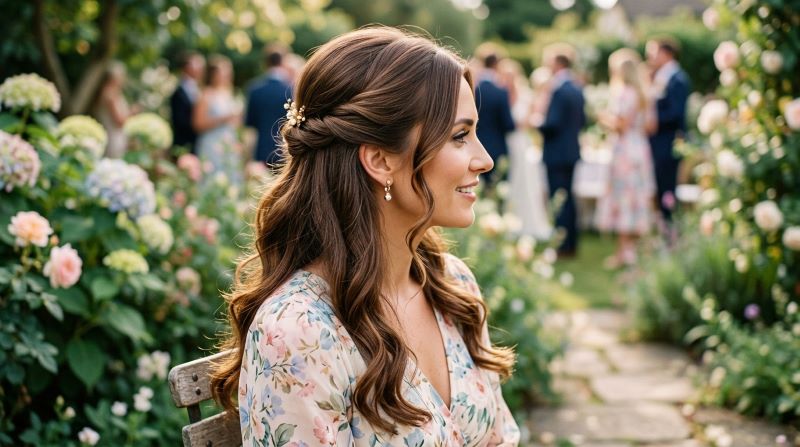
An elegant half-up hairstyle works beautifully when you want your hair to feel polished without pulling it completely away from your face. Start with softly curled hair, then separate the top section from each side of your head. Bring those sections toward the back and secure them with a small elastic or decorative clip. Gently loosen the crown with your fingers for a relaxed finish.
For a more romantic result, twist each side before joining them at the back. Pearl pins can add a pretty detail without requiring much styling experience. If you already have a curling iron at home, this look can cost almost nothing.
For shorter hair, keep the gathered section smaller and use bobby pins to hold the sides securely. A small ribbon can also work in place of a jeweled accessory.
This style suits garden weddings, indoor receptions, and semi-formal celebrations. It also works well with dresses that have open necklines. Finish with a light mist of hairspray so the curls stay soft while the pinned section remains secure throughout the event.
2. Simple Low Ponytail for a Polished Look
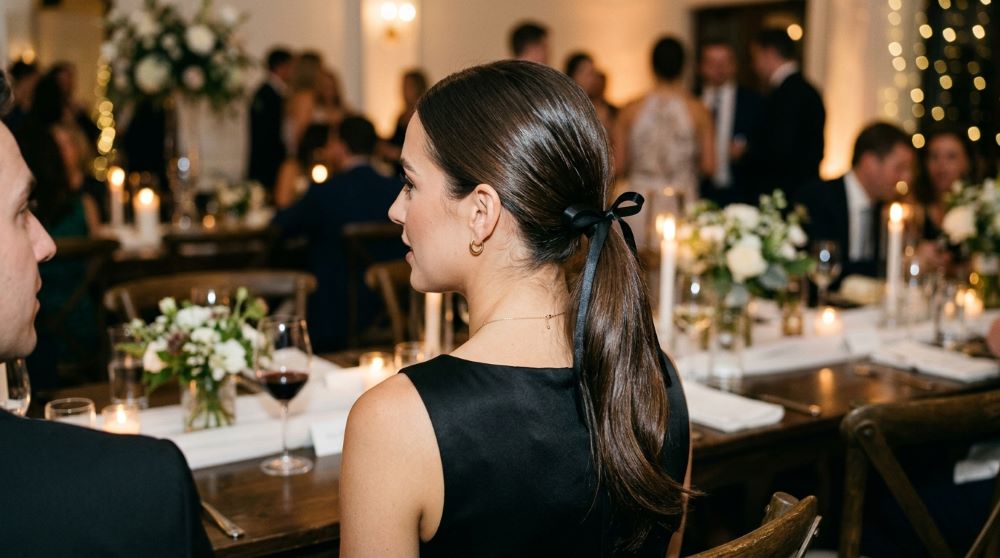
A low ponytail can look surprisingly sophisticated when the details are clean. Part your hair in the center or slightly to one side. Smooth it toward the nape of your neck and secure it with a small elastic. Wrap a thin section of hair around the elastic to hide it.
For extra softness, leave two small strands around your face. Curl those pieces lightly so they frame your cheeks without looking overly styled.
This idea works especially well with satin dresses, tailored outfits, and simple jewelry. You can also add a velvet or satin ribbon for a wedding-ready finish. Affordable ribbon from a craft store can create the same decorative effect as a more expensive hair accessory.
If your hair is fine, gently tease the crown before making the ponytail. This gives the style a little more shape. For thick hair, use a strong elastic designed for heavier hair.
A low ponytail is also practical when you expect dancing or outdoor activities. It keeps the hair controlled while still looking feminine. Add small pearl clips above the elastic if you want a slightly dressier finish.
3. Romantic Loose Waves
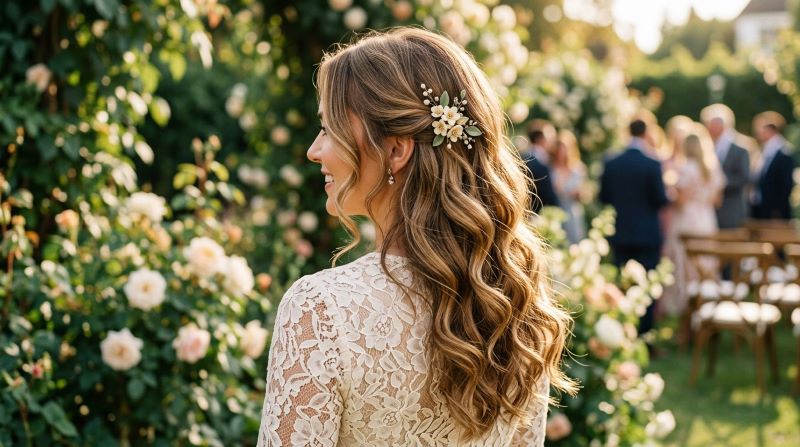
Loose waves are a dependable choice when you want your hair to remain down while still looking special. Begin with dry hair and create large sections. Curl each section away from your face, then allow the curls to cool before gently separating them with your fingers.
Avoid brushing the waves too heavily. A few passes with your fingertips can create a softer shape without making the hair lose its form.
For a budget-friendly finish, use a simple floral clip or one pearl barrette on one side. You do not need several accessories because the waves already create visual interest.
If you have naturally wavy hair, you can simplify the process. Apply a small amount of styling cream to damp hair, scrunch the ends, and let it air-dry. Add a few curls around the front if you want more definition.
This hairstyle suits both daytime and evening weddings. It looks lovely with floral dresses, satin gowns, and simple jumpsuits. Keep the ends slightly relaxed rather than perfectly curled for a natural appearance that photographs beautifully from different angles.
4. Unique Textured Low Bun
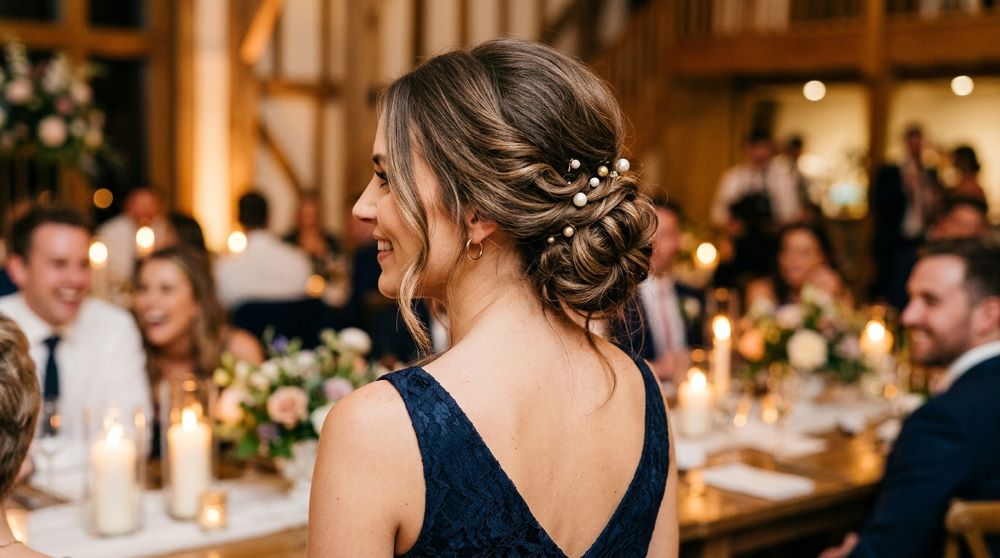
A textured low bun offers a stylish alternative to a perfectly smooth updo. Start by gathering your hair loosely at the nape. Twist the ponytail around itself and secure it with bobby pins. Pull out a few small sections around the face and gently loosen the bun.
The goal is a soft shape rather than perfect symmetry. This makes the hairstyle easier to recreate at home.
If your hair is very straight, add loose curls before creating the bun. The extra texture helps the pins grip the hair and gives the finished style more body.
You can decorate the bun with small pearl pins, tiny flowers, or a simple metallic clip. Choose one detail rather than filling the whole bun with accessories.
This look works particularly well for formal weddings because it keeps the neckline visible. It pairs nicely with halter dresses, statement earrings, and dresses with detailed backs.
For a low-cost DIY version, practice the bun once before the wedding day. Take a few photos from the front and side so you can adjust the shape. A few minutes of practice can make the actual styling session much easier.
5. Easy Side Braid With Loose Waves
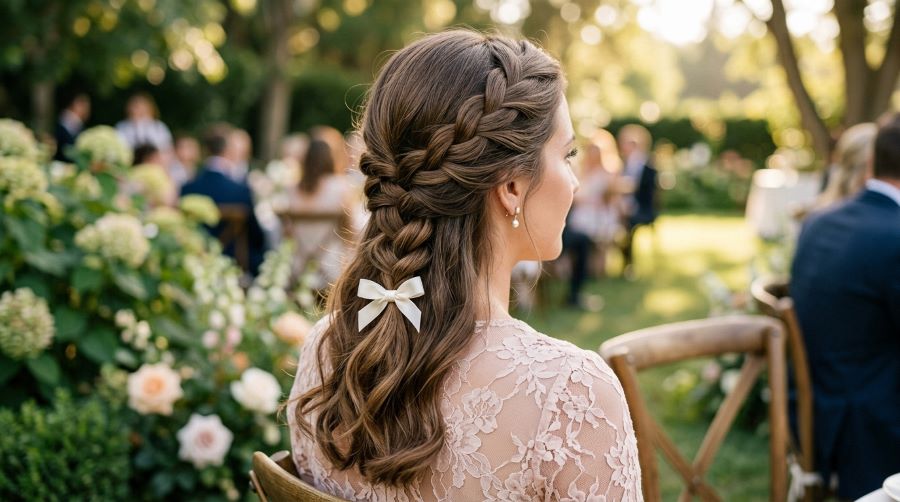
A side braid gives loose hair a little structure without making the style feel formal. Sweep your hair over one shoulder and create a simple three-strand braid near the side of your head. Secure it with a small elastic and gently loosen the braid.
Leave the remaining hair in soft waves for a relaxed wedding guest look. You can also braid only the front section and pin it behind your ear.
This hairstyle is useful when you want something that stays controlled but still looks effortless. It suits outdoor weddings, rustic venues, and daytime celebrations especially well.
A small ribbon tied around the braid can replace a decorative hairpiece. Choose a shade that works with your dress or shoes.
For shorter hair, create a smaller side braid and secure it with discreet bobby pins. If your hair slips easily, add a little dry texture spray before braiding.
The style also works with naturally curly hair. Instead of straightening first, use your existing texture and braid one side. This saves styling time and lets your natural pattern become part of the finished look.
6. Chic High Ponytail
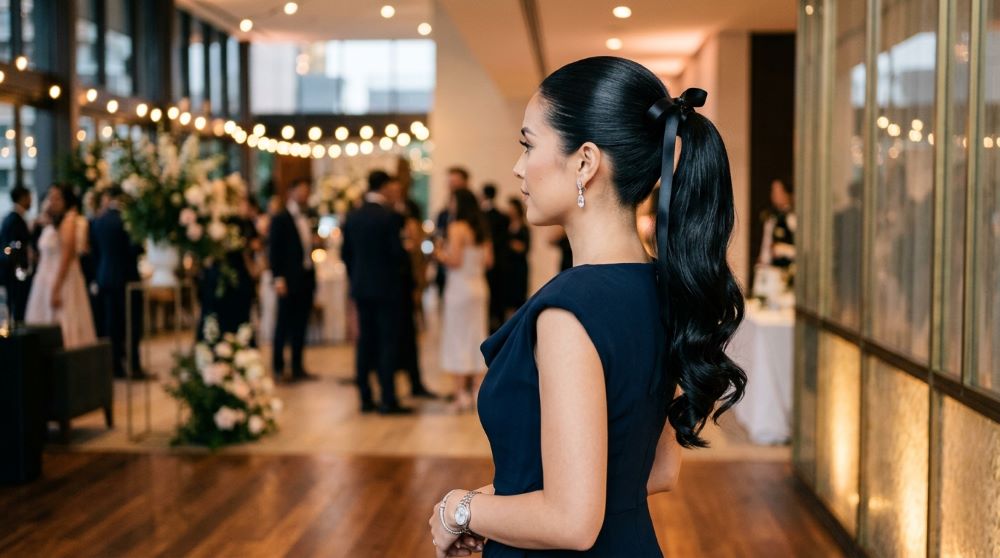
A high ponytail creates a clean, youthful look while leaving plenty of room for statement earrings. Brush the hair upward and secure it near the crown. Smooth the sides with a small amount of styling cream.
For a softer finish, curl the ponytail ends into large waves. This gives the style movement without making it look overly formal.
Wrap a thin section of hair around the elastic to hide it. Secure that piece underneath with a bobby pin.
If you want extra volume, gently tease the ponytail near the base. Avoid overworking the hair because a smooth surface usually looks more polished.
This style pairs nicely with one-shoulder dresses, strapless gowns, and outfits with interesting necklines. It can also work for black-tie weddings when paired with sleek accessories.
For an affordable option, use a satin ribbon or simple metallic elastic instead of a decorative hair cuff. The ponytail itself provides enough structure to make a basic accessory look intentional.
7. Classy French Twist
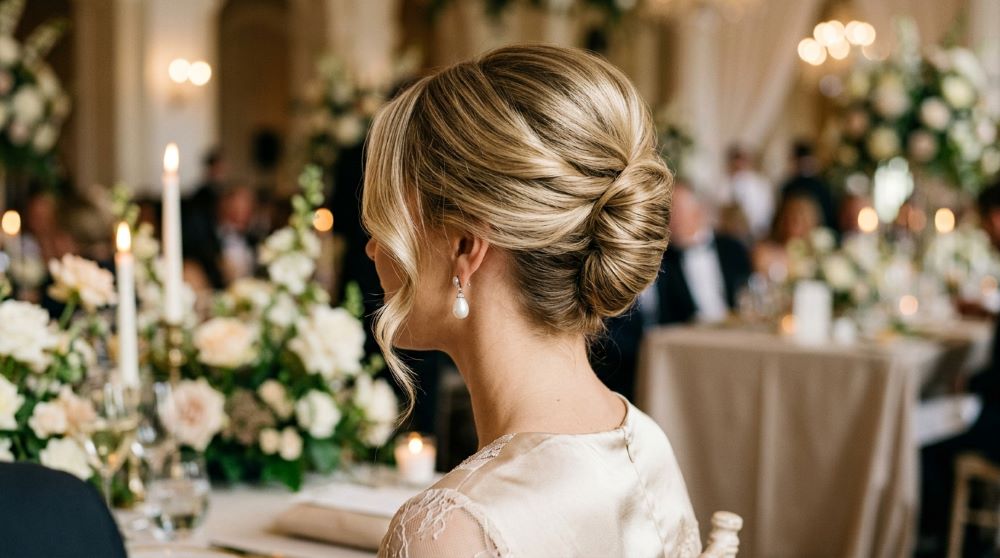
A French twist creates a refined look with surprisingly little equipment. Gather the hair toward one side at the back of your head. Twist the length upward and tuck the ends inside the roll. Secure everything with several bobby pins.
The finish can be sleek or slightly relaxed. For a softer wedding guest style, leave a few wisps around your face.
This hairstyle works particularly well with medium to long hair. If your hair is layered, use extra pins to keep shorter pieces in place.
A pearl barrette placed along the side can make the twist feel more decorative. You can also leave the style completely plain if your dress already has embellishments.
Practice the hand movement before the wedding day. Once you understand how the hair rolls inward, the process becomes much easier.
A French twist is especially useful for formal evening weddings because it keeps the hair away from your shoulders. It also works well with earrings, high necklines, and dresses featuring detailed backs.
8. Beautiful Braided Crown
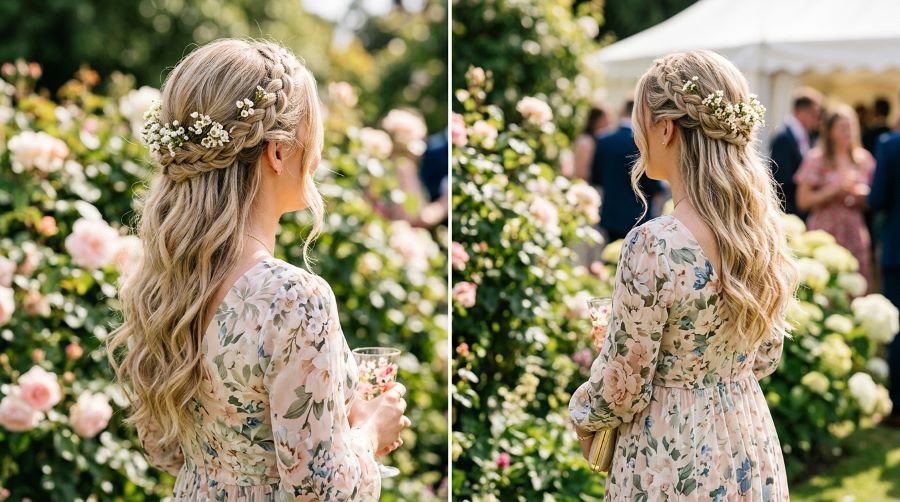
A braided crown gives long hair a romantic shape while keeping the front sections controlled. Divide the hair into two sections and create loose braids on both sides. Bring them across the back of the head and secure them with bobby pins.
Gently loosen the braids with your fingertips. This makes the style look fuller and less rigid.
Small flowers can be tucked into the braid for a garden wedding. Choose lightweight faux flowers if you want a budget-friendly option that will not wilt during the event.
The remaining hair can stay wavy or slightly curled. You can also create a low bun beneath the braided section for a more formal result.
This style works particularly well with bohemian dresses and soft floral prints. It also looks beautiful with open-back outfits because the braid creates interest from behind.
If your hair is short, create two smaller braids near the temples and connect them at the back. The same concept can work even when you do not have enough length for a full crown.
9. Elegant Low Chignon
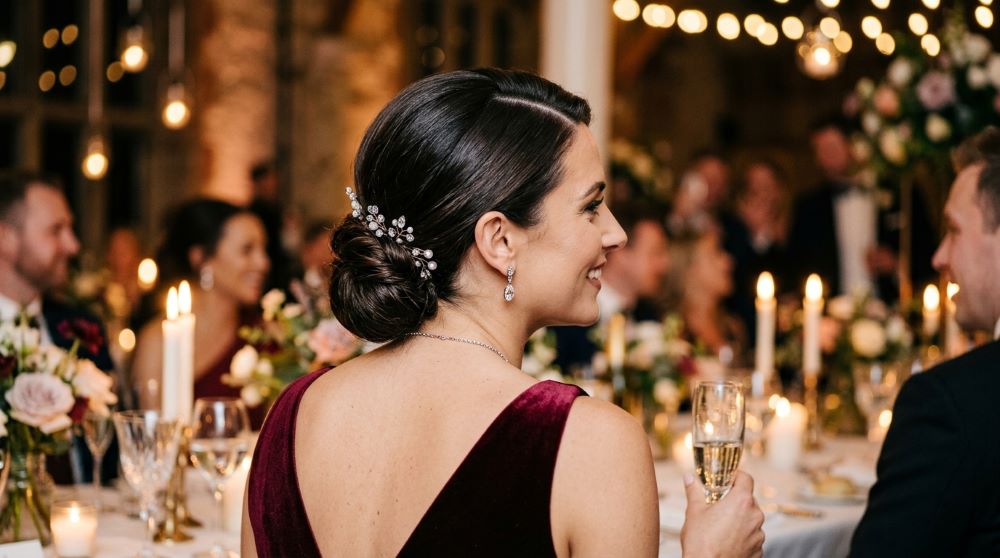
A low chignon is a practical choice for guests who want their hair completely controlled. Start with a low ponytail at the nape. Twist the ponytail and wrap it into a compact bun. Secure the shape with bobby pins.
For a smoother finish, brush the sides before creating the bun. A tiny amount of styling cream can tame flyaways.
You can keep the chignon simple or add a few crystal pins. One or two pins are enough to create a formal detail without spending much.
This style works well with long earrings because the clean shape leaves the ears and neckline visible. It also suits evening dresses and formal wedding venues.
If you have fine hair, use a small bun-forming accessory under the hair. These inexpensive pieces can make the bun look fuller.
For a relaxed version, pull out two small strands around the temples. Curl them lightly and let them fall naturally. The result feels softer while keeping the main hairstyle neat.
10. Simple Shoulder-Length Half-Up Style
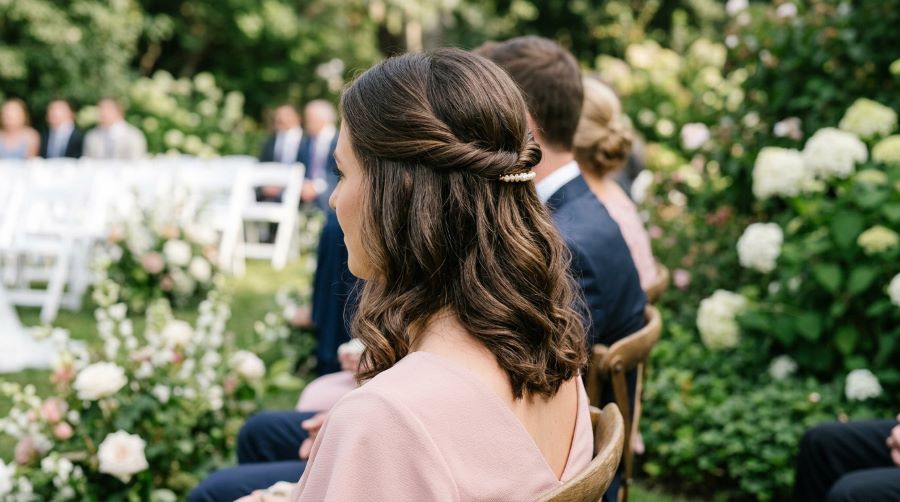
Shoulder-length hair can look beautiful in a half-up style. Curl the ends first so they have gentle movement. Take two sections from the front and twist them toward the back.
Secure them together with a small clip. A pearl or tortoiseshell clip can provide enough decoration without making the hairstyle complicated.
This look works well when you want your hair around your shoulders but still want your face to stay open. It also pairs nicely with statement earrings.
For a budget-friendly version, use a small claw clip you already own. Choose one that matches your outfit rather than buying a wedding-specific accessory.
If your hair is fine, lightly tease the crown before securing the sides. This gives the top more shape.
For naturally straight hair, keep the ends sleek instead of curling them. For naturally wavy hair, simply define your existing texture and pin back the front sections.
The style is easy to adjust during the event, which makes it useful for long wedding days that include both ceremony and reception activities.
11. Slick-Back Bun for a Modern Look
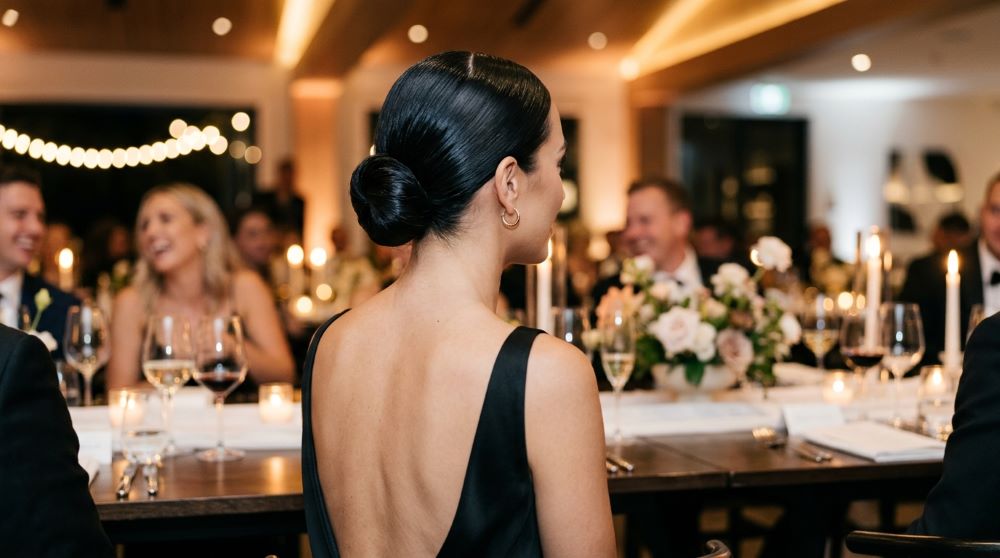
A slick-back bun creates a clean silhouette and lets your outfit take center stage. Start by creating a center part. Brush the hair tightly toward the back and secure it into a low ponytail.
Twist the ponytail into a compact bun and pin it securely. Use a small amount of styling gel or cream to smooth the surface.
This look works especially well with modern dresses, bold earrings, and simple makeup. It can also be useful when the wedding venue is warm because the hair stays completely off your neck.
For a softer version, avoid making the bun perfectly tight. Leave a little natural texture around the hairline.
You do not need expensive styling products. A small amount of affordable gel and a strong elastic can do most of the work.
If your hair is thick, divide the ponytail into two sections before wrapping it. This makes the bun easier to control.
The finished style is neat, practical, and easy to refresh if a few strands become loose during dancing.
12. Unique Fishtail Braid Ponytail
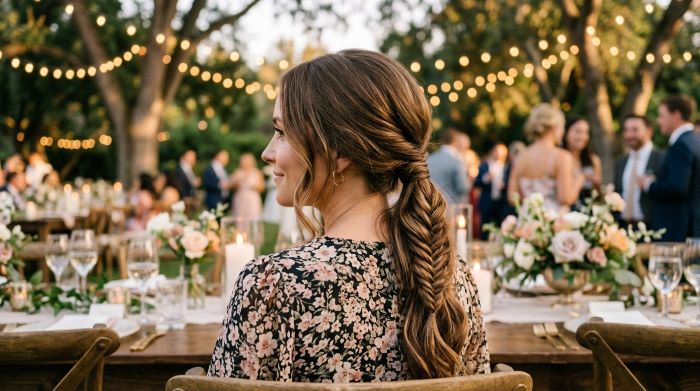
A fishtail braid adds detail to a simple ponytail. Gather your hair low at the back and secure it with an elastic. Divide the ponytail into two sections. Take a small piece from the outside of one section and cross it over to the other side.
Repeat this pattern until you reach the ends. Keep the braid loose if you want a fuller appearance.
A fishtail braid can look complicated, but it becomes easier after a few practice attempts. Watch your hand placement rather than trying to rush through the process.
For a decorative touch, tie a small satin ribbon around the end. You can choose a color that matches your dress.
This hairstyle works well for outdoor weddings because the braid keeps much of the hair contained. It also suits long hair particularly well.
If your hair is medium length, create the braid only through the lower half of the ponytail. The shorter length can still create a pretty textured effect without requiring a long braid.
13. Romantic Curls With Curtain Bangs
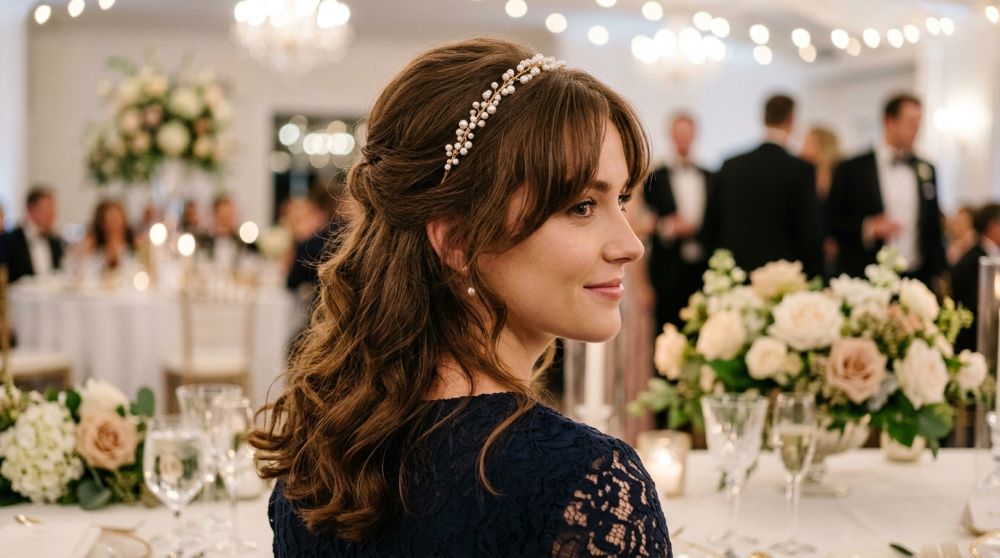
Curtain bangs can work beautifully with loose curls because the shorter pieces naturally frame the face. Start by creating large curls through the lengths. Then style the bangs away from the face with a round brush or curling tool.
Keep the bangs soft rather than heavily sprayed. They should move naturally when you turn your head.
A pearl headband can add a wedding-ready detail, especially when the rest of the hairstyle remains simple.
This look works with both casual and formal dresses. It also photographs nicely because the face remains open while the hair provides softness around the cheeks.
If you have naturally curly hair, you can use your own texture. Apply a lightweight curl cream and shape the bangs separately.
For a low-cost accessory, try a plain satin headband instead of a jeweled one. The right color can make it look polished.
A small amount of hairspray around the bangs can help them stay in place without making them stiff.
14. Easy Short Bob With a Pearl Clip
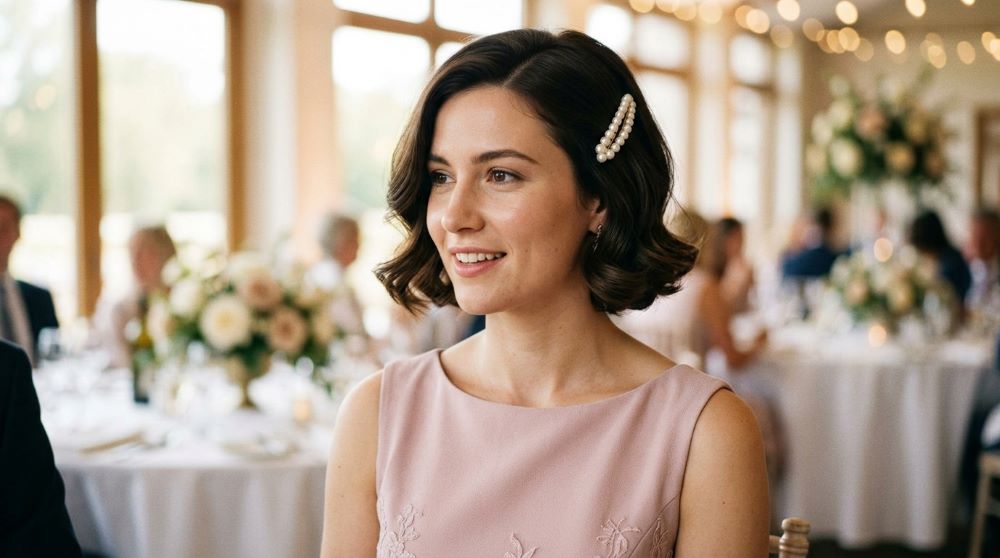
Short hair does not require an elaborate updo to look wedding-ready. For a bob, start with clean, dry hair and create a deep side part. Curl the ends slightly inward or outward depending on your preference.
Add one pearl clip above the ear on the heavier side of the part. This small detail can completely change the feel of the hairstyle.
For extra volume, lift the roots with a round brush while drying. If you already have naturally full hair, simply shape the ends with a flat iron or curling tool.
A pearl clip is an affordable accessory that can be reused for other events. Choose a simple design rather than a large statement piece if you want something practical.
This style pairs well with dresses featuring interesting necklines because the shorter length keeps the upper body visible.
For a more relaxed wedding, leave the texture slightly undone. For a formal evening event, smooth the surface and keep the ends consistent.
15. Classy Medium-Length Ponytail
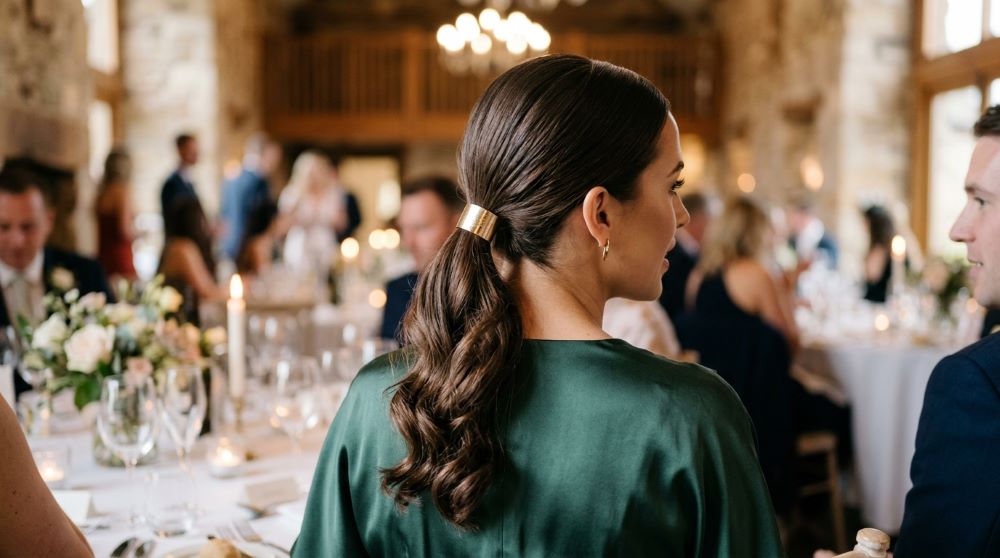
A medium-length ponytail can look elegant when the base is neat and the ends have movement. Create a center part and smooth the hair toward the back. Secure it at mid-height and wrap a small section around the elastic.
Curl the ends into loose waves. This adds softness without making the style complicated.
For a more formal finish, use a simple metallic hair cuff around the base. A basic cuff can be found at many affordable accessory shops and reused after the wedding.
If your hair is naturally straight, you can keep the ends sleek instead. Add a little shine spray for a polished finish.
This hairstyle works with dresses that have detailed shoulders or necklines because the ponytail keeps the hair controlled without fully exposing the neck.
It is also a useful option when you are styling your own hair. There are fewer sections to manage than with a full updo.
Take a few minutes to check the back with a second mirror before leaving home. A smooth base and secure elastic can make the entire hairstyle look much more finished.
16. Elegant Side-Swept Low Bun
A side-swept low bun creates a graceful shape around the face. Begin with a deep side part and sweep the front section across the forehead. Gather the remaining hair low behind one ear.
Twist the hair into a loose bun and secure it with pins. Keep the front section smooth but not completely flat.
A few gold or pearl pins can decorate the bun. You can also use one statement clip on the side for a simpler approach.
This style pairs especially well with one-shoulder dresses and asymmetrical necklines. It also works beautifully with long earrings.
If your hair is naturally curly, keep the texture rather than straightening it. Gather the curls into the bun and allow a few pieces to remain visible.
For a DIY version, practice the side sweep before the event. The most useful part to rehearse is securing the front section so it stays comfortable for several hours.
17. Easy Natural Curly High Bun
Natural curls can create plenty of texture without heat styling. Gather the curls high on the head and secure them with a soft hair tie. Shape the bun with your fingers rather than trying to make every curl perfectly uniform.
Leave a few curls around the face for softness. Add small gold pins if you want a little extra detail.
This approach can save both time and money because you are working with your natural texture. Use a styling cream or gel you already have rather than buying a new product specifically for the wedding.
If your curls are very thick, divide the hair into two sections before gathering it. This can make the bun easier to secure.
The style pairs well with floral dresses, colorful accessories, and simple jewelry. It also works for outdoor celebrations where you want the hair away from your shoulders.
Bring a few spare pins in your bag. They take almost no space and can help if a curl shifts during the reception.
18. Beautiful Straight Hair With a Flipped Ponytail
Straight hair can look special with a simple change at the ends. Create a sleek low or mid-height ponytail, then use a styling tool to gently flip the ends outward.
Keep the top smooth and clean. A small silver clip or narrow ribbon around the base can add a decorative touch.
This style works particularly well when your dress already has plenty of detail. The hair remains simple while still looking intentional.
For a budget-friendly version, use your existing flat iron to create the flipped ends. You do not need a salon blowout.
If your hair is naturally straight, the style can be completed quickly. If it tends to become frizzy, apply a small amount of smoothing cream before creating the ponytail.
This hairstyle is also comfortable for long receptions because the hair stays controlled. It suits both daytime weddings and evening celebrations.
A center part creates a modern appearance, while a side part gives the same hairstyle a softer feel. Try both before deciding which works better with your outfit.
19. Romantic Low Braid With Flowers
A low braid can create a relaxed romantic look with very little equipment. Gather the hair near the nape and create a loose three-strand braid. Keep the tension gentle so the braid looks soft.
Pull apart a few sections carefully to make the braid appear fuller. Add tiny faux flowers along one side for a garden-inspired finish.
You can purchase a small bundle of inexpensive artificial flowers and use only a few stems. Secure them with tiny bobby pins rather than buying a pre-made floral hairpiece.
This hairstyle works especially well with outdoor weddings, floral dresses, and flowing fabrics.
If your hair is shorter, create the braid from a low ponytail. The shorter length can still produce a pretty textured shape.
For naturally wavy hair, skip the curling step and work with your existing texture. This saves time and gives the braid a relaxed appearance.
Keep a few spare pins in your purse. Flowers can shift during hugs or dancing, so quick adjustments can help the style stay neat.
20. Chic Side-Parted Low Ponytail
A side part can instantly change the appearance of a basic ponytail. Create a clean part and brush the hair toward the nape. Secure the ponytail low and keep the base smooth.
Curl the ends slightly to add movement. Then wrap a small section of hair around the elastic.
A black ribbon creates a simple, polished finish and works especially well with neutral dresses. You can also use velvet ribbon for a softer evening look.
This hairstyle is affordable because it relies on items you may already have at home. A brush, elastic, curling tool, and a few pins are enough.
For fine hair, gently lift the crown before securing the ponytail. For thick hair, use a stronger elastic and secure the wrapped section underneath.
The side part works well with earrings because it creates a little more visual interest around the face.
This style can also be refreshed quickly during the wedding. If the ends lose their curl, run a styling tool through only the lower section rather than restyling the entire head.
21. Unique Half-Up Twisted Hairstyle
A twisted half-up style offers an easy alternative to a traditional pinned half-up look. Take a small section from one side and twist it backward. Repeat on the other side and connect both sections at the back.
Secure the twists with a small clip or bobby pins. Keep the rest of the hair loose and wavy.
A tortoiseshell clip can create a stylish detail without looking overly formal. Pearl clips work well if you want a more traditional wedding appearance.
This style is especially useful for long or medium-length hair. It keeps the front sections away from your face while allowing the rest of the hair to move naturally.
For naturally curly hair, twist the front sections without brushing out the curls. The texture will help create a fuller appearance.
You can also add a small amount of dry shampoo at the roots if your hair feels too soft to hold the twists. This creates a little grip without requiring professional products.
22. Classy French Braid Ponytail
A French braid can keep the front and crown controlled while allowing the lower hair to remain relaxed. Start near the crown and braid downward, gradually adding small sections from each side.
Stop around the middle of the head and secure the braid with an elastic. Gather the remaining hair into a low ponytail.
The result combines the structure of a braid with the simplicity of a ponytail. It is a useful option for outdoor weddings or long celebrations.
If you are new to French braiding, practice with slightly damp hair first. The extra grip can make the sections easier to manage.
A satin ribbon tied around the ponytail can add color. Choose one that coordinates with your shoes, bag, or dress.
For shorter hair, stop the braid earlier and pin the remaining pieces at the back. The same concept can work without creating a full ponytail.
23. Elegant Braided Low Bun
A braided low bun combines two simple techniques into one polished hairstyle. Start with a low ponytail and divide it into three sections. Braid the length, then wrap the braid around its base to form a bun.
Secure it with several bobby pins. Gently loosen the braid before wrapping it if you want a fuller appearance.
Pearl pins can be added around the bun for a traditional wedding detail. You can also leave it plain if your dress has embellishments.
This hairstyle works well for long hair because the braid provides structure. It can also help keep thick hair contained during a long event.
For a DIY version, practice wrapping the braid once before the wedding. Check that the pins are hidden and that the bun feels comfortable.
A small amount of hairspray can keep shorter pieces in place. Avoid using too much because the braid looks prettiest when its texture remains visible.
24. Easy Beachy Waves
Beachy waves can suit relaxed weddings without looking too casual. Create loose curls with a larger barrel, leaving the very ends slightly straighter. Once the hair cools, separate the curls with your fingers.
Add a small gold clip above one ear if you want a decorative detail. Keep the accessory simple so the waves remain the main feature.
This hairstyle works well for beach weddings, destination celebrations, and outdoor venues. It also suits flowy dresses and lighter fabrics.
If your hair naturally has a wave pattern, use it instead of applying heat. Apply a small amount of styling cream to damp hair, scrunch, and allow it to dry.
For a budget-friendly approach, try overnight braids on slightly damp hair. Undo them in the morning and gently separate the waves with your fingers.
A small amount of hairspray can help the shape last through the event. Carrying a travel-size product can make touch-ups easy if the weather is humid.
25. Sophisticated Voluminous Low Ponytail
A voluminous low ponytail gives a simple hairstyle a more formal appearance. Start by adding gentle curls throughout the hair. Let them cool, then lightly loosen them with your fingers.
Create a soft side or center part and gather the hair low at the back. Keep the crown slightly lifted rather than completely flat.
Wrap a small piece of hair around the elastic. Add crystal earrings or a small metallic clip if your outfit allows it.
For fine hair, tease the crown gently before making the ponytail. You can also use an inexpensive clip-in ponytail piece if you want additional length or fullness.
For naturally thick hair, focus on smoothing the surface rather than adding volume.
This hairstyle works particularly well for evening receptions, formal dresses, and ballroom venues. It offers the elegance of an updo while keeping the hair down.
Before leaving home, check the ponytail from several angles. Make sure the elastic is hidden and that the crown has an even shape.
26. Beautiful Soft Bun With Face-Framing Tendrils
A soft bun with face-framing tendrils creates a relaxed formal hairstyle. Gather the hair low and twist it into a loose bun. Secure it with bobby pins, then gently pull out two small pieces around the face.
Curl those pieces away from the cheeks. Keep the curls loose so they blend naturally with the bun.
Small floral pins can add a romantic detail. You can make the accessory yourself by purchasing tiny faux flowers and attaching them to plain bobby pins.
This style works well with dresses that have open shoulders or delicate straps. It also pairs nicely with drop earrings.
If your hair is short, create a smaller bun at the nape and use pins to control shorter layers. If your hair is long, twist the length in sections before securing it.
Practice the bun once before the event so you know how much hair to leave around the face. A little preparation can save time when you are getting ready with friends or family.
27. Modern Sleek Straight Hair
Straight hair can make a strong statement when it is polished and simple. Create a precise center part and smooth the hair with a flat iron if needed. Tuck both sides behind the ears.
Add one minimalist silver barrette above the ear for a subtle wedding detail.
This hairstyle works especially well with modern dresses, tailored outfits, and simple jewelry. It allows your clothing to remain the main focus while giving your hair a finished appearance.
For a budget-friendly routine, use the tools and products you already own. A flat iron and small amount of smoothing cream can be enough.
If your hair is naturally straight, avoid adding unnecessary curls. The clean texture is part of the style.
For humid outdoor weddings, keep a small comb and smoothing product in your bag. A quick touch-up around the part can restore the polished shape after several hours.
28. Romantic Loose Side Braid
A loose side braid is easy to create and works beautifully with naturally wavy hair. Sweep the hair over one shoulder and create a simple braid. Keep the sections relaxed instead of pulling them tightly.
Once the braid is complete, gently loosen a few pieces for a fuller appearance. Leave a couple of strands around the face.
Pearl pins can be tucked into the braid for a wedding-ready touch. You can also use tiny ribbons if you prefer something more colorful.
This hairstyle suits garden weddings, rustic venues, and relaxed receptions. It also works well with long floral dresses and soft fabrics.
If your hair is fine, add a little texture spray before braiding. If your hair is thick, divide it into manageable sections before starting.
The style is easy to repair during the event. Simply re-braid the lower section if it becomes loose after dancing or outdoor activities.
Conclusion
The right wedding guest hairstyle does not have to require a salon appointment or an expensive collection of products. A simple ponytail, soft waves, braided bun, polished updo, or half-up style can look beautiful with the right finishing details. Choose a hairstyle that matches your hair length, outfit, wedding setting, and comfort level. Practice it once before the event, prepare a few spare pins, and keep your accessories simple. With these Wedding Guest Hair Ideas, you can create a polished look that feels comfortable from the ceremony through the final dance.

Emma is the author and creative voice behind TheFashionary, sharing inspiring ideas on bridal fashion, wedding dresses, hairstyles, and timeless style. She loves discovering beautiful fashion trends and helping readers find inspiration for their special moments.