12 Wedding Signs, Stationery & Details Worth Copying for Your Big Day
Wedding signs and stationery do more than tell guests where to sit. They set the tone before anyone even reaches the dance floor. From the welcome sign at the entrance to the tiny place cards on each table, these small details shape how people feel the moment they arrive. If you’re planning a wedding and want guest-favorite touches without the designer price tag, this list rounds up signs, paper goods, and tabletop details worth recreating. Each idea comes with practical, low-cost ways to bring it to life, whether you’re hiring a calligrapher or grabbing a paintbrush yourself.
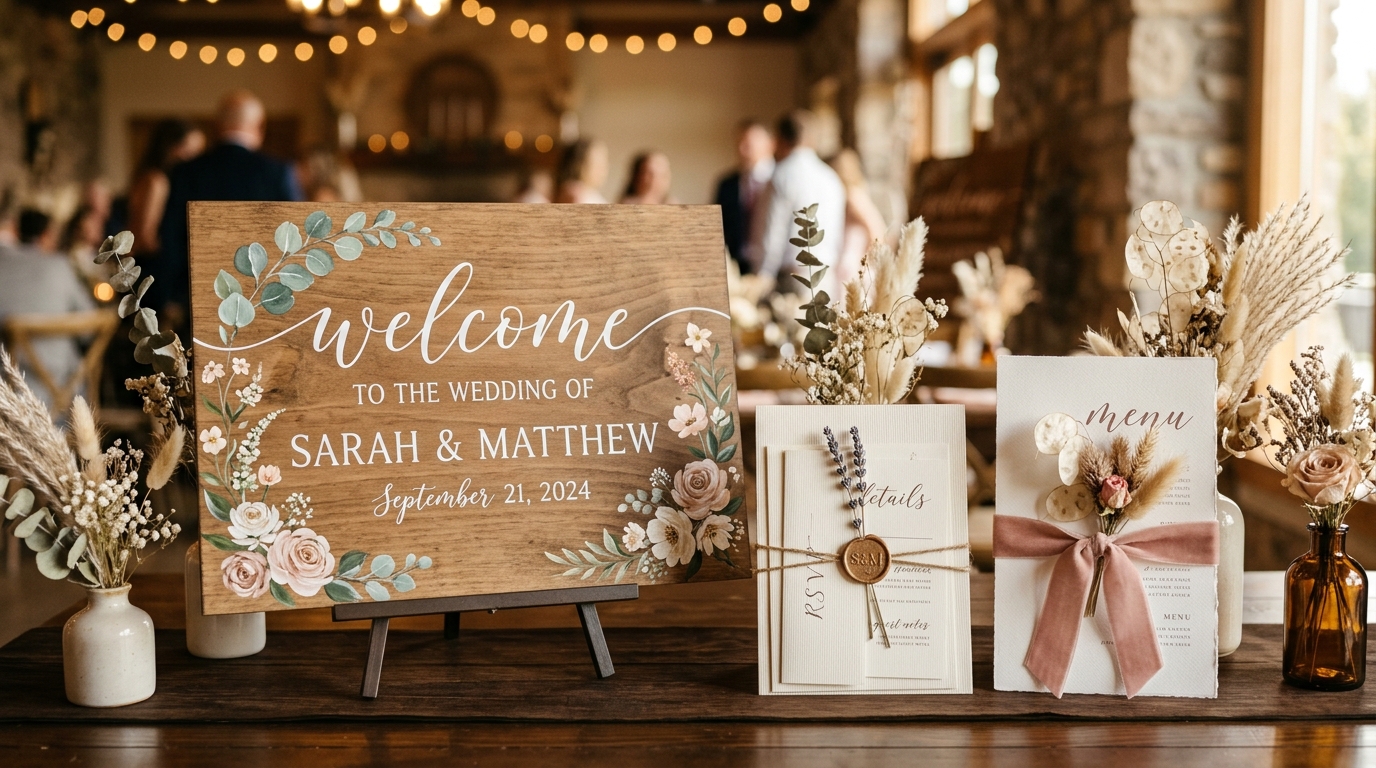
Wooden Welcome Sign at the Entrance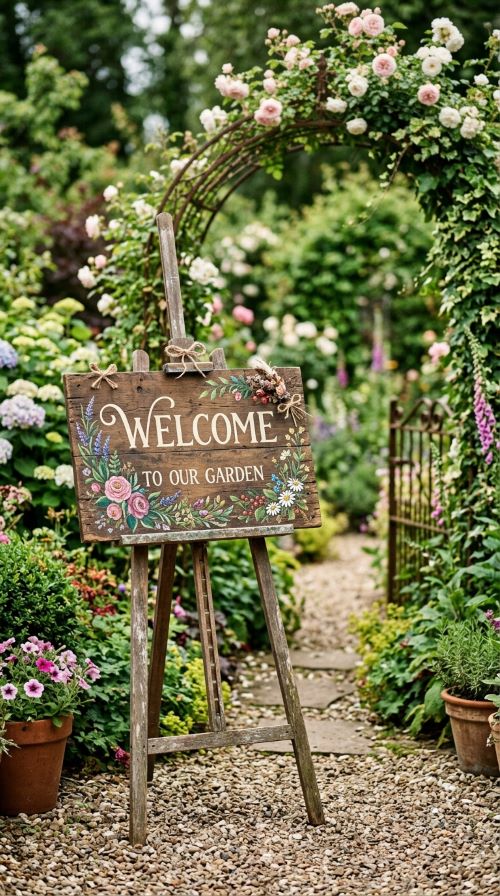
A welcome sign greets guests before they even find their seats. It sets expectations for the whole day. Keep wording short: names, date, and a warm phrase like “we’re so glad you’re here.”
Budget tip: Skip custom shops. Buy an unfinished wood board from a craft store and paint it yourself with acrylic paint pens. Stencils make lettering easy even for beginners.
Pair the sign with a simple easel you can reuse later as home decor. Thrift stores often carry vintage easels for a few dollars.
If painting feels intimidating, print your design on cardstock and frame it instead. A frame from a discount store looks just as polished from a few feet away.
Keep the color palette tied to your wedding theme so the sign blends naturally with your other details instead of standing apart.
This is one of the simplest details to DIY, and guests almost always stop to take a photo with it.
Hand-Lettered Seating Chart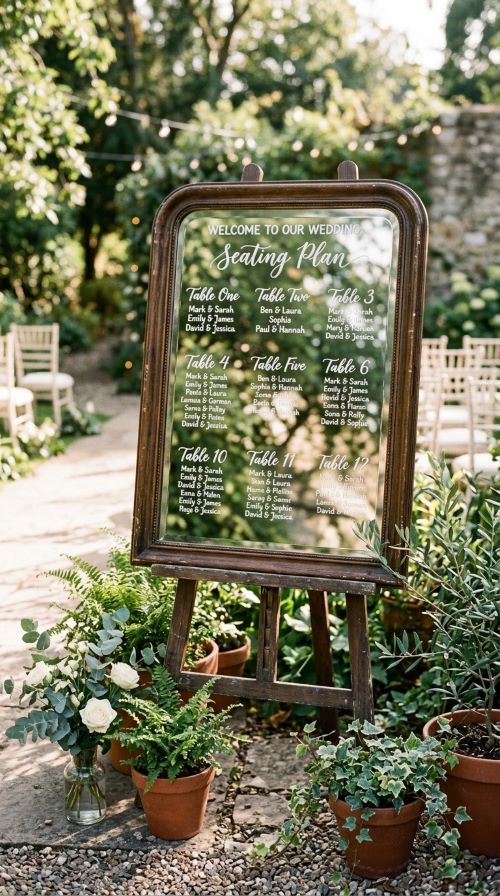
A seating chart saves guests from wandering around confused. It also doubles as a decor piece if you make it pretty.
Budget tip: Use a mirror or glass pane from a thrift store. Write names with a chalk marker, which wipes off cleanly if you need to fix a typo.
If lettering isn’t your strength, print names on paper strips and glue them onto a poster board in neat rows. Simple and tidy still looks intentional.
Group names by table number, and keep the font size consistent so it’s easy to scan from a few feet away.
Add a small floral arrangement at the base of the stand to soften the look without buying anything extra. Use leftover greenery from your other arrangements.
A seating chart doesn’t need to be fancy. It just needs to be readable and placed somewhere obvious near the entrance.
Printed Menu Cards on Each Place Setting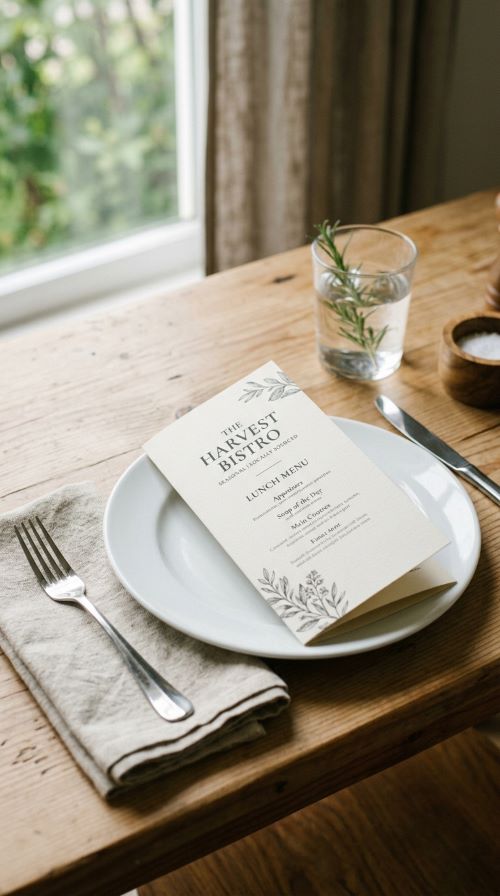
Menu cards give guests something to look forward to and help servers move faster. They also add a refined touch to the table without much cost.
Budget tip: Design your own menu using a free online tool, then print at home or at a local print shop. Cardstock paper keeps costs low while still feeling sturdy.
Stick to one font for the menu title and a simpler font for the dish list. This keeps things easy to read at a glance.
If you want texture, tear the edges of the paper slightly for a relaxed, handmade feel. It costs nothing and adds personality.
Tie a small piece of twine or ribbon around the card for a finished look. Reuse leftover ribbon from other decor pieces.
Even a basic black-and-white menu card looks intentional when placed neatly atop a plate or folded napkin.
Calligraphy Place Cards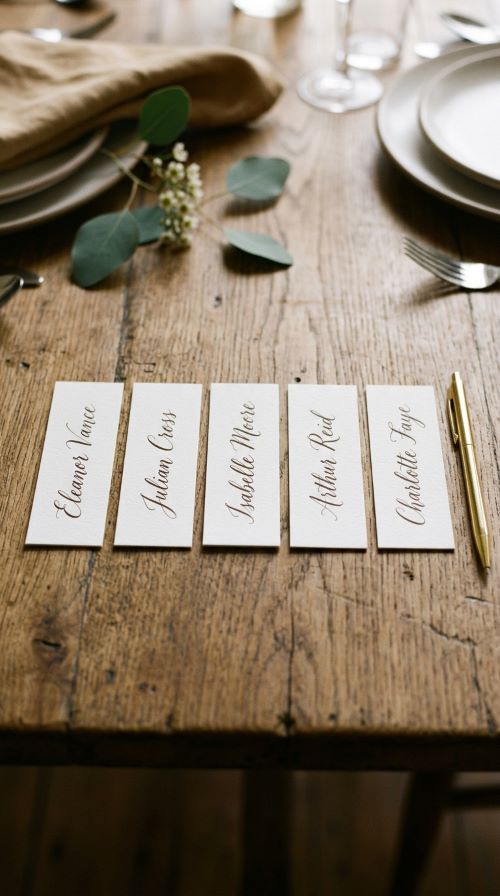
Place cards help guests find their seats fast. A little calligraphy makes them feel personal.
Budget tip: Practice basic brush lettering using a workbook or free online tutorials. You don’t need fancy ink, just a brush pen and blank cardstock cut into small rectangles.
If handwriting isn’t your thing, use a printer with a script font instead. Choose a clean, easy-to-read style so guests aren’t squinting at their own names.
Keep the cards small and simple. A flat rectangle works fine, no folding required.
Add a tiny pressed flower or leaf next to the name for texture. Pressed flowers are easy to make weeks ahead with a heavy book.
Place cards are one of the cheapest DIY projects on this list, and they make every seat feel thought out.
Acrylic Table Number Signs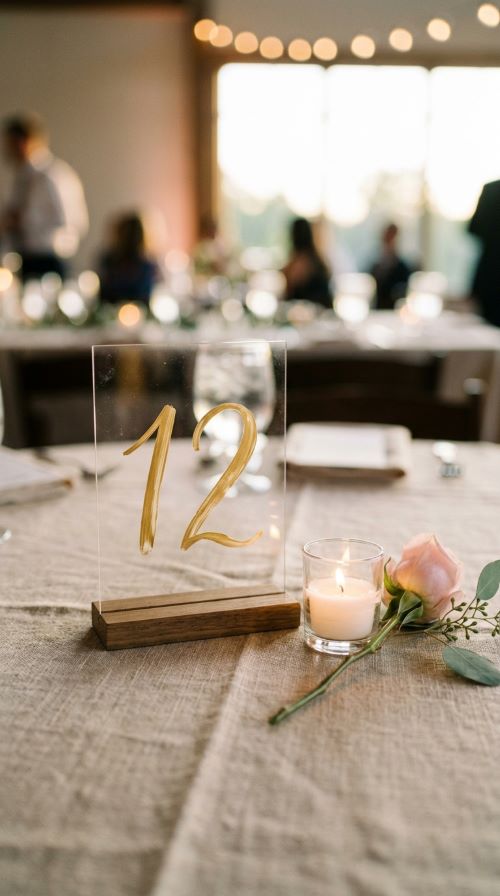
Acrylic signs look clean and modern without needing frames or stands. They’re also reusable for future events.
Budget tip: Buy blank acrylic sheets online in bulk. Use vinyl number stickers or paint pens to add the numbers yourself.
Keep the numbers centered and large enough to read from across the table. A simple serif or sans-serif font works best.
Prop the sign against a small stand, a vase, or even a stack of books wrapped in fabric. You don’t need a special holder.
If acrylic feels out of budget, cut numbers from cardstock and glue them onto a small wooden block instead. It gives a similar clean look for less.
These signs photograph well because they reflect candlelight, adding a soft glow to your reception photos.
Floral-Adorned Ceremony Welcome Sign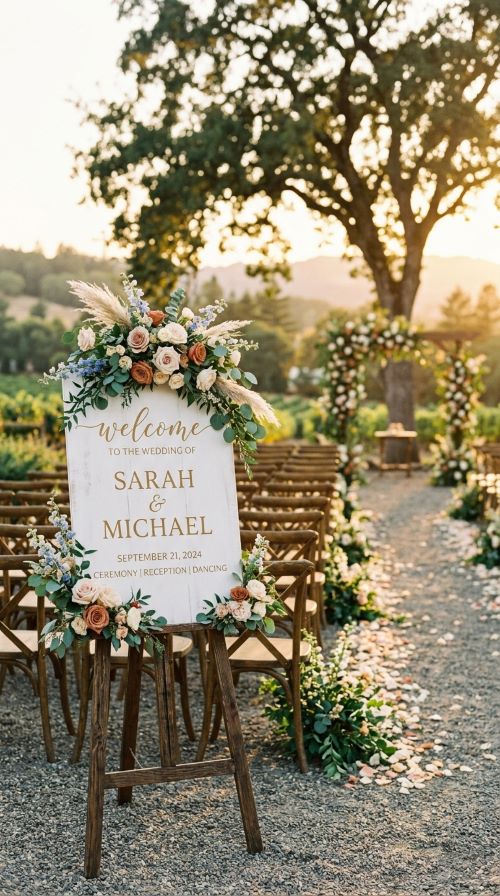
A ceremony sign greets guests right as they take their seats outdoors or indoors. Adding flowers makes it feel like part of the decor, not an afterthought.
Budget tip: Use leftover flowers from your bouquet order or ask your florist for extra stems at a discount. Attach them with floral wire or tape directly to the sign’s corner.
Keep the wording minimal, just your names and the date, so the flowers stay the focus.
If fresh flowers aren’t in the budget, faux greenery from a craft store looks similar in photos and lasts long after the wedding.
Place the sign where guests naturally walk past, like the ceremony entrance or aisle start, so it gets seen without extra effort.
This detail blends decor and signage into one piece, saving you from buying separate items.
Vintage Typewriter Guestbook Sign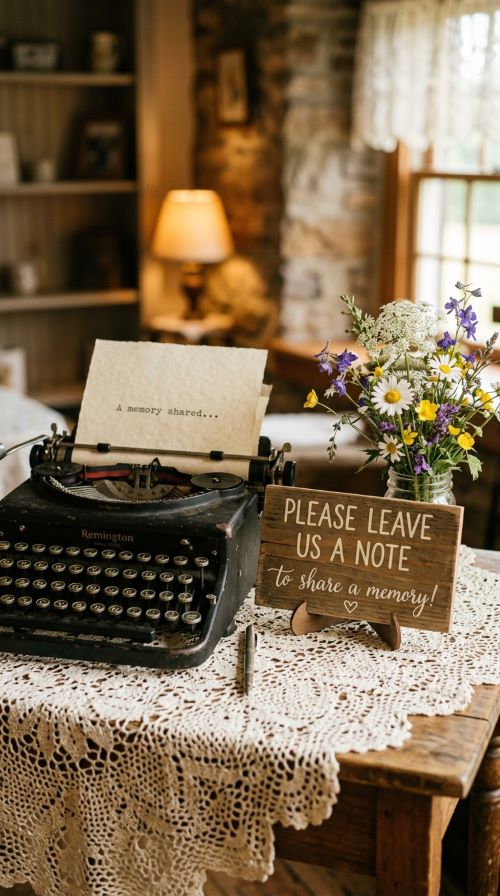
A typewriter guestbook gives guests something fun to interact with instead of just signing their name.
Budget tip: Rent or borrow a vintage typewriter rather than buying one. Many resale shops or rental companies offer them for a flat day rate.
Pair it with a small sign explaining what to do: type a note, then drop it in a box or envelope. Keep instructions short and friendly.
If a typewriter isn’t available, set out blank postcards and pens instead. Guests can write notes the same way, just without the clatter of keys.
Add a small basket or jar nearby to collect the finished notes so they don’t get scattered around the table.
This detail becomes a keepsake you’ll actually read again, unlike a guestbook that often sits unopened.
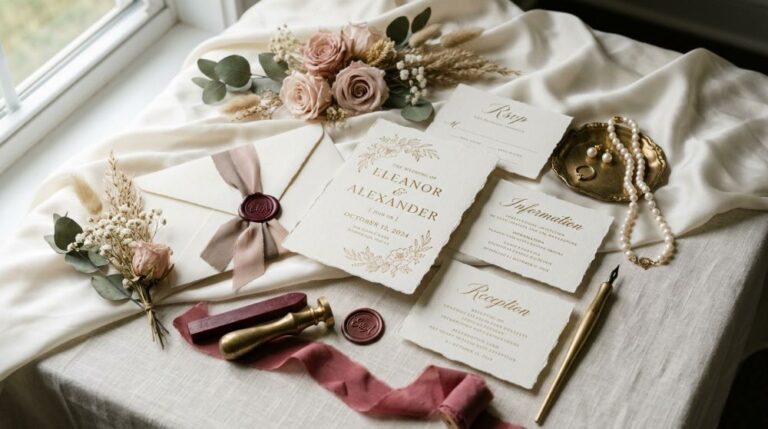
Ribbon-Wrapped Invitation Suite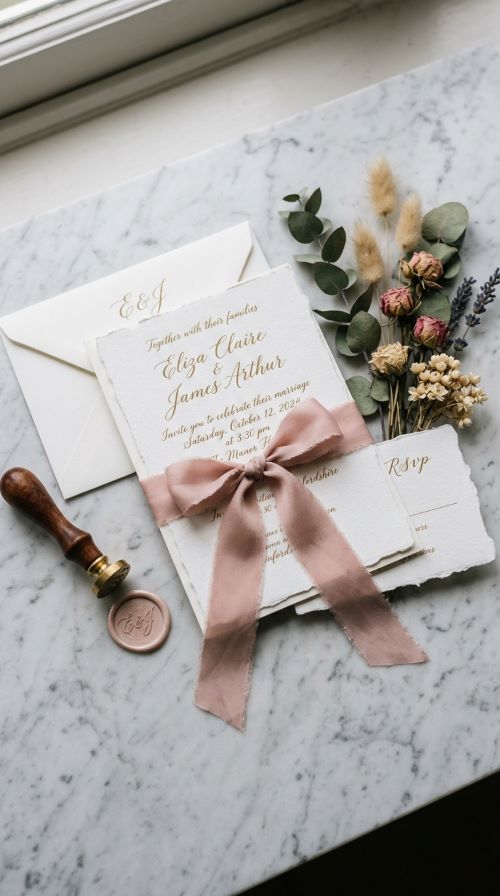
Your invitation suite is the first physical thing guests touch. A ribbon wrap makes it feel like a small gift.
Budget tip: Print invitations at home or through an affordable online printer, then add ribbon yourself. Thin silk-style ribbon from a craft store costs very little per yard.
Stack the invite, RSVP card, and details card together, then wrap once and tie a simple bow. No need for elaborate knots.
If you want extra texture, add a sprig of dried lavender or baby’s breath under the ribbon. It dries well and holds its shape for weeks.
Keep the paper colors consistent across all pieces so the stack looks cohesive once wrapped.
This small touch makes a basic printed invite feel noticeably more finished, for just a few extra cents per envelope.
Wax Seal Envelopes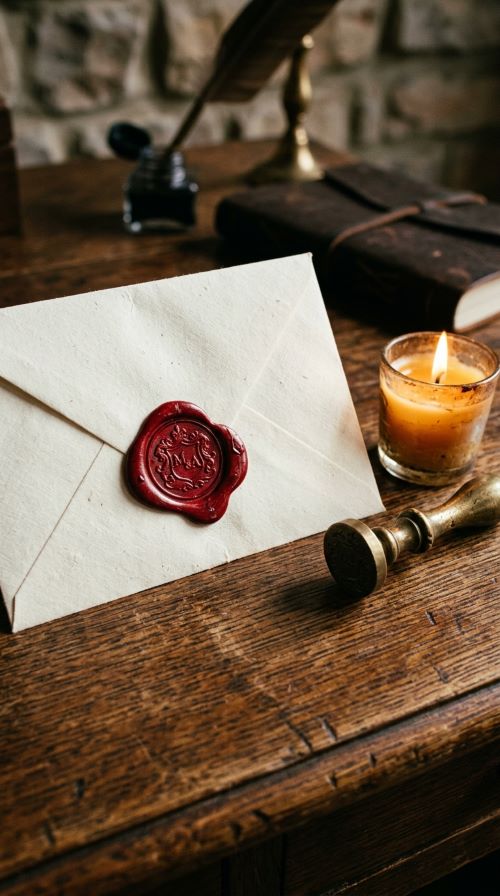
Wax seals turn a plain envelope into something guests want to keep. They’re easier to make than they look.
Budget tip: Buy a wax seal kit online, which usually includes the stamp, wax sticks, and a small spoon for melting. Kits are often less than a fancy dinner out.
Practice on scrap paper first. The wax melts fast, so work in small batches to avoid mess.
Choose a seal color that matches your invitation palette, like a deep green or soft gold, for a cohesive look.
If melting wax feels tricky, use peel-and-stick wax seal stickers instead. They look nearly identical in photos and take seconds to apply.
This detail adds a tactile, old-world feel to your invites without much added cost or time.
Hand-Painted Watercolor Save-the-Dates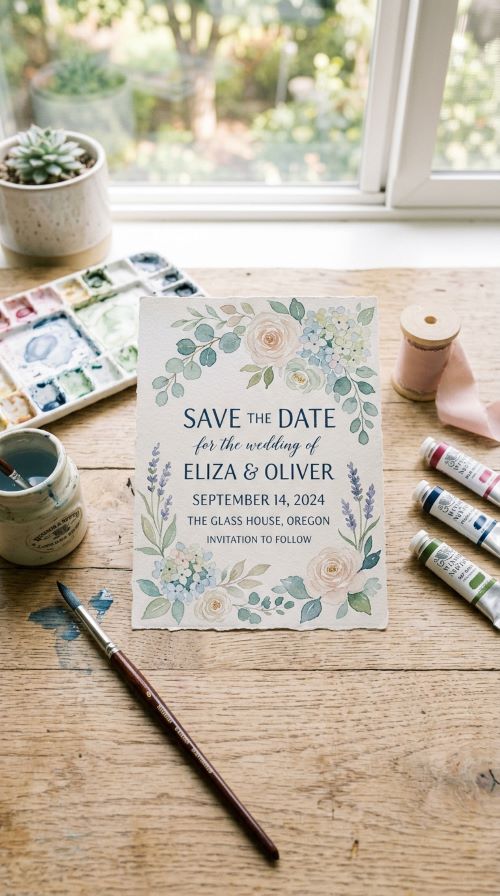
Watercolor save-the-dates feel personal and artistic, even if you’re not a trained painter.
Budget tip: Buy a basic watercolor set and practice simple shapes like loose flowers or leaves. You don’t need realistic detail, just soft color and movement.
Paint one design, then scan or photograph it to print as many copies as you need. This way you only paint once.
Add your names and date in a simple handwritten or printed font below the artwork.
If painting feels out of reach, search for free watercolor clip art online and layer it digitally instead. Many design tools offer free floral elements.
This approach gives you a custom, artistic save-the-date without paying a designer’s rate for original artwork.
Chalkboard Bar Menu Sign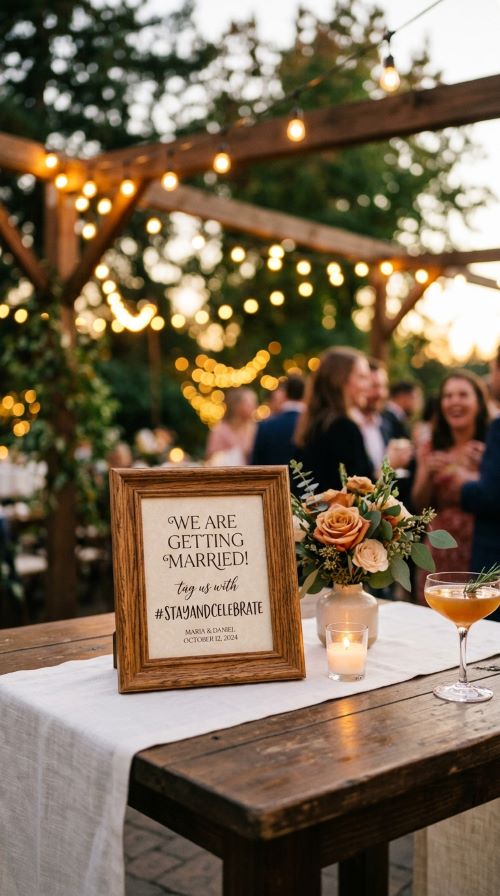
A bar menu sign helps guests know what’s on offer and speeds up the line.
Budget tip: Buy a small chalkboard from a discount store and write the menu yourself with a chalk marker for cleaner lines than regular chalk.
List your signature cocktails by name, plus basic options like wine, beer, and water. Keep it short so it’s easy to read quickly.
If your handwriting feels uneven, trace letters lightly in pencil first, then go over them with chalk.
Add a small drawing, like a simple lemon slice or olive, for character without much effort.
Prop the sign against a drink dispenser or cart so guests see it right as they approach the bar.
Custom Wedding Hashtag Sign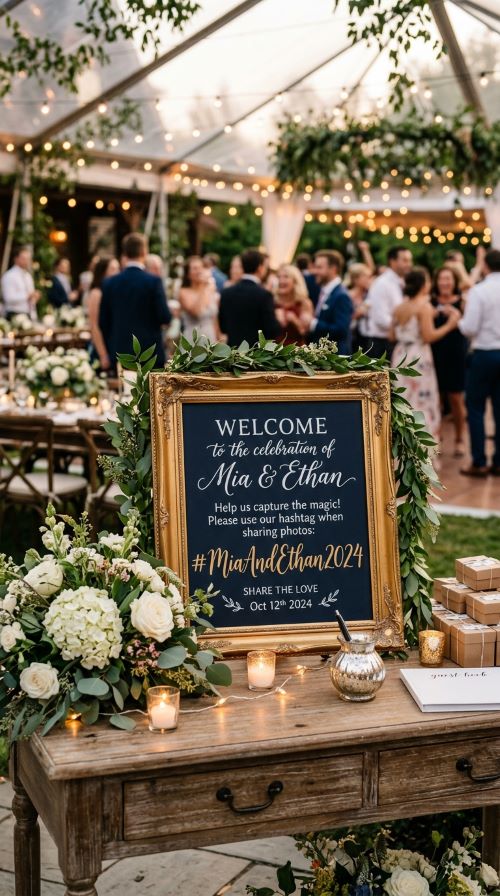
A hashtag sign helps you collect photos from every guest’s phone in one place.
Budget tip: Pick a short, easy-to-spell hashtag using your names or a fun pun. Print it on plain cardstock and slide it into an inexpensive frame.
Place the sign somewhere guests naturally gather, like near the bar or photo booth, so they remember to use it.
If you want it to stand out, add a small icon like a camera or heart next to the text using a stamp or sticker.
Skip costly framing services. A basic frame from a discount store works just as well once the sign is inside.
This detail costs almost nothing but helps you gather memories you might otherwise miss
Conclusion
Small paper details and handmade signs carry more weight than their size suggests. They guide guests, tell your story, and turn ordinary tables into something memorable, often for just a few dollars per piece. You don’t need a professional stationer or a big budget to pull off any of these ideas. A craft store, some patience, and a free afternoon are usually enough. Pick a handful that match your style, start early, and let these small details do the heavy lifting on your big day.