16 Wedding Photography Poses That Look Absolutely Stunning
Wedding photography turns a single day into a lifetime of memories, and the right poses make all the difference. Whether you’re a couple planning your big day or a photographer building a portfolio, knowing which shots truly work can save time, money, and stress. This list breaks down 24 poses that photograph beautifully, along with simple, budget-friendly ways to pull them off. No fancy gear required. No hired stylist needed. Just practical ideas you can use on any budget, at any venue, with any camera. Let’s get into the poses that make wedding albums unforgettable.
The First Look Moment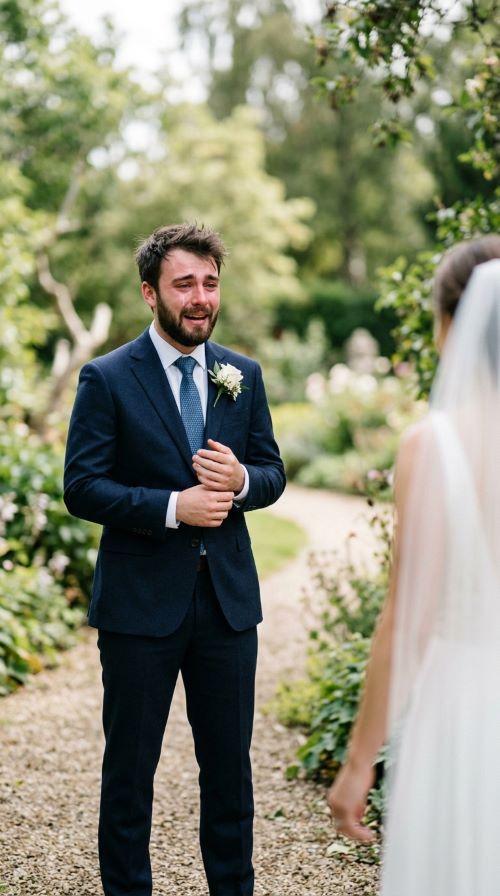
The first look is one of the most emotional shots you can capture. It happens before the ceremony, when the couple sees each other in private. This gives real, raw reactions instead of stiff smiles. You don’t need a big production for this. A quiet corner of the venue works fine. Ask a friend to stand at a distance with a smartphone if you can’t afford a second photographer. Natural light near a window or doorway gives the softest results. Keep the couple close together, facing each other, hands held. Let the moment happen without posing too much. The best shots come from genuine surprise, not direction. If you’re on a tight budget, skip the professional lighting kit. Early morning or late afternoon sun does the job for free. This pose works for any wedding size, backyard or ballroom. It also gives you private time together before the crowd arrives. Many couples say this moment feels more personal than the actual ceremony. Try it near a garden, a hallway, or even a parking lot with good light. The setting matters less than the connection between the two people in frame.
Walking Down the Aisle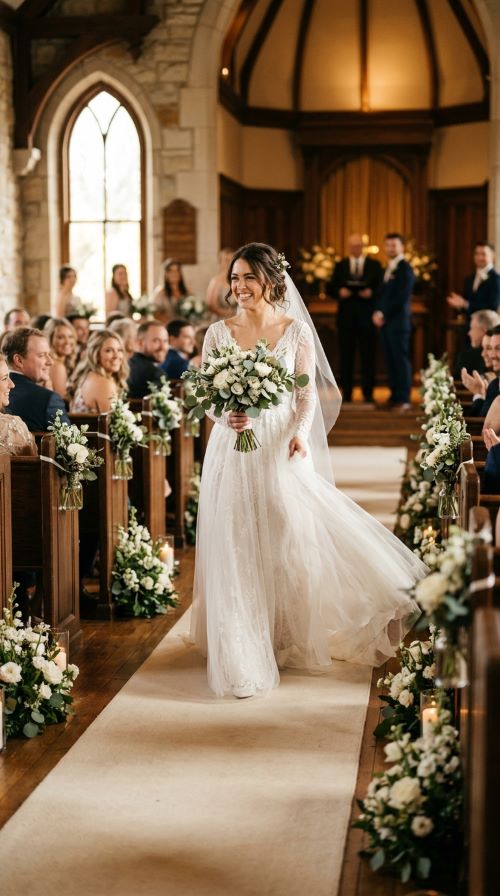
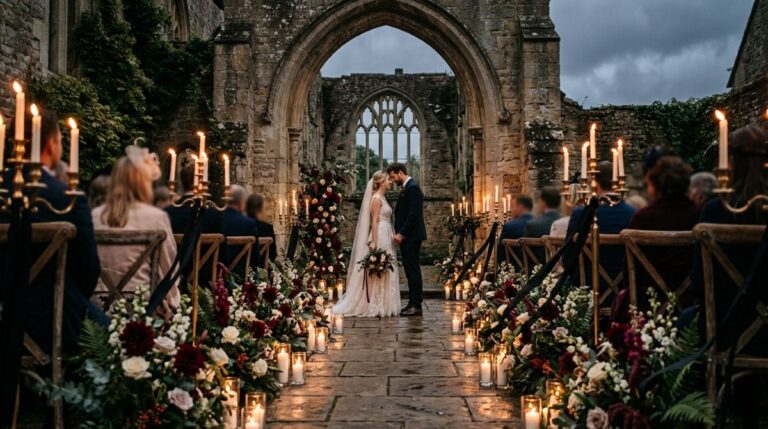
This classic pose still holds up because it captures a full range of emotion in one frame. The nerves, the joy, the tears. It’s a walk that only happens once. To get this shot right, position the camera at the end of the aisle, slightly off-center. This avoids blocking guests’ view while still framing the bride clearly. A wide-angle lens works well here, but even a phone camera with portrait mode can produce a strong result. If your venue doesn’t have a long aisle, use any straight path, a hallway, a garden walkway, or a row of chairs at home. Ask someone to snap a burst of photos rather than single shots. This way you catch the exact second of eye contact with the groom or a proud parent’s expression. Skip the expensive drone shot if budget is tight. A simple ladder or elevated chair gives a similar higher angle for free. Lighting matters more than gear here. Outdoor aisles during soft afternoon light photograph better than harsh midday sun. This pose works for religious ceremonies, courthouse weddings, and backyard setups alike.
Ring Exchange Close-Up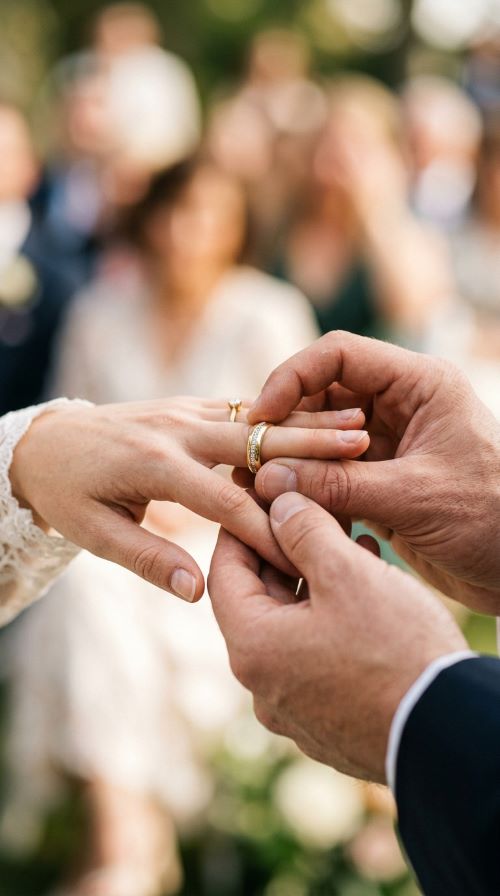
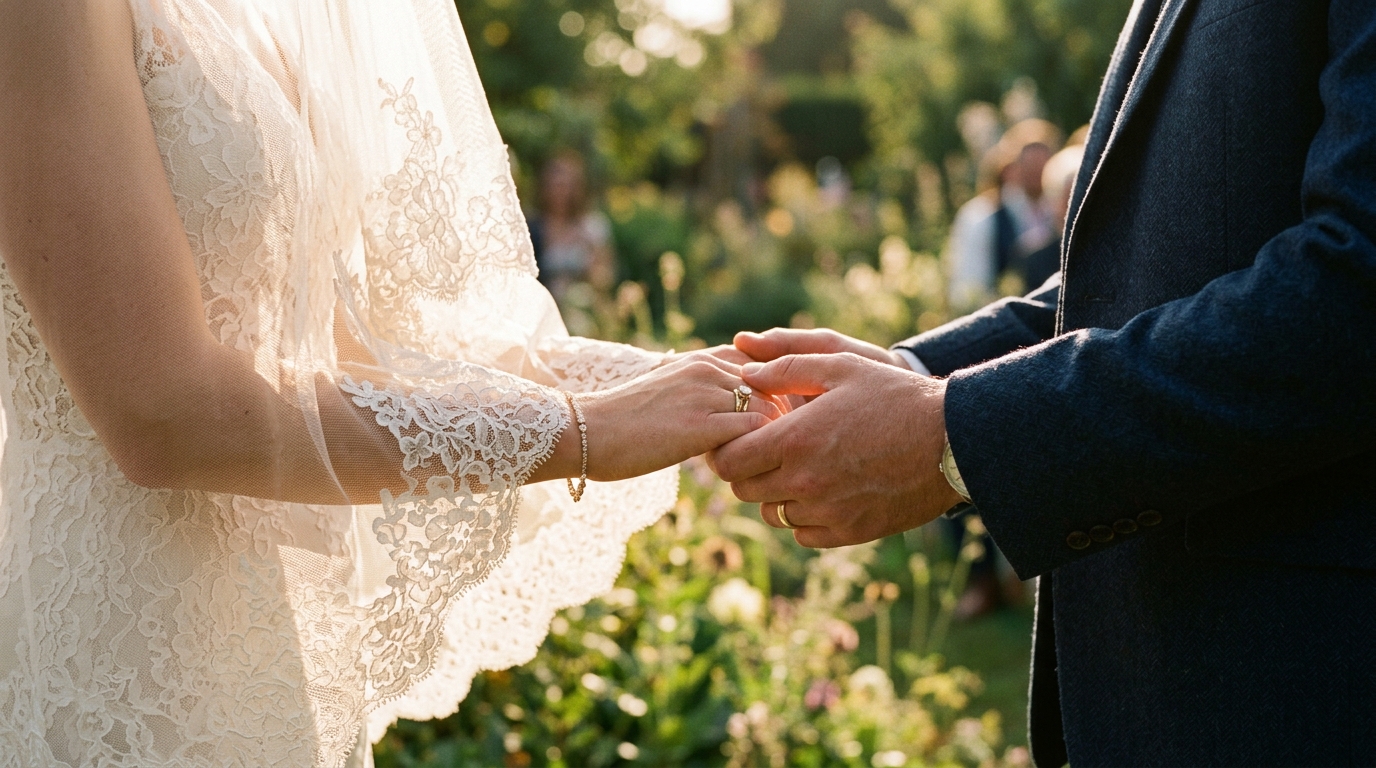
This shot zooms in on the small moment that makes everything official. Hands, rings, fingers touching. It’s simple but powerful. A macro lens gives the sharpest detail, but a regular camera lens close to the subject also works fine. Set up slightly to the side of the officiant so you don’t block the exchange. Ask the couple beforehand to slow down their hand movements for a beat. This gives you time to focus and click without missing the shot. If you don’t own a macro lens, try a smartphone with a portrait or close-up mode. Many budget phones handle this surprisingly well. Natural light from a window or open doorway adds a soft glow without needing extra equipment. Avoid using flash here since it can wash out the fine details on the rings and skin. This pose also works well as a repeat shot during the reception if the ceremony version didn’t turn out. Just ask the couple to redo the exchange privately for five seconds. Nobody will notice, and you’ll get a cleaner frame with better lighting control.
Confetti Toss Celebration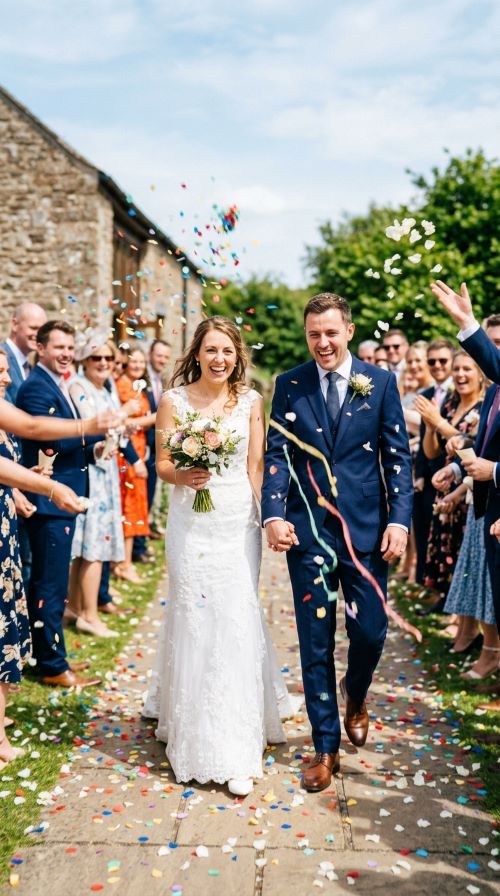
Confetti shots bring pure joy into a single frame. The motion, the color, the laughter. It’s a crowd favorite for a reason. To pull this off without spending much, buy biodegradable confetti or dried flower petals in bulk online. They cost very little and look great in photos. Line up guests on both sides of a walkway and have them toss the confetti at the same time on your signal. Use a fast shutter speed to freeze the confetti mid-air instead of blurring it into streaks. If your camera doesn’t have manual settings, sports mode or action mode on most phones works well too. Shoot from a slightly lower angle to make the confetti fill more of the frame. Natural daylight gives the brightest, most vibrant colors, so plan this shot for outdoors if possible. Practice the timing once before the real toss so guests know when to throw. This avoids a messy, scattered look. It’s a low-cost pose that photographs like a magazine cover with almost no setup required.
Silhouette Against the Sunset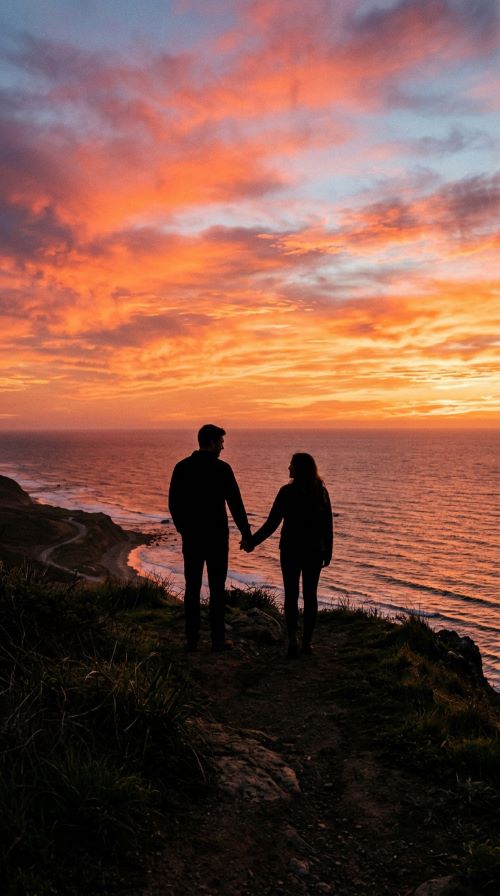
Sunset silhouettes give a dreamy, cinematic feel without needing any special equipment. All you need is a clear horizon and good timing. Check sunset times for your wedding date ahead of time and plan a fifteen-minute window around it. This is often called golden hour, and it’s free lighting nature provides. Position the couple between the camera and the sun so their outline stands out sharply. Have them hold hands, lean in for a kiss, or simply stand close together. Avoid using flash, since it will ruin the silhouette effect. A basic camera or phone works fine as long as you expose for the sky, not the subjects. Try tapping on the brightest part of the sky on your phone screen before shooting. This darkens the couple into a clean outline. Beach weddings, rooftop venues, and open fields all work well for this pose. If your venue faces the wrong direction, a short walk to a nearby hill or parking lot with an open view can still deliver the shot. This is one of the most affordable poses on this list since it needs zero equipment beyond a camera.
Forehead Touch Portrait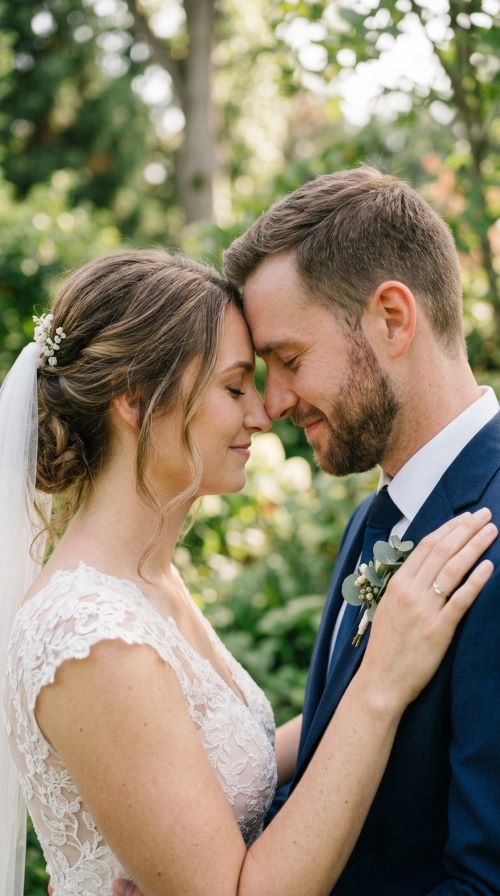
This pose feels calm and personal. Foreheads together, eyes closed, a quiet pause in a busy day. It works anywhere with soft light and a little space. Find a spot away from the crowd, even just a corner near a wall or under a tree. Ask the couple to close their eyes and breathe for a second before you shoot. This removes the stiffness that comes from staring at a lens. A portrait lens gives the softest blur behind them, but standing further back and zooming in with a regular lens creates a similar effect. Overcast days are actually great for this shot since the light is even and soft across both faces. No need for a professional reflector. A white poster board or even a light-colored shirt held nearby can bounce light back onto their faces for free. Keep the background simple. A plain wall, a row of trees, or a soft curtain works better than a busy, cluttered scene. This pose takes under a minute to capture but often becomes one of the most requested prints for the couple’s home.
Candid Laughter Shot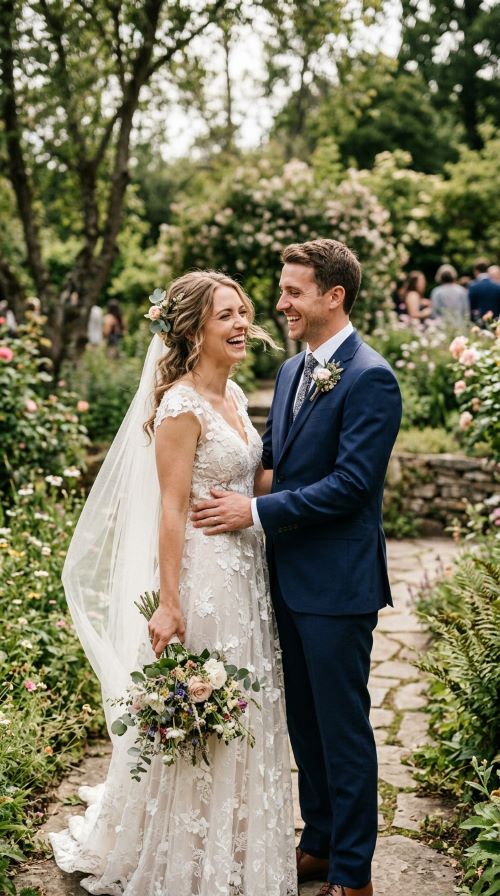
Genuine laughter beats a forced smile every time. This pose isn’t really a pose at all. It’s about creating the right moment and staying ready to shoot. Tell the couple a joke, ask them to whisper something silly to each other, or just let them talk freely while you shoot in burst mode. Burst mode is available on almost every phone and camera today for free. It captures several frames per second so you don’t miss the real laugh. Keep some distance so they forget the camera is there. A zoom lens helps, but even cropping in later works if you shoot with enough resolution. Outdoor settings with natural light give the most relaxed feel. Avoid asking them to “say cheese,” since this often creates a stiff, fake smile instead. Let a friend or family member stand near you and say something funny off to the side. This pulls a real reaction without the couple looking directly at the camera first. These candid shots often become favorites because they show personality, not just posture. They also cost nothing extra to capture beyond a little patience and timing.
Veil Flowing in the Wind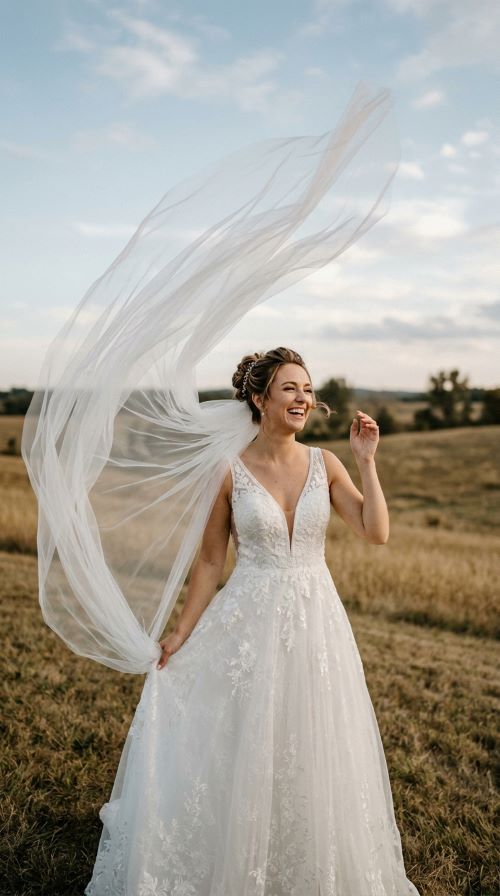
A flowing veil adds drama and movement to an otherwise still portrait. Wind does the work here, so this pose depends on timing and location more than gear. Look for an open area like a field, hilltop, or beach where wind naturally picks up. If there’s no breeze on the day, ask a bridesmaid or family member to gently toss the veil upward just before you shoot. This creates a similar flowing effect without waiting on the weather. Stand a few steps back from the bride and shoot slightly upward to catch the veil against the sky. A fast shutter speed freezes the fabric mid-motion instead of blurring it. Most phone cameras have a sports or action setting that works for this. Try several attempts since the veil moves differently each time. Keep the background simple so the veil stands out clearly rather than blending into a busy scene. This shot doesn’t require any paid accessories beyond the veil itself, which many brides already own. It’s one of the more dramatic poses on this list, yet it costs nothing beyond a bit of wind or a helping hand.
Dancing Under String Lights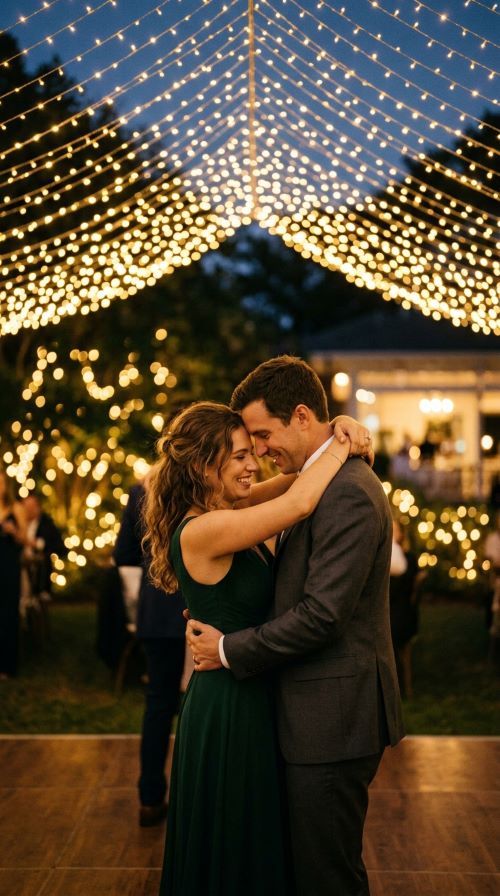
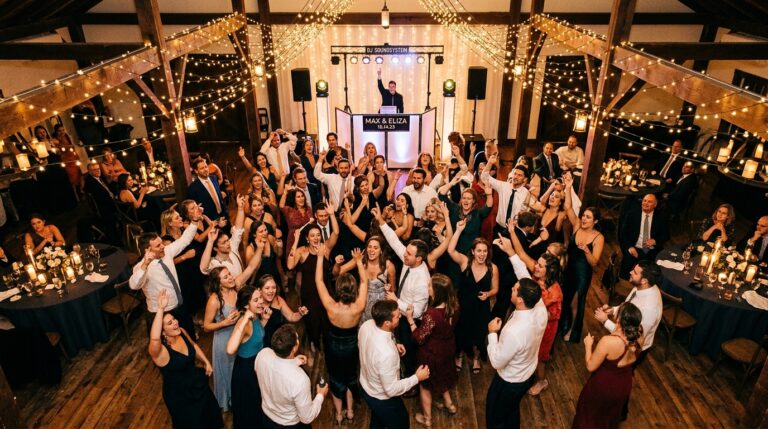
String lights turn any space into a romantic setting without a large budget. A backyard, patio, or barn can look like a high-end venue with a few strands of lights. Buy warm white string lights online for a low cost and hang them above the dance area before the reception starts. Shoot this pose during dusk, right as the sky turns a deep blue. This is when the string lights glow brightest against the fading daylight. Use a wide aperture setting if your camera allows it, since this creates soft, blurry light circles behind the couple, known as bokeh. Phones with portrait mode can mimic this effect fairly well too. Get low to the ground and shoot slightly upward so the lights fill more of the frame above the couple’s heads. Ask them to sway slowly rather than move quickly, since slower movement is easier to capture sharply in lower light. This pose works even without a professional dance floor. A simple patio or driveway strung with lights delivers the same warm, intimate feeling for a fraction of the cost of a decorated ballroom.
Getting Ready Details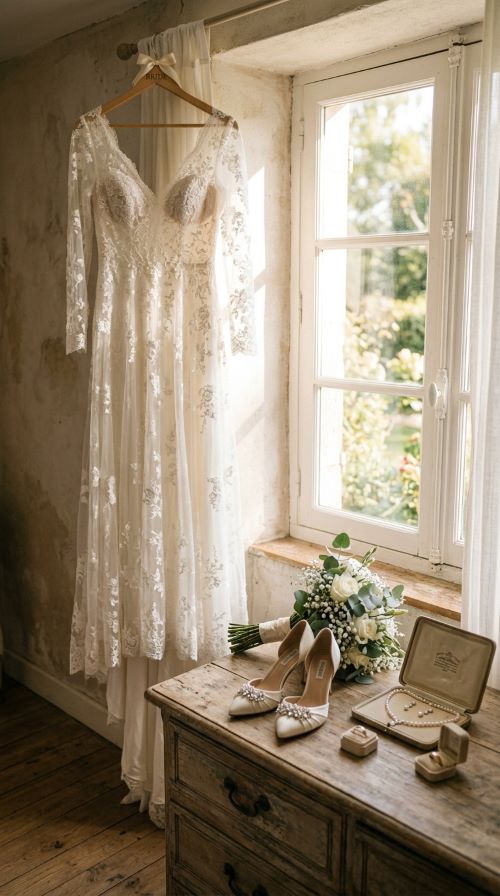
Small details tell a big part of the wedding story. The dress on a hanger, shoes lined up, a grandmother’s necklace resting on a table. These quiet shots add depth to the full album. Find a window with soft natural light in the getting-ready room. Hang the dress from a curtain rod, a hook, or even a hanger looped over a door frame. Arrange the shoes, rings, and any small heirlooms nearby on a simple surface like a chair or table. You don’t need props or a stylist for this. A plain white sheet or a piece of fabric can work as a clean backdrop if the room looks cluttered. Shoot close-up with a wide aperture so the background blurs softly, keeping focus on the details. Morning light works best since it’s softer and less harsh than midday sun. Take these shots early, before the room fills with people and clutter. This gives you calm, quiet time to compose the image properly. These detail shots cost nothing extra and often become some of the most treasured pages in a wedding album years later.
Bouquet Toss Action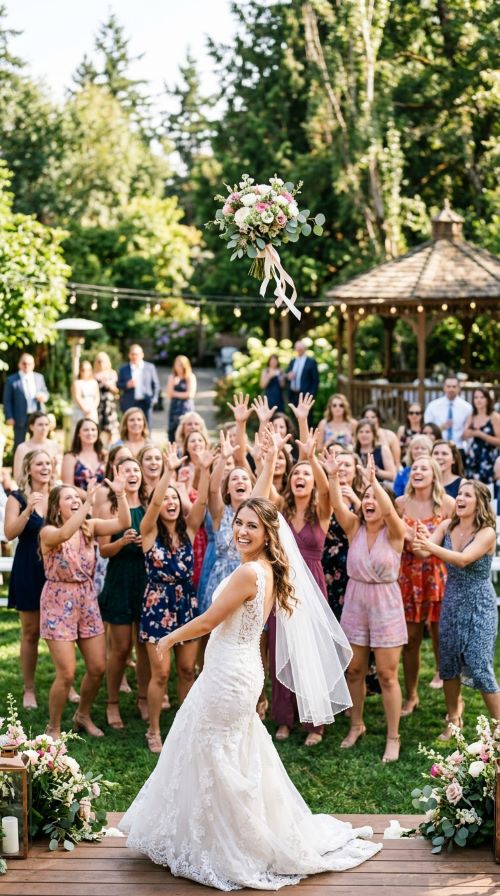
The bouquet toss is full of energy, and capturing it well means being in the right spot before it happens. Stand facing the bride, slightly to the side, so you catch both her toss and the reactions of guests behind her. A second angle from behind the crowd, even shot on a guest’s phone, adds variety without hiring extra help. Use a fast shutter speed to freeze the bouquet mid-air rather than letting it blur. Most cameras and phones have a sports or action mode built in for this exact situation. Ask the bride to toss with a bit more height than usual, since this gives you more time to catch the peak of the throw. Bright outdoor lighting or a well-lit indoor space works best, since fast shutter speeds need more light to expose properly. Position guests in a semicircle rather than a straight line so more faces are visible in the frame. This pose needs zero props or purchases beyond the bouquet itself. It’s fast, fun, and delivers one of the most energetic shots of the entire reception.
Grand Exit with Sparklers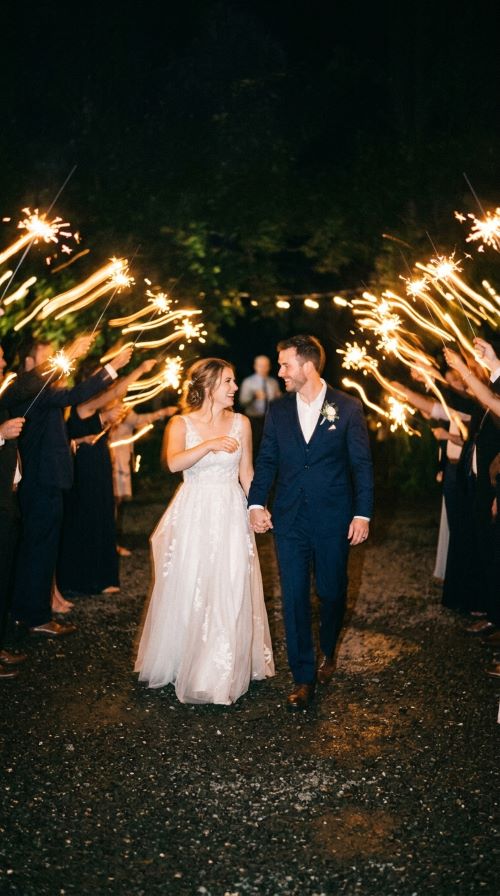
The sparkler exit is a night-time classic that photographs like fireworks without the fireworks budget. Buy a box of long sparklers online in bulk since they’re inexpensive and easy to find. Line guests up in two rows facing each other, sparklers lit on your signal, forming a glowing tunnel for the couple to walk through. Use a slow shutter speed to capture the light trails from the sparklers as streaks rather than tiny dots. This setting is available on most cameras and even some phone night modes. A tripod or steady surface helps avoid blur from camera shake during the longer exposure. Practice the timing once with unlit sparklers so guests know when to raise them and how fast to move. Shoot from a low angle facing the couple as they walk toward you, since this captures both their expressions and the glowing tunnel behind them. Keep the background dark for the best contrast against the bright sparks. This pose needs almost no budget beyond a box of sparklers, yet it consistently ranks as one of the most shared wedding photos on social media.
Rainy Day Umbrella Pose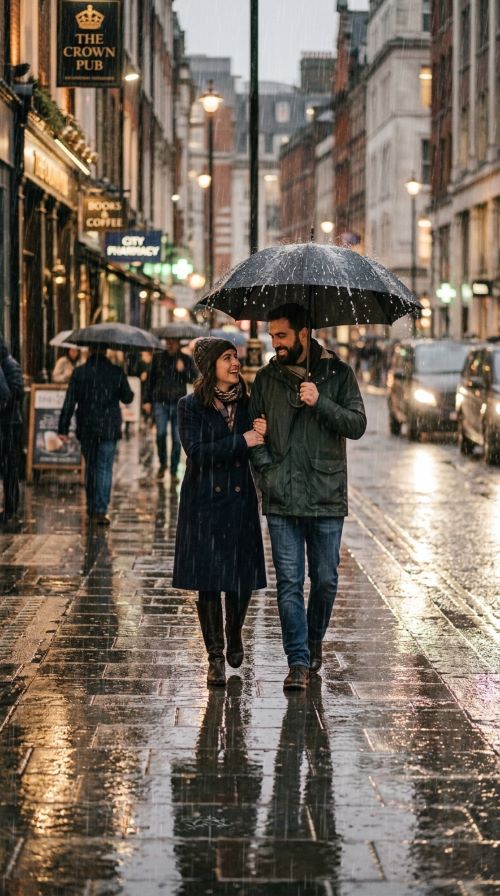
Rain doesn’t have to ruin wedding photos. It can actually create a softer, more romantic mood than harsh sunlight. Grab a plain black or clear umbrella, since these photograph better than busy patterns. Have the couple huddle close together underneath it, both facing slightly toward the camera. Wet pavement reflects light beautifully, so look for puddles or shiny streets nearby to add depth to the shot. Shoot at a moderate shutter speed to catch a few raindrops in the air without blurring the whole scene. Overcast, rainy skies actually give even, soft lighting that’s flattering on skin tones, unlike bright midday sun. No professional rain gear is needed. A five-dollar umbrella from any store works just as well as an expensive one. Keep a small towel nearby to dry the camera lens between shots since raindrops on the lens can blur the image. This pose turns bad weather into a creative opportunity instead of a problem. Many couples end up loving their rainy day photos more than the sunny backup plan they originally hoped for.
Family Group Portrait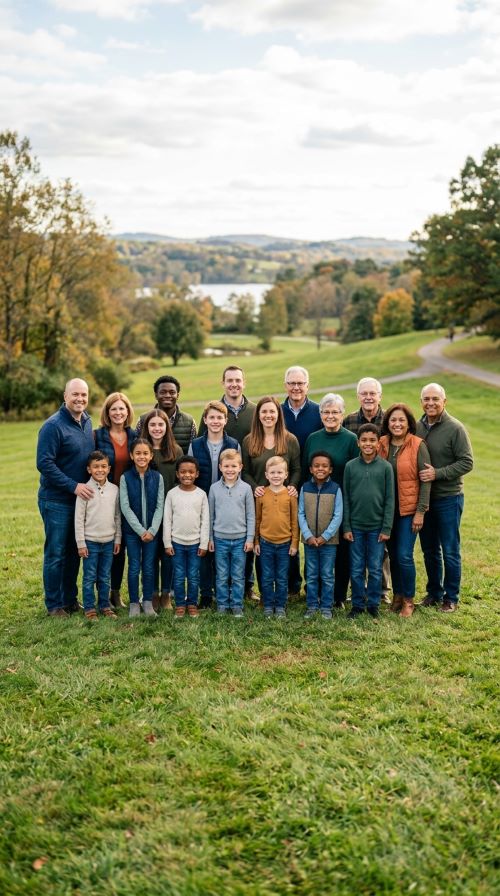
Group photos can turn chaotic fast, but a little planning keeps things simple. Arrange family members by height, shortest in front, tallest in back, so every face is visible. A wide-angle lens fits more people into the frame without needing to stand far back, though stepping back a few extra feet works fine with a regular lens too. Pick a plain background like a wall, a row of trees, or open sky, since busy backgrounds distract from the faces. Natural light works best in open shade rather than direct sun, which causes squinting. Ask a family member to help gather people quickly between shots to save time. Making a simple list beforehand of which combinations you need, immediate family, grandparents, extended relatives, avoids confusion on the day. Take three or four shots per grouping instead of just one, since someone always blinks. This costs nothing extra beyond a few minutes of planning. A tripod isn’t required if you have steady hands, but resting the camera on a fence or car hood adds stability for free. These portraits become the ones relatives frame and keep for decades.
Hand-in-Hand Walk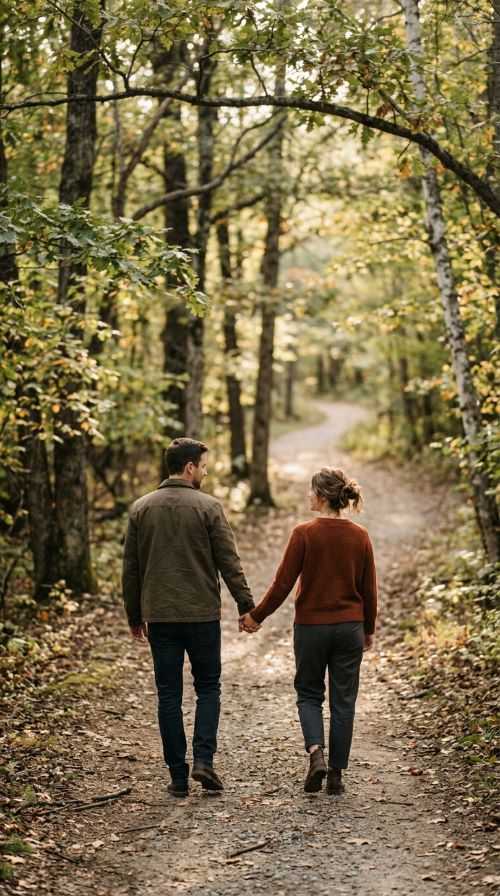
A simple walk captures ease and connection without any forced posing. Find a quiet path, a tree-lined trail, or even a driveway at the venue. Ask the couple to walk naturally while holding hands, talking to each other rather than looking at the camera. Shoot from a slight distance behind or to the side, since this creates a candid, storytelling feel rather than a stiff portrait. A zoom lens helps capture this from farther away, but walking a few extra steps back with a standard lens works just as well. Soft, dappled light through trees adds texture without needing extra equipment. Shoot in burst mode to catch the most natural stride and expression, since walking shots often look better mid-motion than standing still. Avoid asking them to stop and pose, since this breaks the relaxed feeling. Let them walk the path two or three times if needed to get variety. This pose costs nothing and takes only a few minutes, yet it often becomes one of the most timeless images in the whole gallery.
Kiss Behind the Bouquet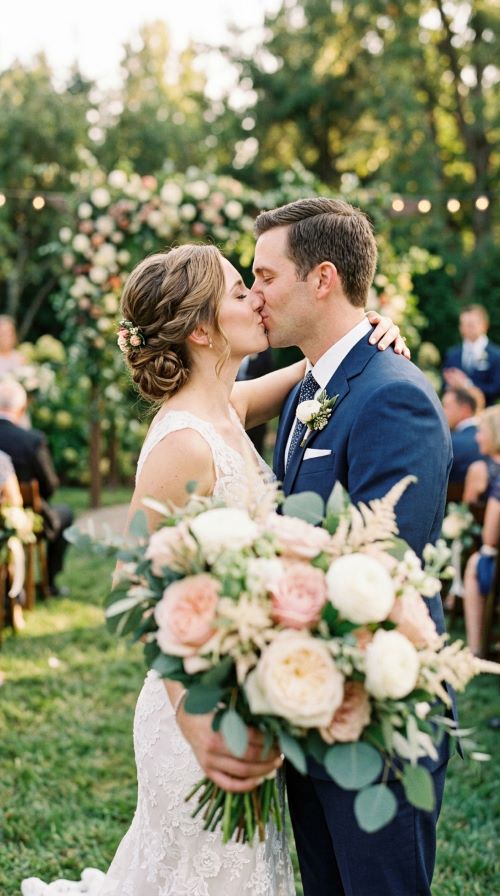
This pose adds texture and color by framing the kiss behind the bridal bouquet. It’s an easy way to make a simple portrait feel more layered. Have the bride hold the bouquet slightly toward the camera while the couple leans in for a kiss just above it. Shoot with a wide aperture so the flowers in the foreground blur softly while the couple’s faces stay sharp. If your camera doesn’t allow manual aperture control, most phone portrait modes create a similar blur effect automatically. Stand close enough that the bouquet takes up part of the lower frame without covering their faces completely. Natural light from the side works best, giving gentle shadows that add depth to the photo. This pose doesn’t require an expensive bouquet either. A small handful of flowers from a grocery store or a garden works just as well for the shot. Try a few different angles, straight on, slightly from the left, slightly from the right, to see which one frames the faces best. This simple trick turns an everyday kiss photo into something that feels styled and intentional.
Conclusion
Great wedding photos come down to timing, light, and a willingness to try something new, not an expensive camera bag. Every pose on this list works on almost any budget, from a backyard ceremony to a full-scale reception. Pick a handful that fit the couple’s personality and the venue, practice the timing beforehand, and let real moments guide the shots rather than forcing stiff poses. Print a few favorites, share the rest online, and let the small, honest moments carry just as much weight as the big, staged ones. A memorable wedding gallery is built one simple, well-timed shot at a time.